

Are you seeking to construct a WooCommerce retailer however don’t know the place to start out?
Let’s make it simple!
On this WooCommerce tutorial, we’ll take you thru the fundamentals of organising your personal WooCommerce retailer and present you simply how easy it’s to get began.
So put in your entrepreneurial hat and let’s get began!
Disclosure: Our web site is reader-supported. If you are going to buy any service by means of our associate hyperlinks, we could earn a fee at no further value to you.
What’s WooCommerce?
WooCommerce is an open-source eCommerce answer that has revolutionized the best way companies promote on-line. It’s a WordPress plugin that allows you to shortly create a web based retailer in your services and products.
The plugin comes with a variety of options and choices, making it simple to customise your retailer to fulfill your particular wants. With WooCommerce, you possibly can add merchandise, handle orders and funds, and way more.
For individuals who are simply getting began, WooCommerce makes it simple to rise up and working shortly. There are a variety of themes obtainable to select from, so you can also make positive your retailer appears to be like precisely the best way you need it to.
Plus, with the assistance of plugins and extensions, you possibly can simply prolong and customise your retailer’s performance even additional.
What Do You Must Construct a WooCommerce Retailer?
You’ve determined to affix the eCommerce wave and have taken a fantastic first step. However earlier than you launch your retailer, you’ll want a couple of issues.
- Area Title: That is your retailer’s handle and what clients will sort into their browsers to entry your web site.
- Net Internet hosting Service: That is the place your web site’s information and knowledge might be saved. A great internet hosting service will mean you can simply handle and replace your web site.
- SSL Certificates: It is a safety measure that encrypts the information exchanged between your web site and your clients. It’s important for securely accepting your clients’ on-line funds.
So there you will have it.
These are the three key components you’ll must construct a WooCommerce retailer.
It’s essential to keep in mind that these items should not free and price you some cash.
However it’s possible you’ll be questioning, if WooCommerce is free, why do I must pay for something?
The reality is, whereas WooCommerce is free, there are a number of belongings you’ll must buy to make your web site profitable. These embody website hosting, a website title, and an SSL certificates.
These things are important for any web site, not simply WooCommerce shops.
With out them, your web site gained’t be safe, gained’t be seen on the net, and gained’t be capable of settle for funds securely.
Nevertheless, this may value an arm and a leg should you don’t know the place to look.
Fortunately, Cloudways, a strong managed cloud internet hosting supplier, has agreed to supply TalkBitz readers an unique low cost of 15% off for 3 months.
Plus, you get a free SSL certificates with each plan.
And that’s not all – you additionally get a 3-day trial.
All it’s important to do is pay to register your area title right this moment, which is about $1 to $20.
Prepared?
Let’s get all the way down to enterprise and get your retailer up and working!
1. Getting Began With WooCommerce
Whether or not you’re a budding entrepreneur or an skilled enterprise proprietor, launching an eCommerce retailer will be an awesome course of.
Fortunately, it’s additionally one thing you are able to do by yourself, with the appropriate steerage and assets.
Registering a Area Title
Step one is to register your area title.
Namecheap has probably the greatest costs in terms of domains, so that you’ll be sure you get one of the best deal.
For those who don’t have already got a website title, don’t fear. We’ve bought your again!
Merely, enter your required area title beneath and hit the “Search” button to test if it’s obtainable and to purchase it from Namecheap.
Test in case your area title is obtainable:
If that’s too heavy for you, learn our information on how one can register a website title to get one shortly and simply.
When you’ve chosen and registered your area title, it’s time to get website hosting.
Organising Net Internet hosting
There are a lot of several types of website hosting to select from, however one of the standard and economical selections is shared internet hosting.
Shared internet hosting is nice for smaller websites and blogs, however should you’re searching for one thing extra strong and safe in your eCommerce retailer, then you definitely’ll want a strong website hosting supplier.
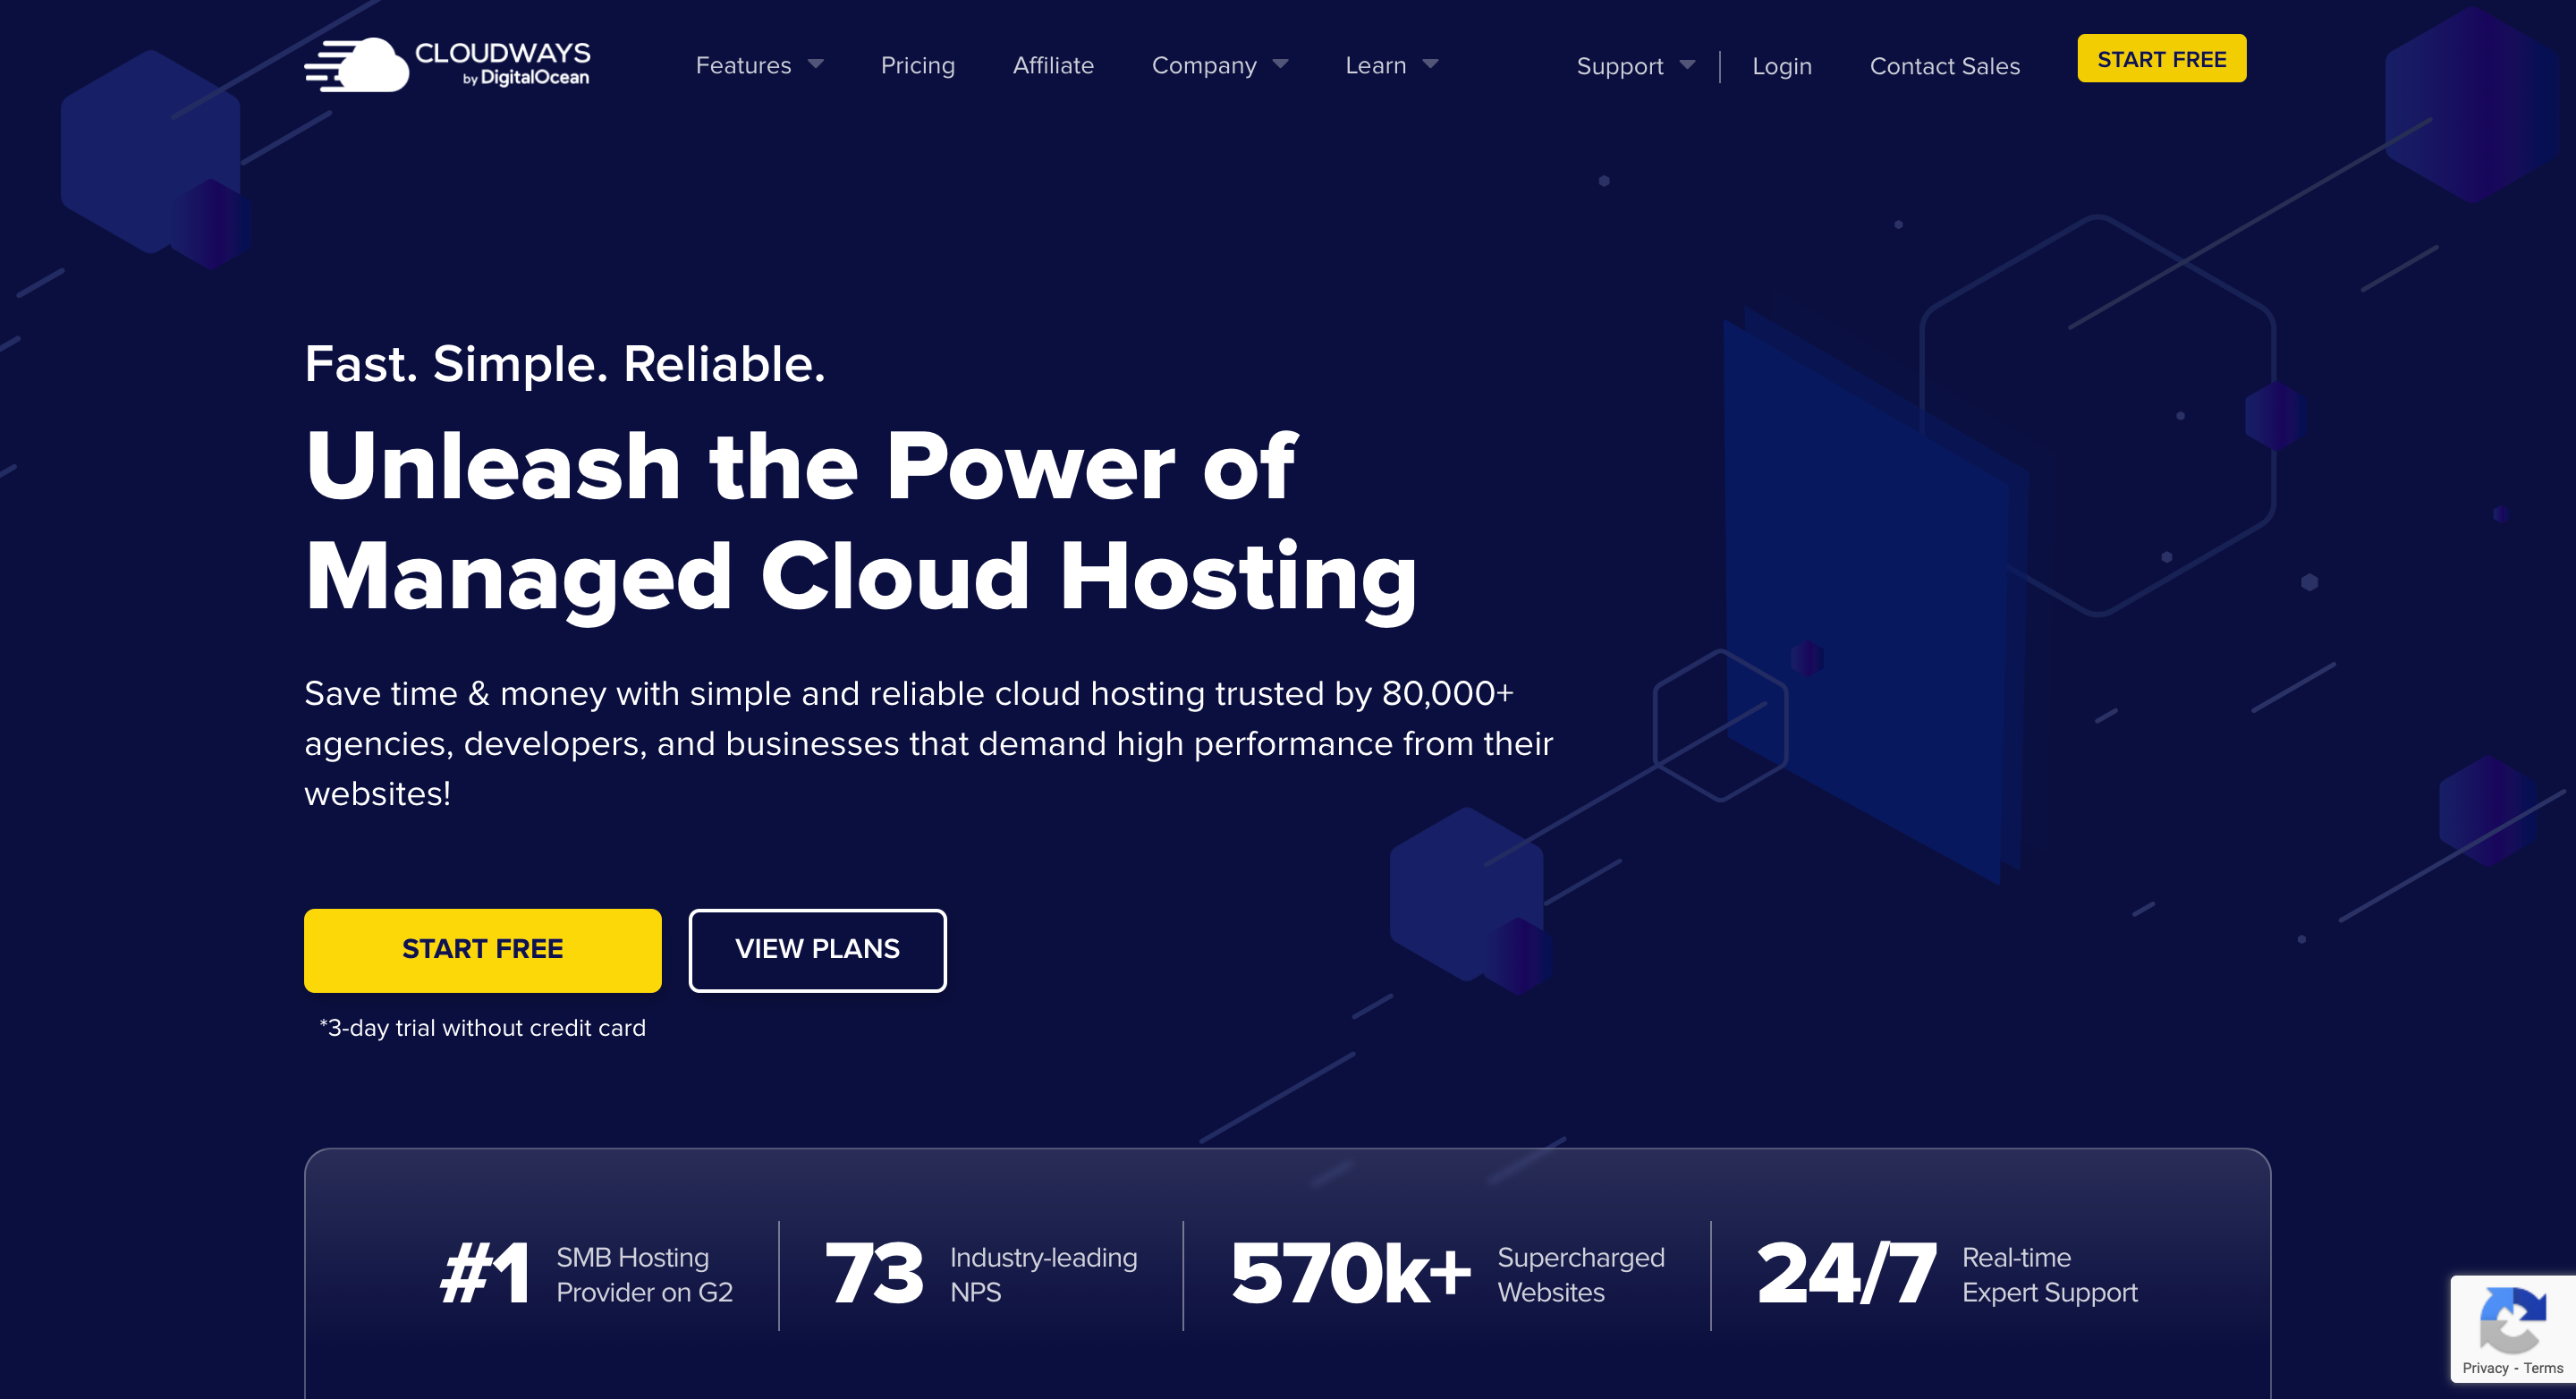
Cloudways is a managed cloud internet hosting supplier that provides a spread of options particularly designed to assist energy your eCommerce retailer.
→ Click on right here to go over to Cloudways and hit the “Begin Free” button to start out your 3-day trial
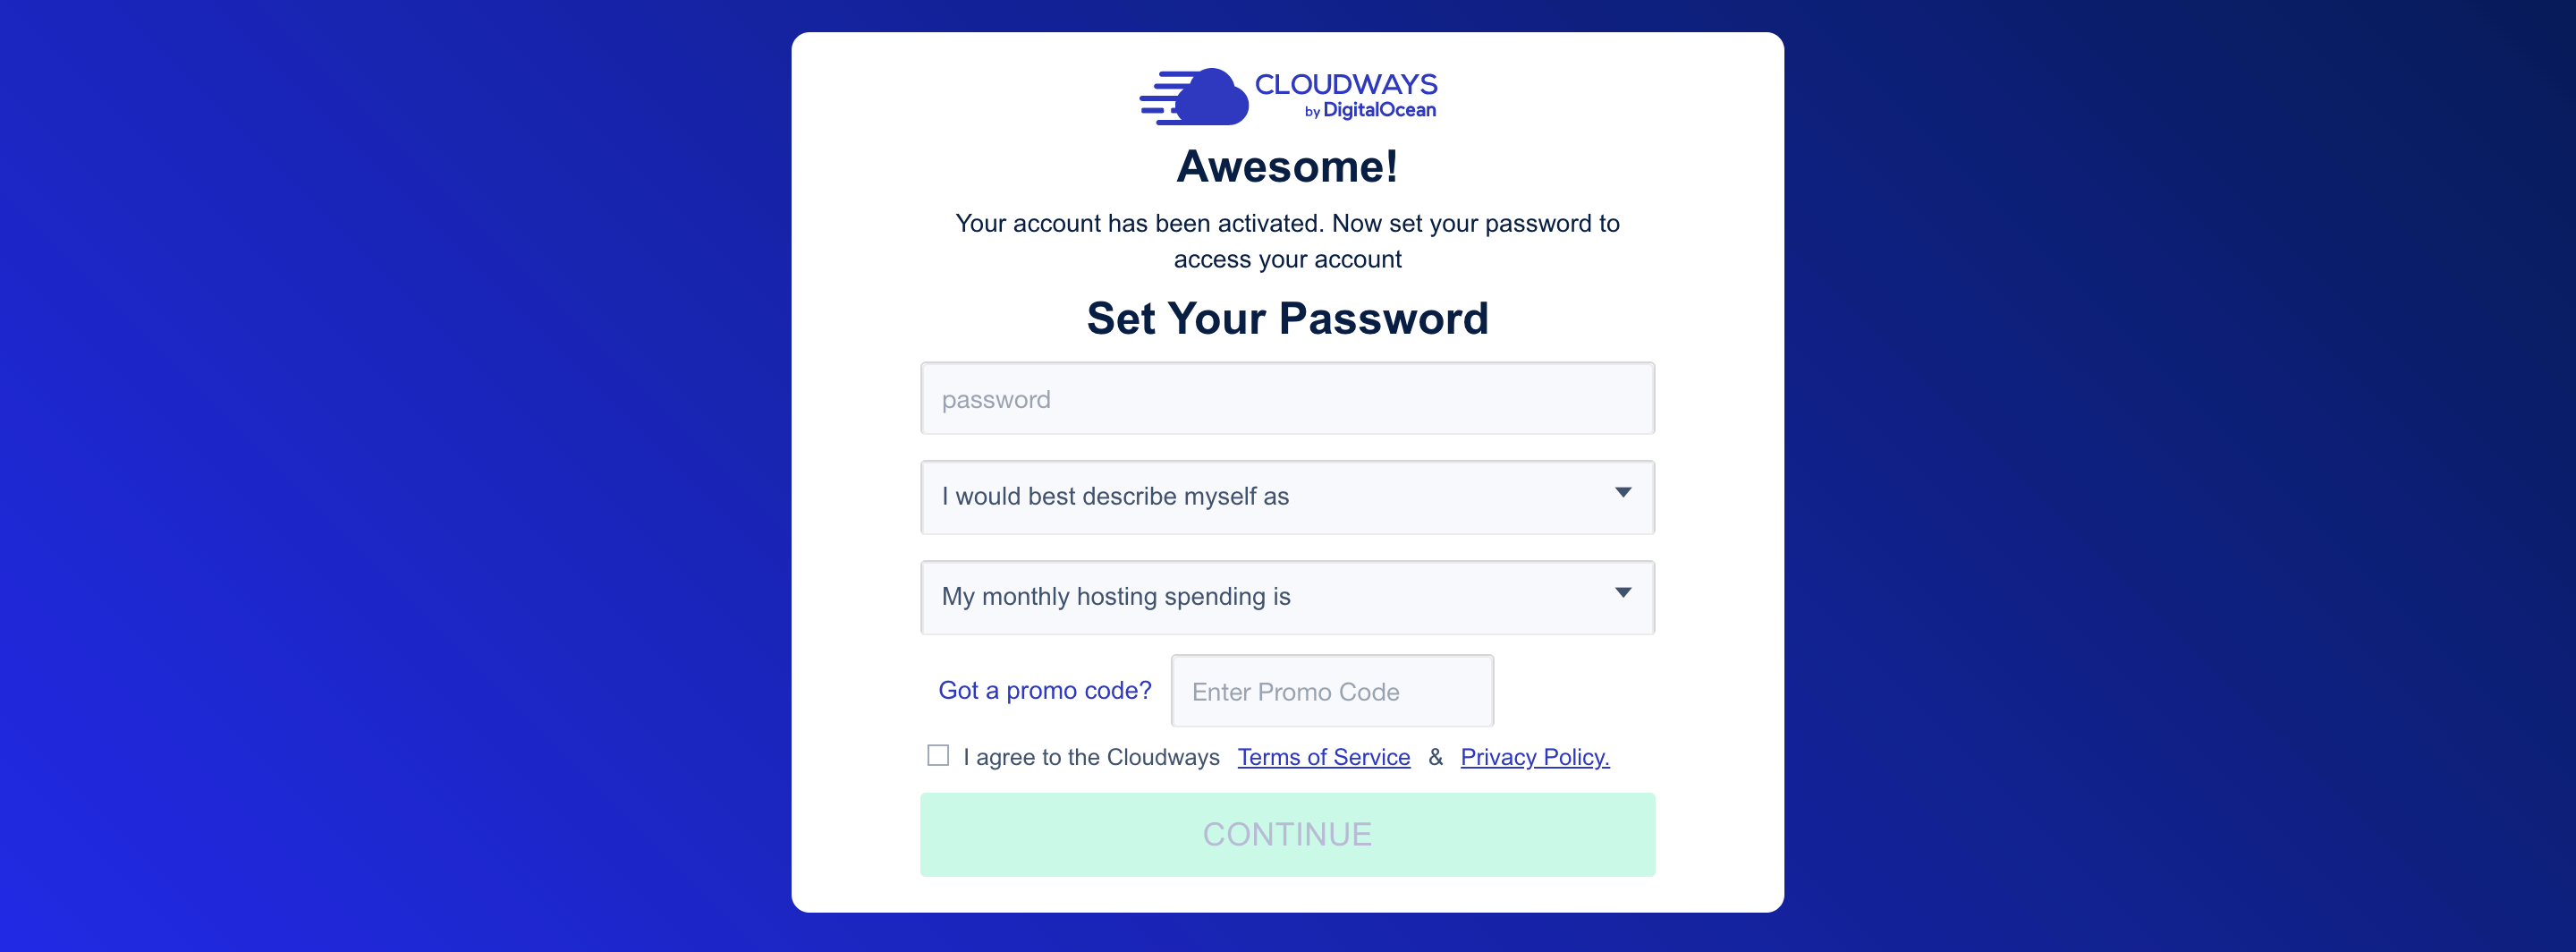
Subsequent, you’ll be requested to create and internet hosting account with them. Enter your info and click on “Proceed.”
What’s extra, don’t overlook to make use of our particular promo code TALKBITZ to avail 15% off for 3 months.
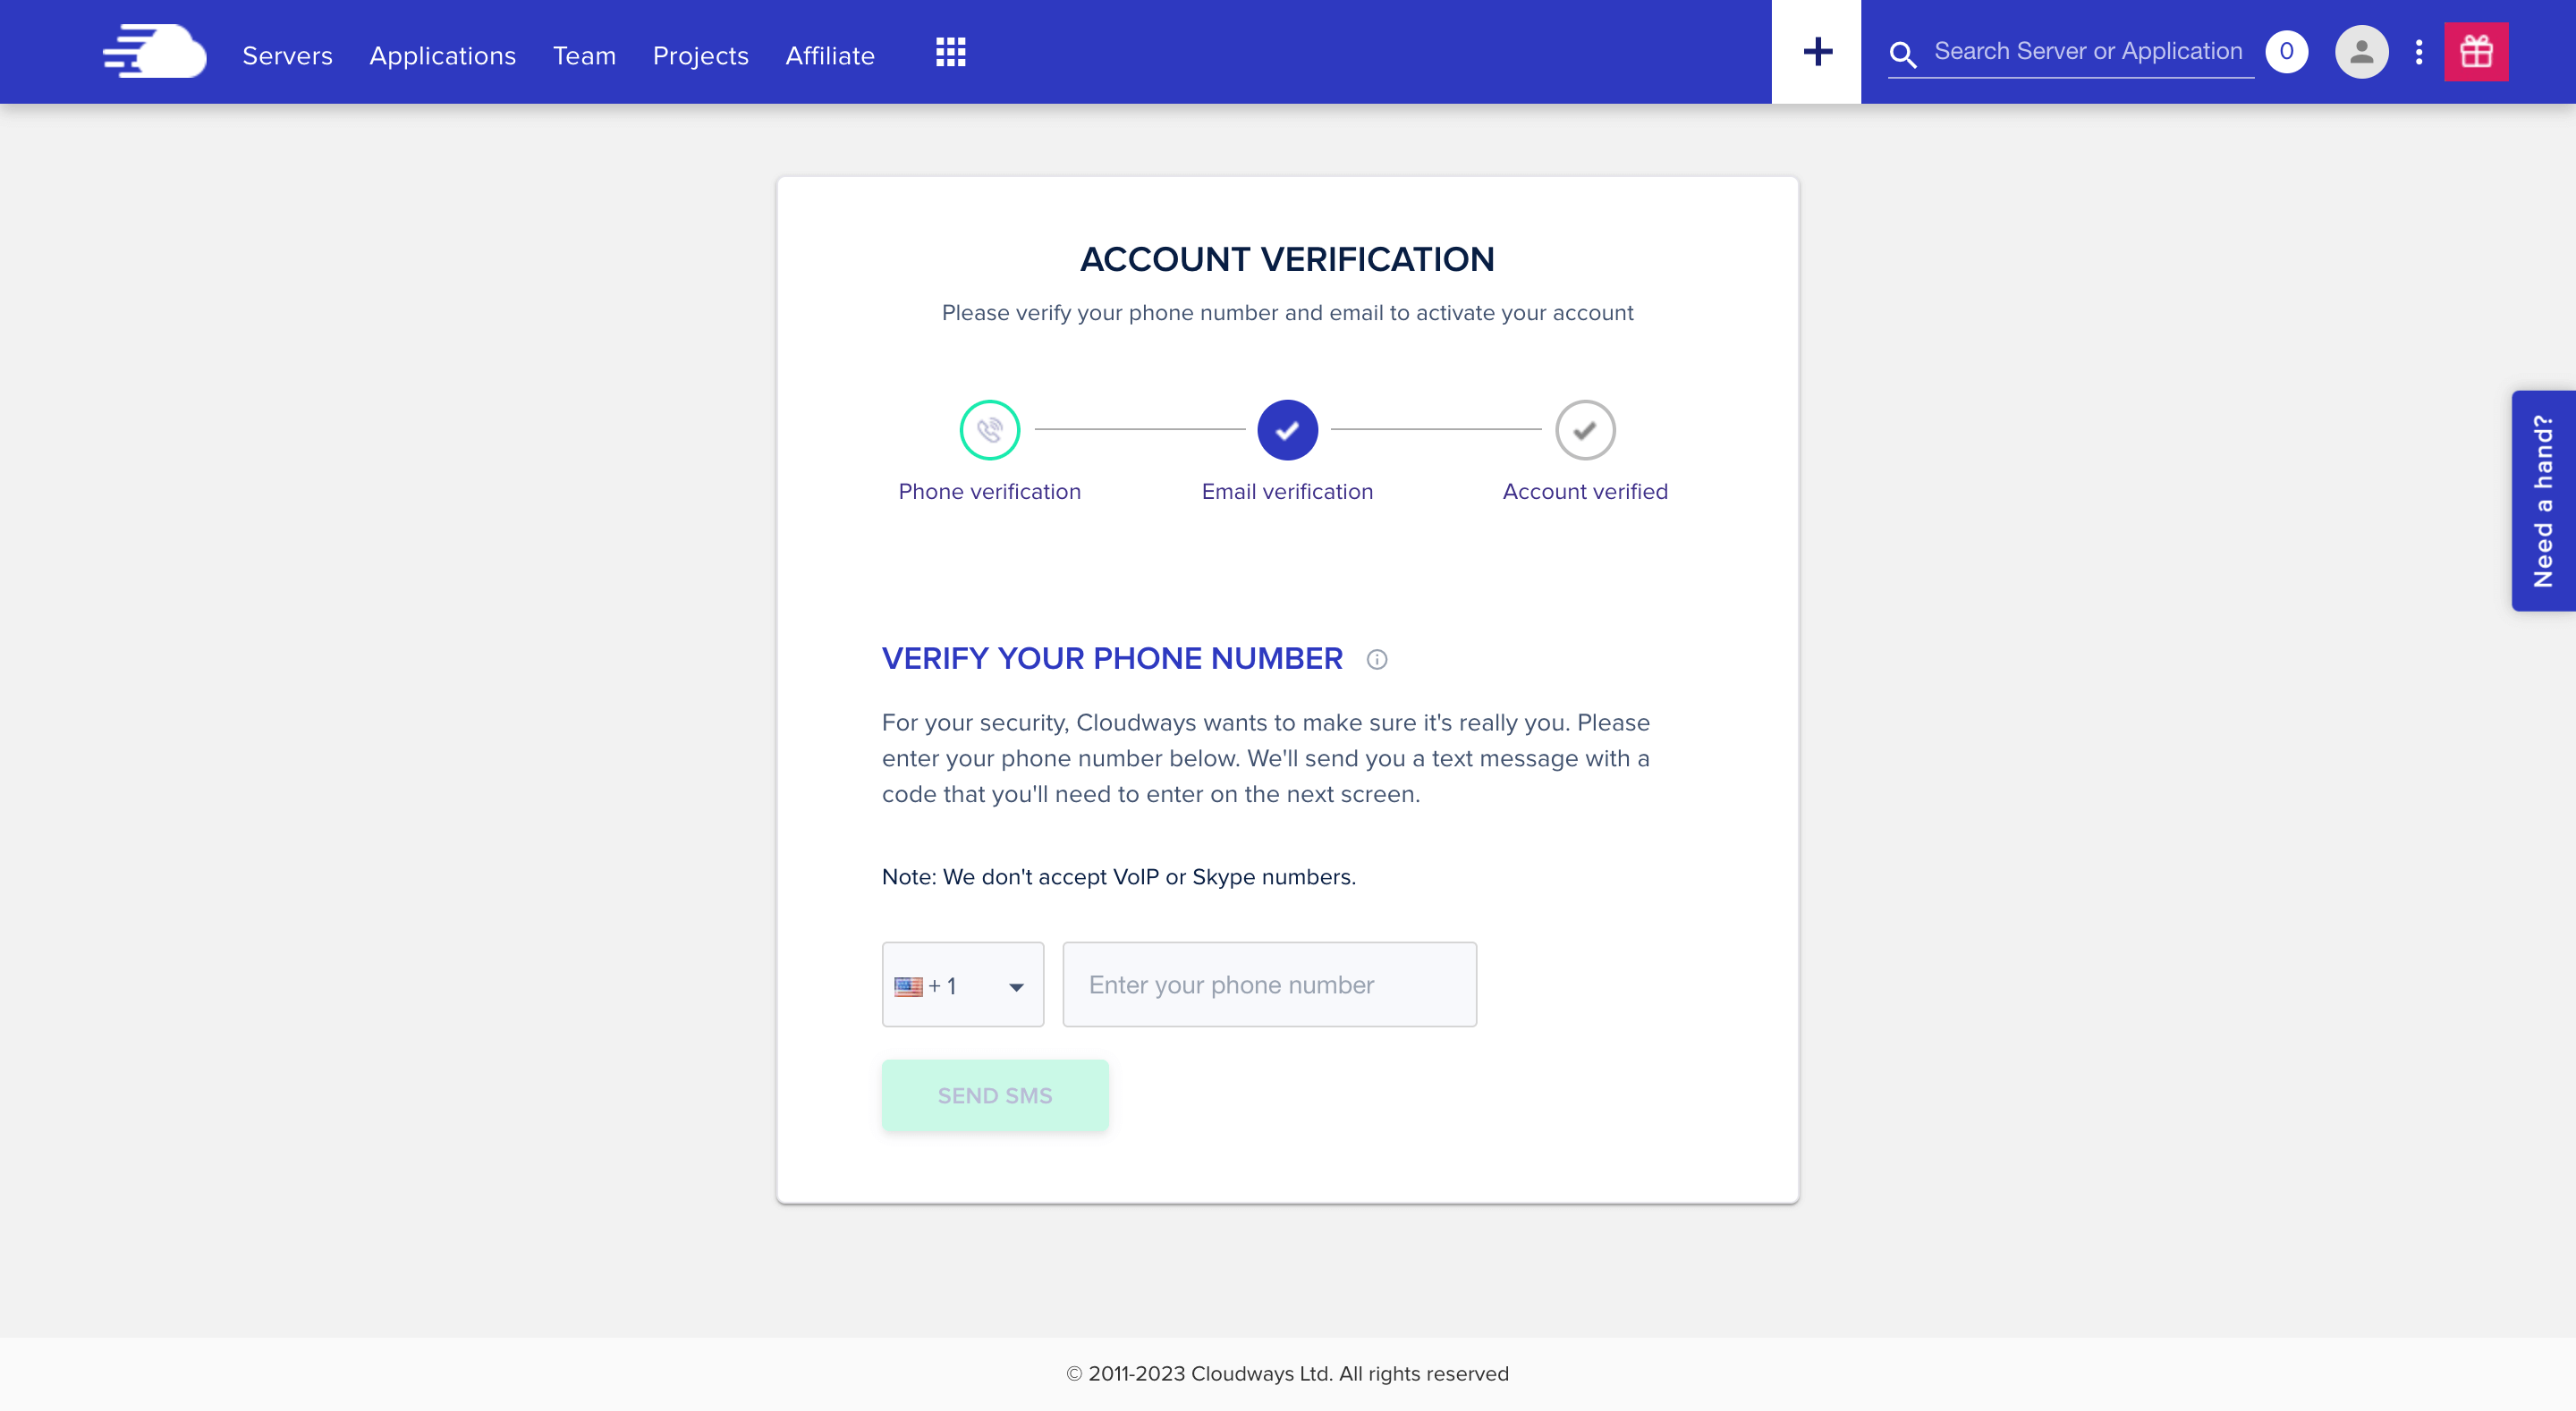
After you create an account, they’ll ask you to confirm it. Click on, the “Confirm your account” button, and comply with the on-screen directions to confirm your account.
Subsequent, you’ll see the Cloudways server configuration wizard to get your app up and working. You’ll be capable of choose an app, choose your server, and choose the server location. When you’ve accomplished that, you’ll be capable of configure your server settings and launch your app.
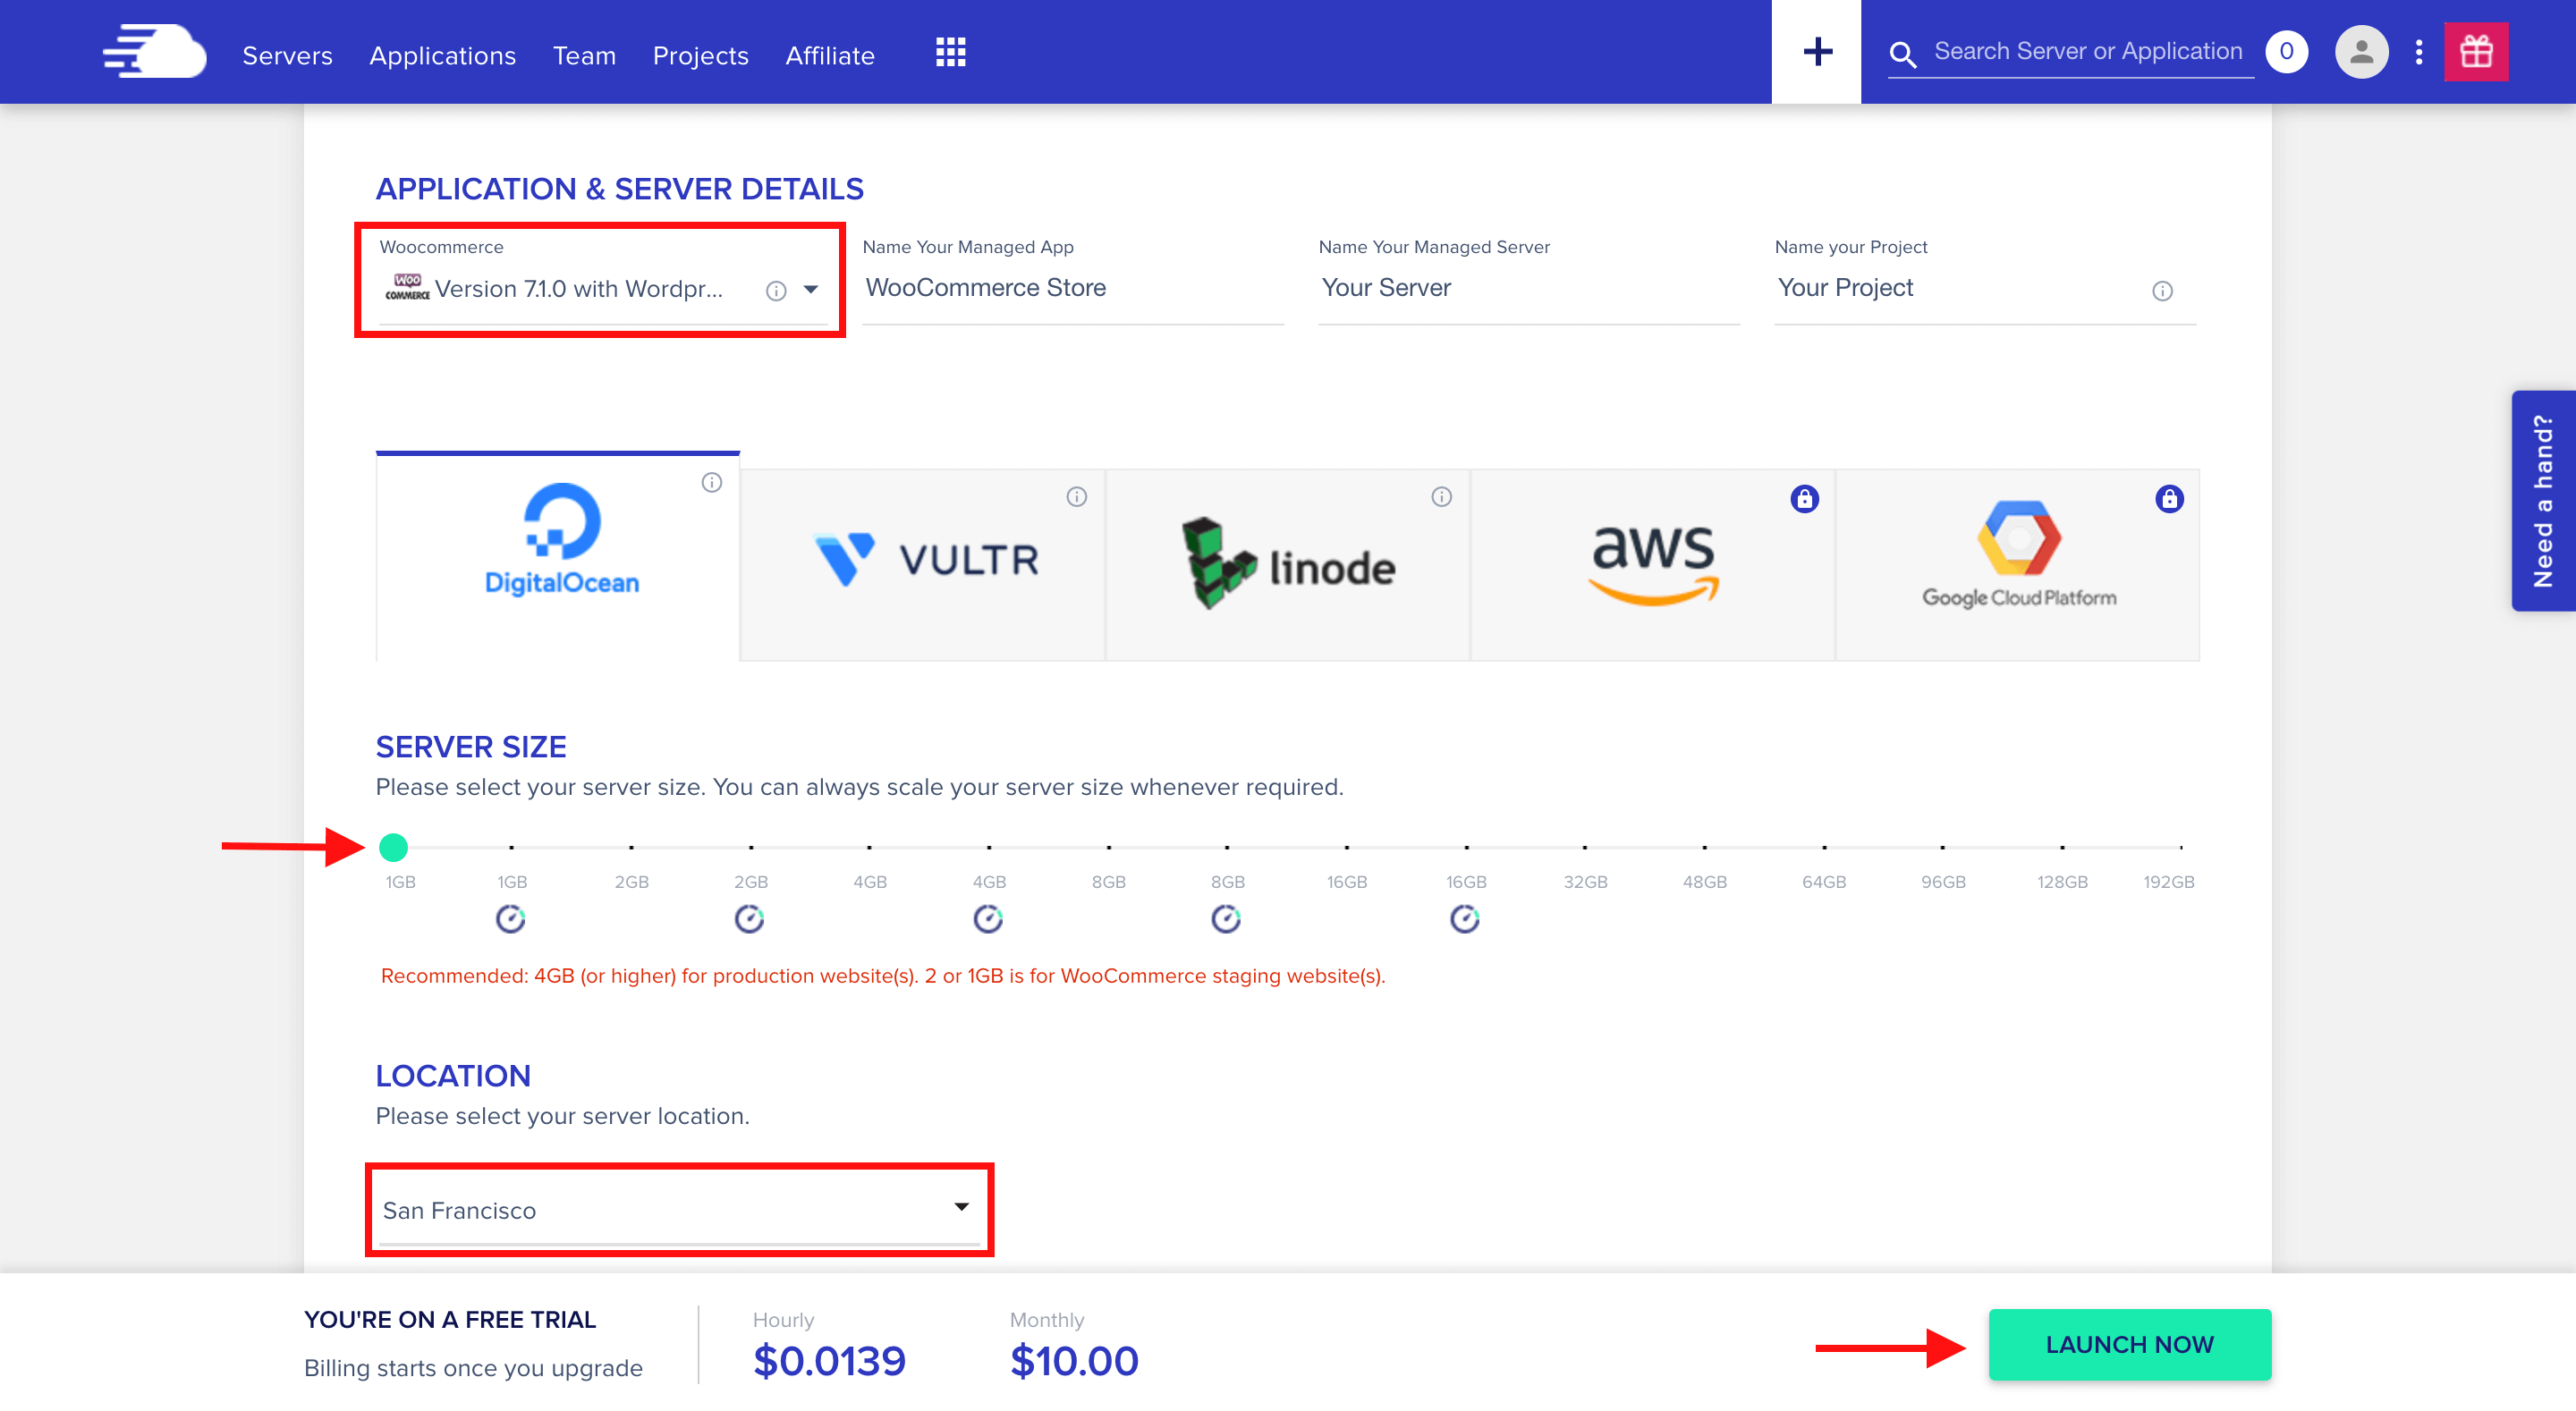
In our case, we’re organising an eCommerce retailer, so go forward and choose the configurations as follows:
- Software & Server Particulars: Choose Woocmmerce from the dropdown checklist. For the App, Server, and Mission, give them names associated to your web site. This can enable you simply find every web site sooner or later, particularly if you wish to create a number of web sites or servers.
- Cloud Supplier and Server Measurement: They provide 5 completely different cloud infrastructure suppliers to select from. You’ll want to pick one supplier. For those who’re simply beginning out, Digital Ocean’s 1GB server (1 Core Processor, 25GB Storage, and 1TB Bandwidth) must be ok and you may all the time scale up your server as your retailer grows.
- Server Location: For one of the best outcomes, choose a server that’s near your clients. That manner, your eCommerce retailer will load sooner.
When you’ve completed organising your Cloudways server, click on the “Launch Now” button to proceed.
As soon as your server is prepared, it’s time to log in to your WooCommerce retailer!
To get began, head to the Cloudways Platform and click on Purposes within the top-left menu. From there, you’ll see a listing of all of your apps – click on in your WooCommerce retailer to enter the appliance space.
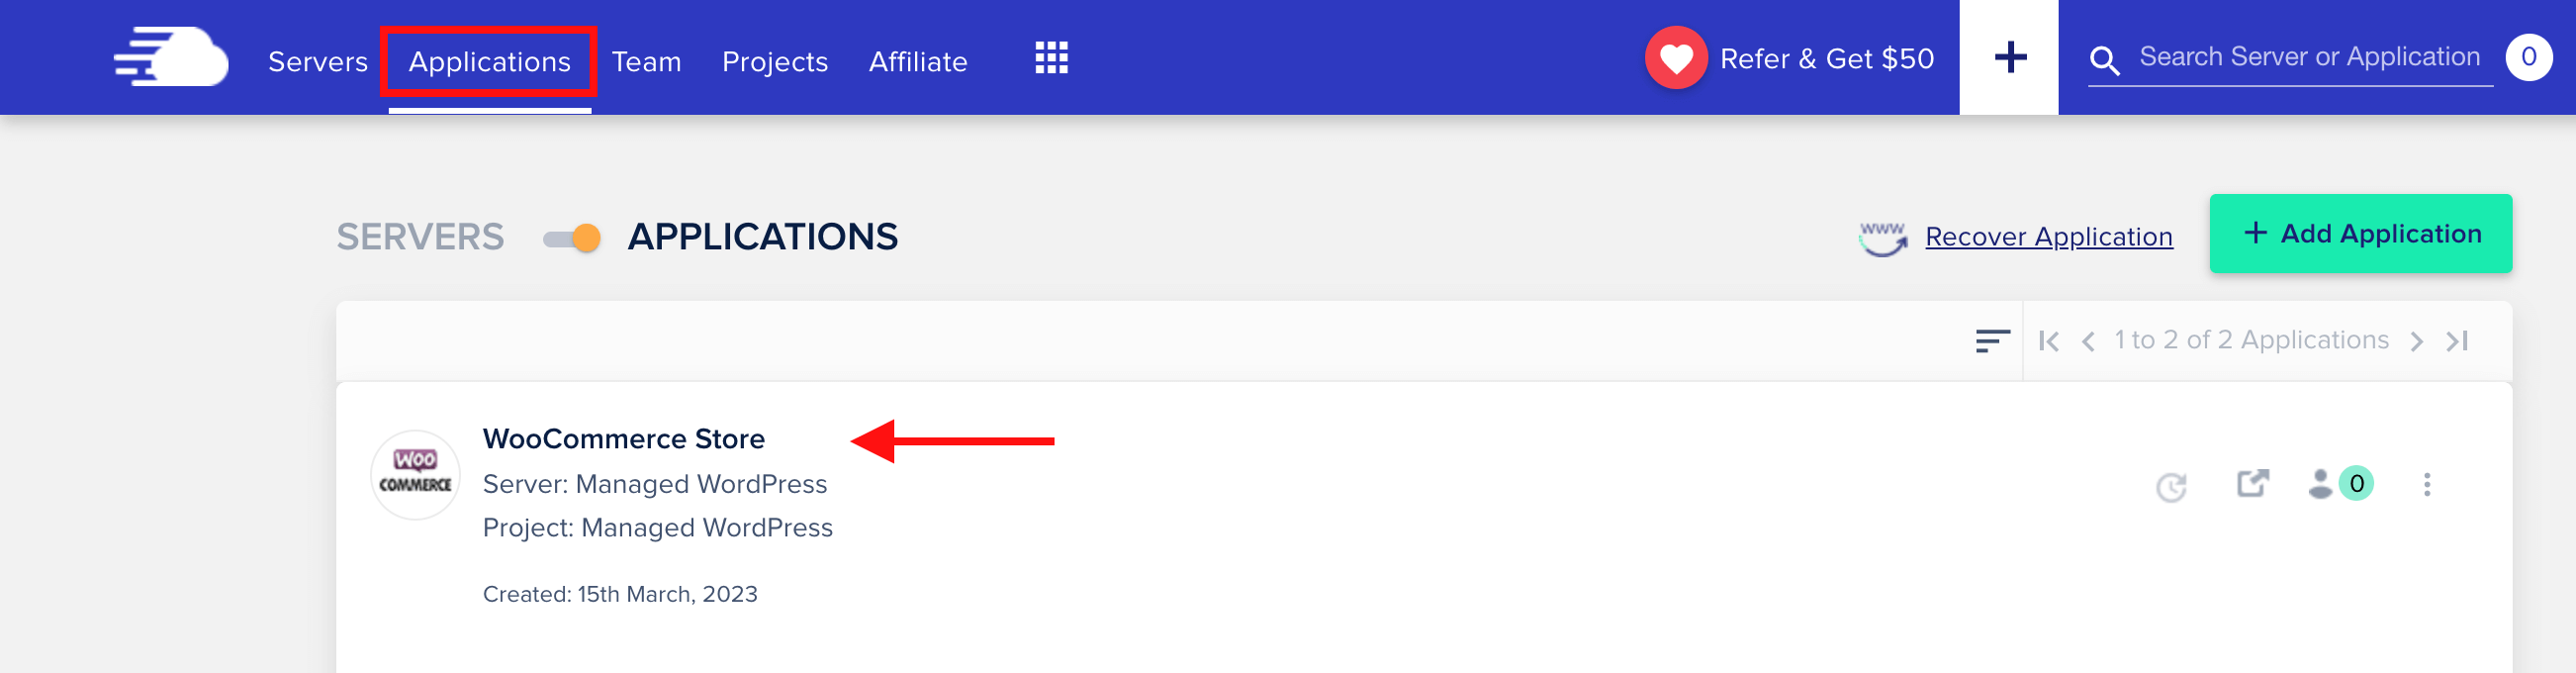
When you’re within the utility space, you’ll discover the credentials you might want to log in to your WooCommerce Dashboard – the URL in your admin panel, in addition to your username and password.
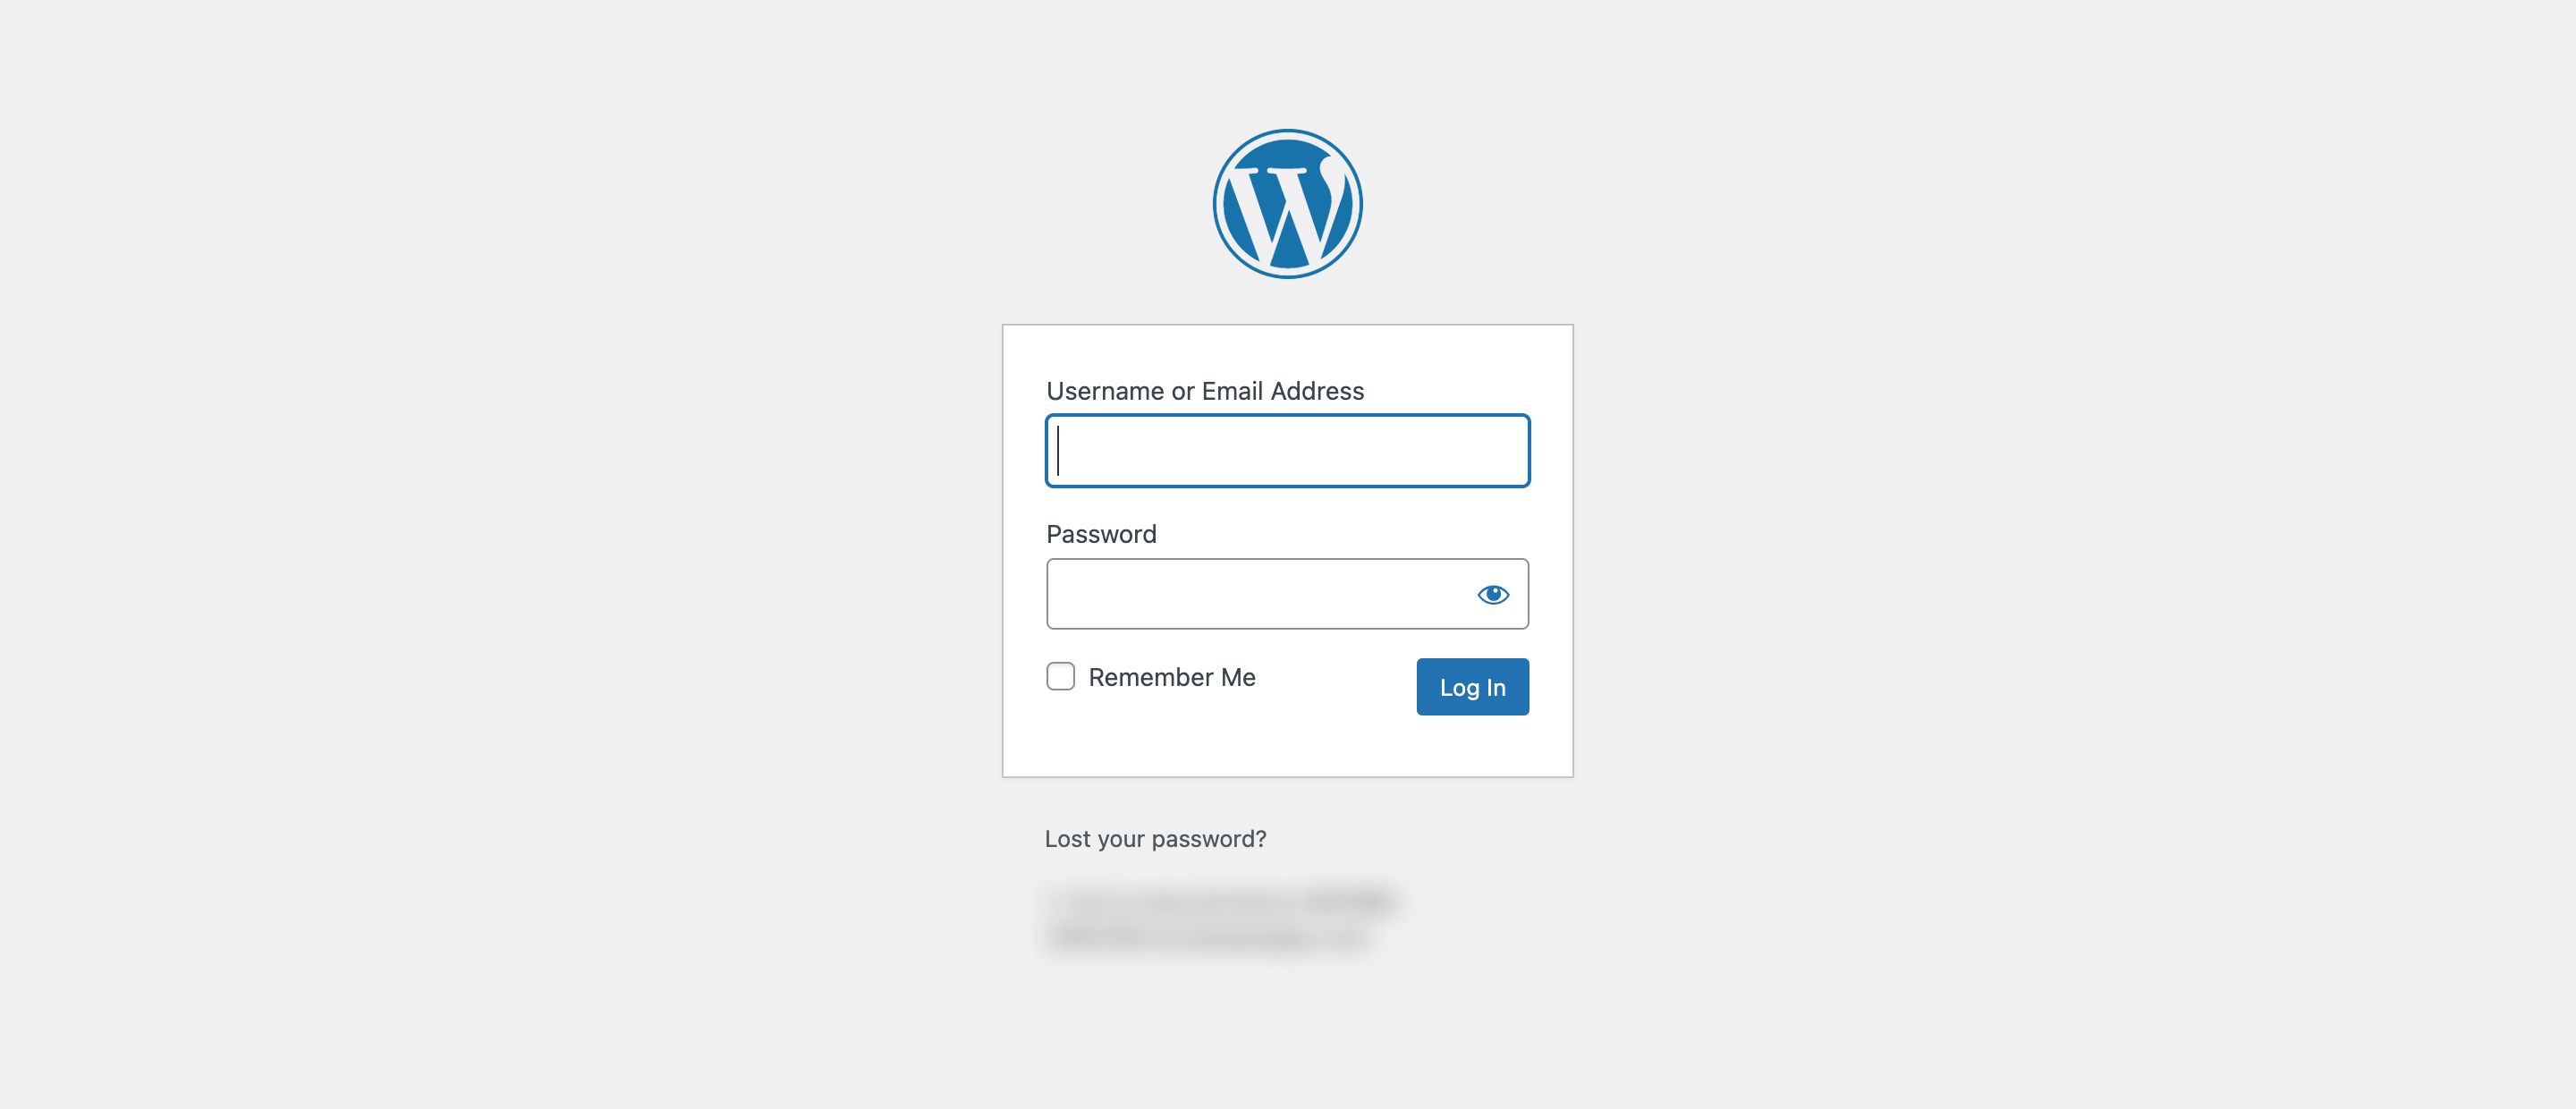
With the URL and your credentials at hand, click on the URL and log in to the WooCommerce Dashboard.
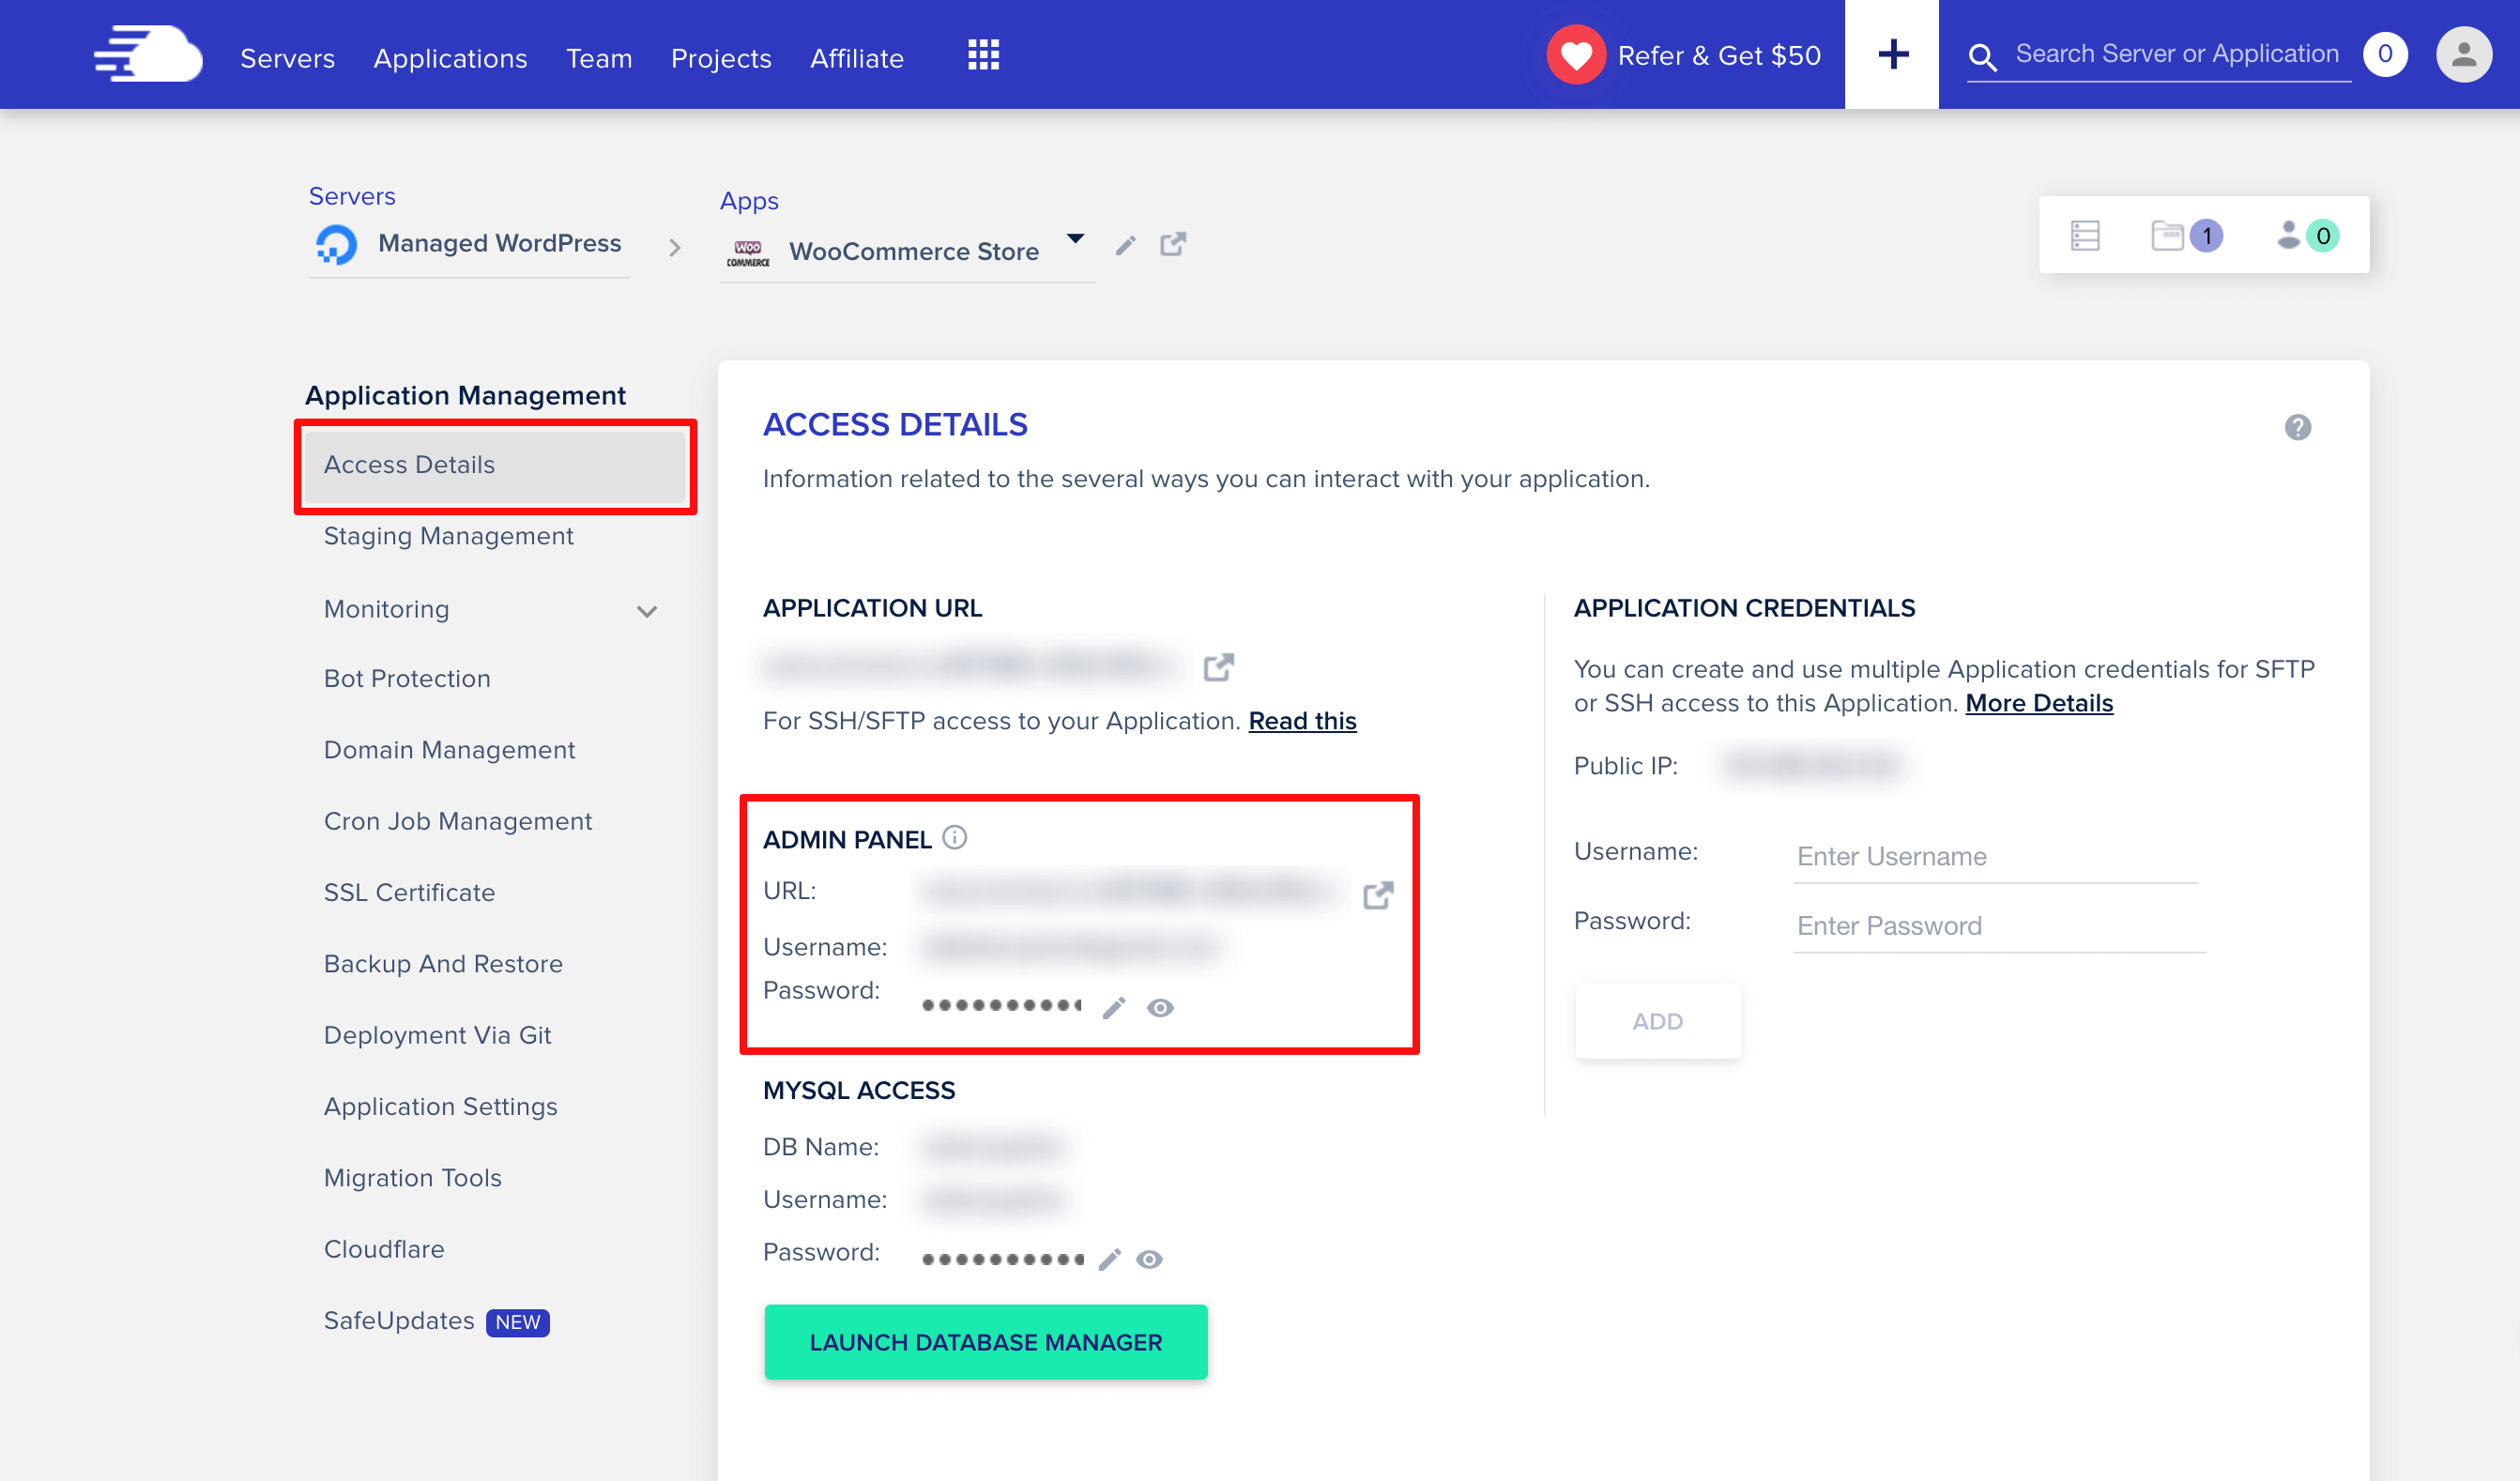
Subsequent, copy your Username and Password from the Admin Panel, and paste them into the WooCommerce Login Web page.
You may also click on “keep in mind me” should you don’t wish to need to enter your credentials each time you log in. With that accomplished, click on the “Log in” button and also you’ll be taken to the WooCommerce dashboard.
Now that you simply’re logged in, you need to be capable of begin customizing your retailer, including merchandise, and organising fee strategies. It’s that easy!
2. Organising the WooCommerce Retailer
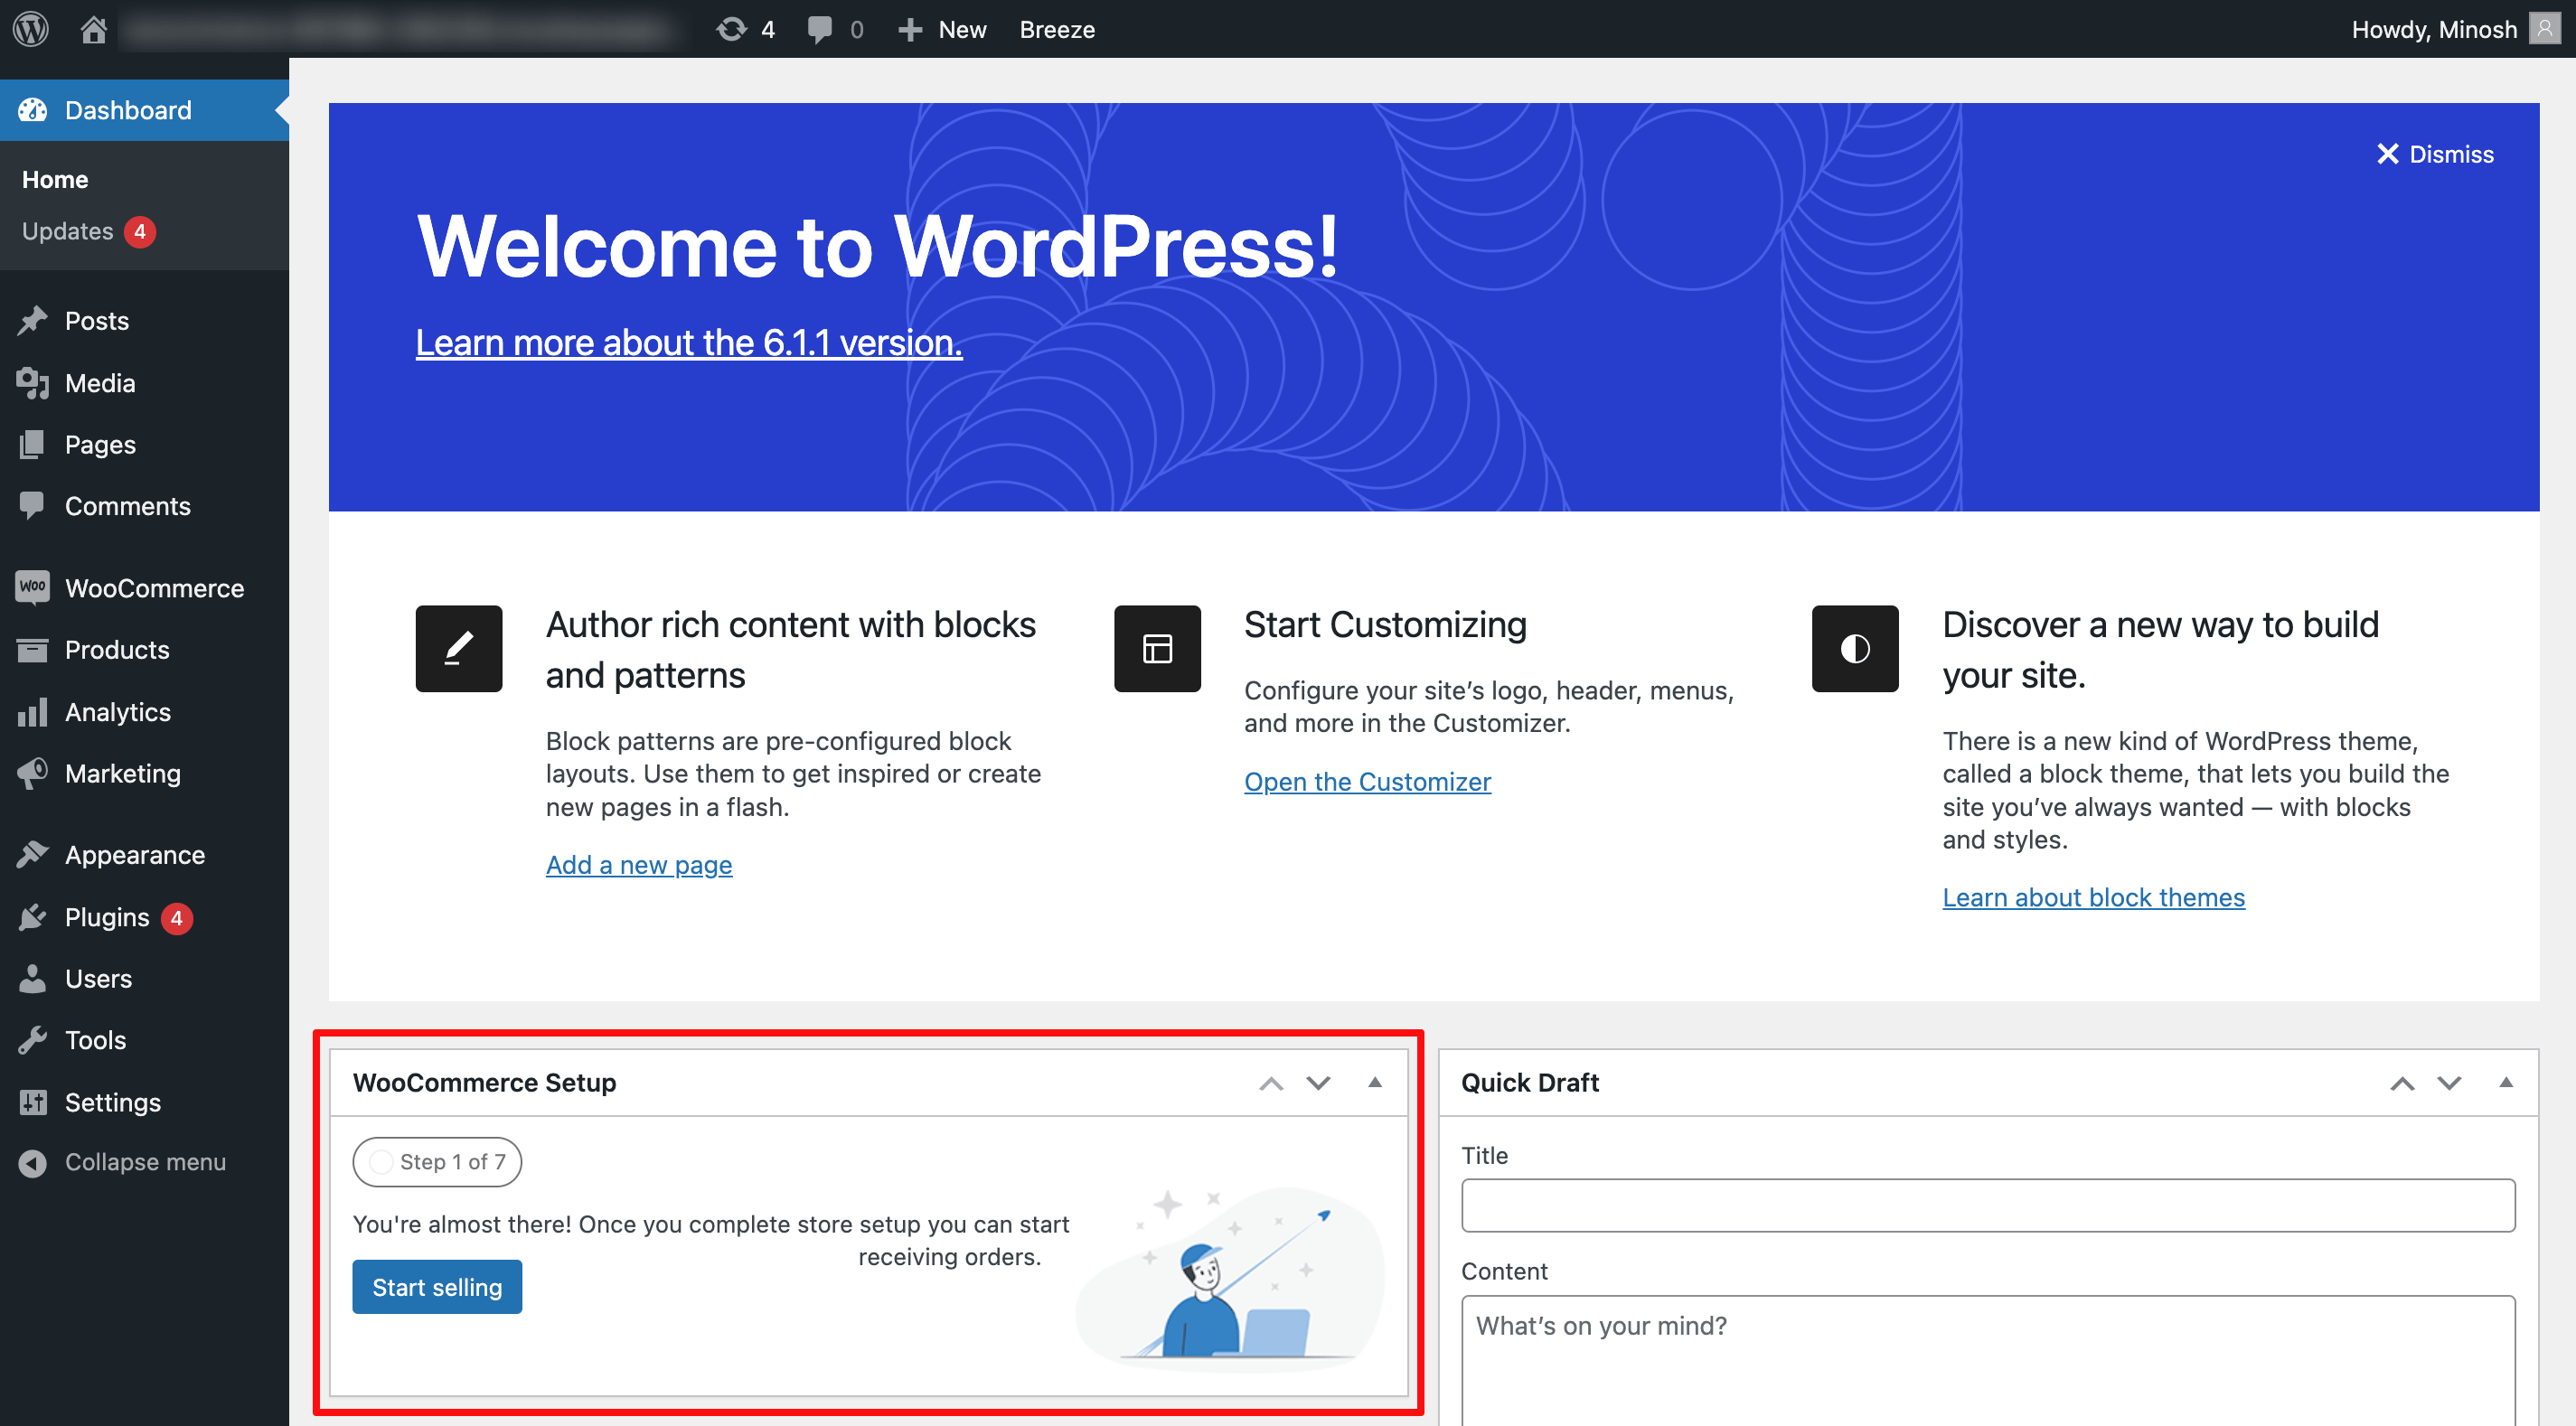
Now that you’ve got WooCommerce put in in your WordPress setup, it’s time to start out organising your on-line retailer!
First, click on the “Begin Promoting” button to launch the WooCommerce setup wizard. This wizard will information you thru the method of organising your retailer, step-by-step.
The setup wizard will information you thru the method of organising your retailer, beginning with getting into your retailer particulars. Right here, you’ll enter fundamental info equivalent to your retailer’s handle and promoting and transport areas, in addition to the forex you’d like to make use of.
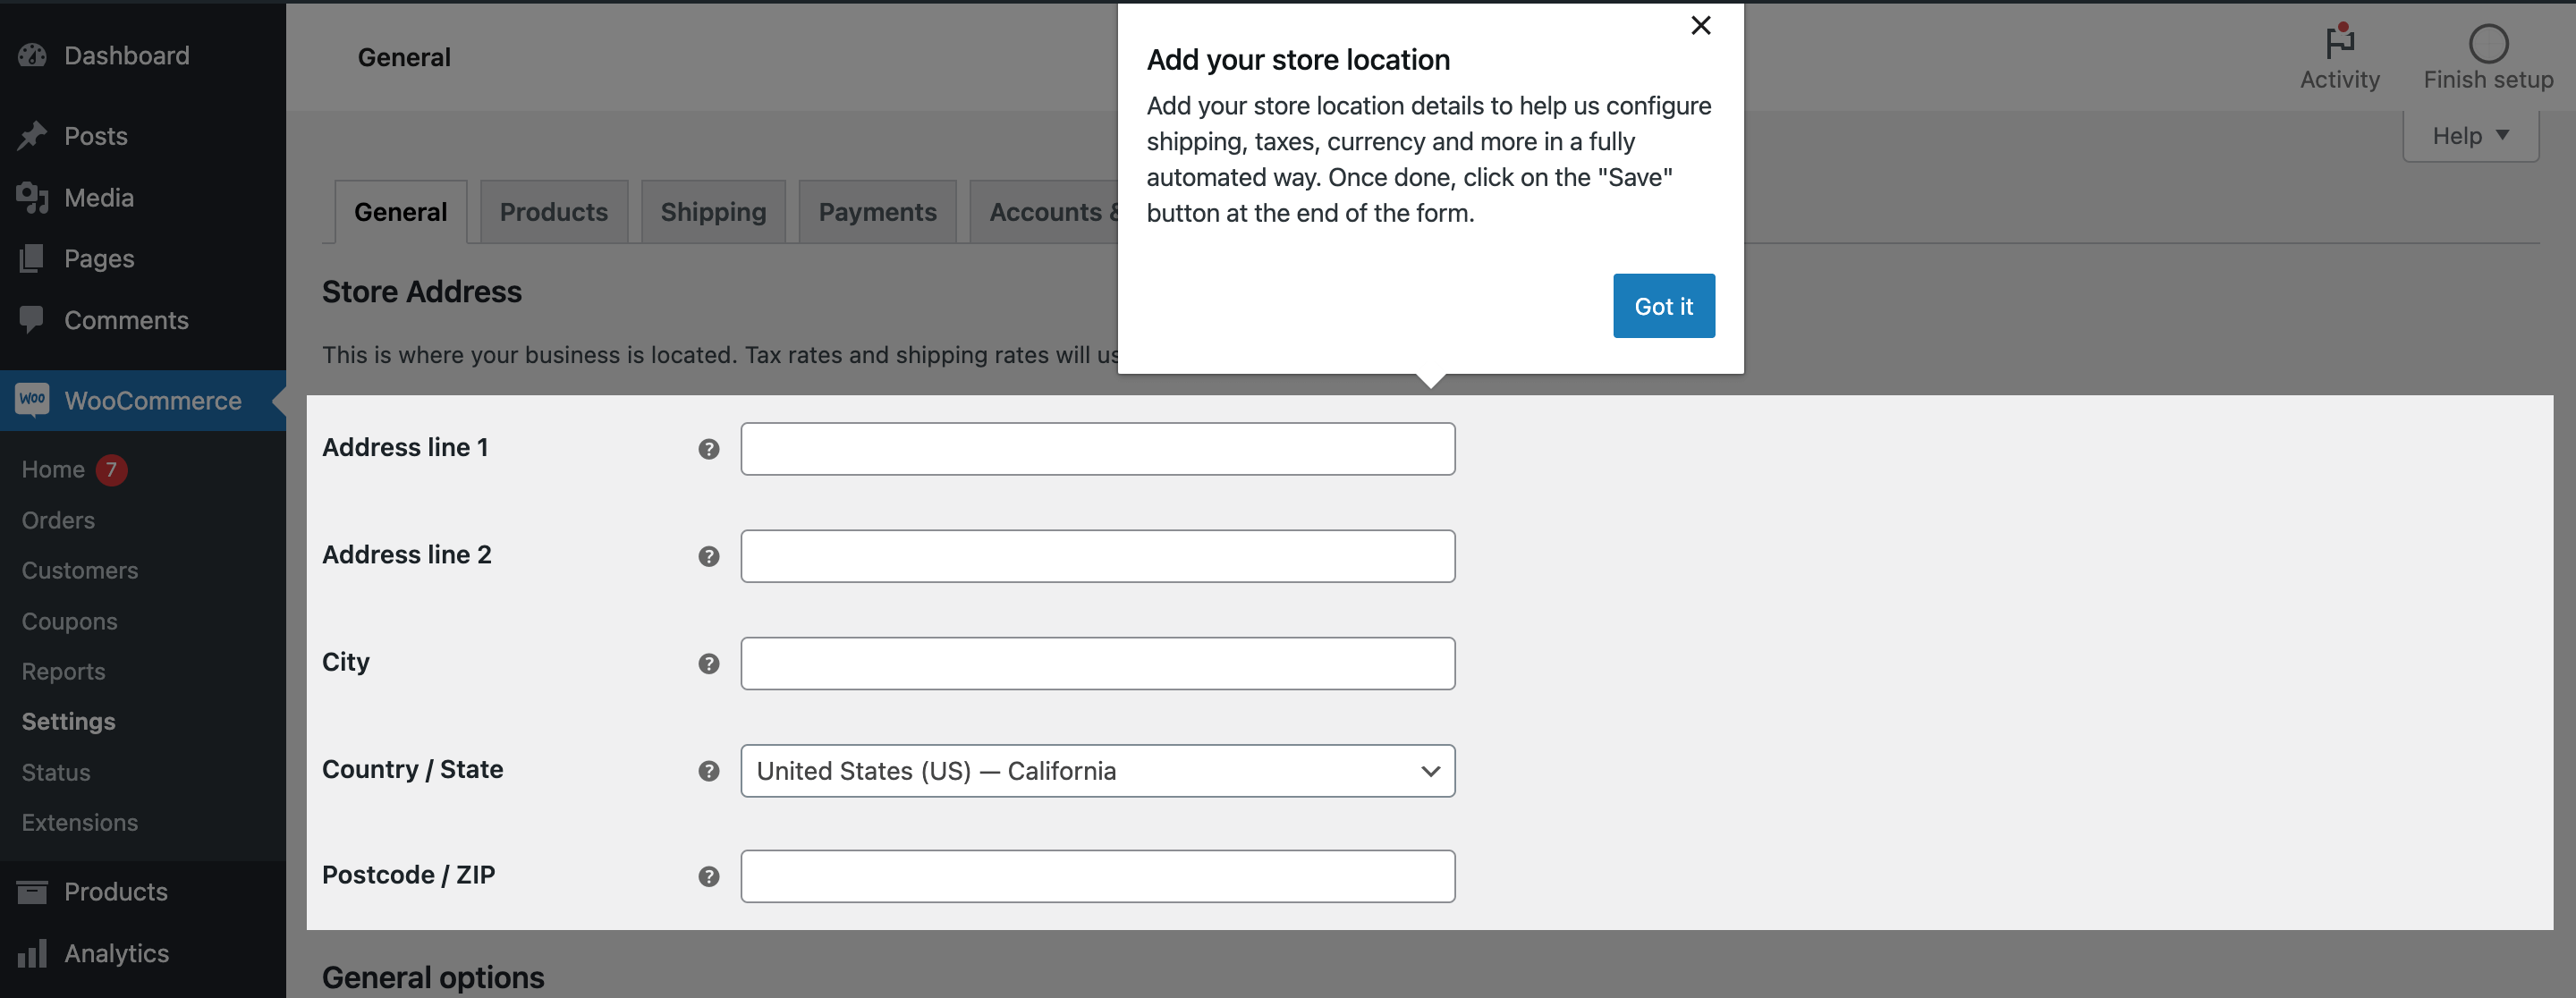
It’s essential that you simply enter this info appropriately and totally, so take your time and double-check it earlier than you progress on.
When you’ve completed, don’t overlook the save them.
After that, it’s time to maneuver on to the following step of the setup wizard. Merely click on the “Proceed Setup” button on the prime proper nook and it’ll take you to the following web page of the setup course of.
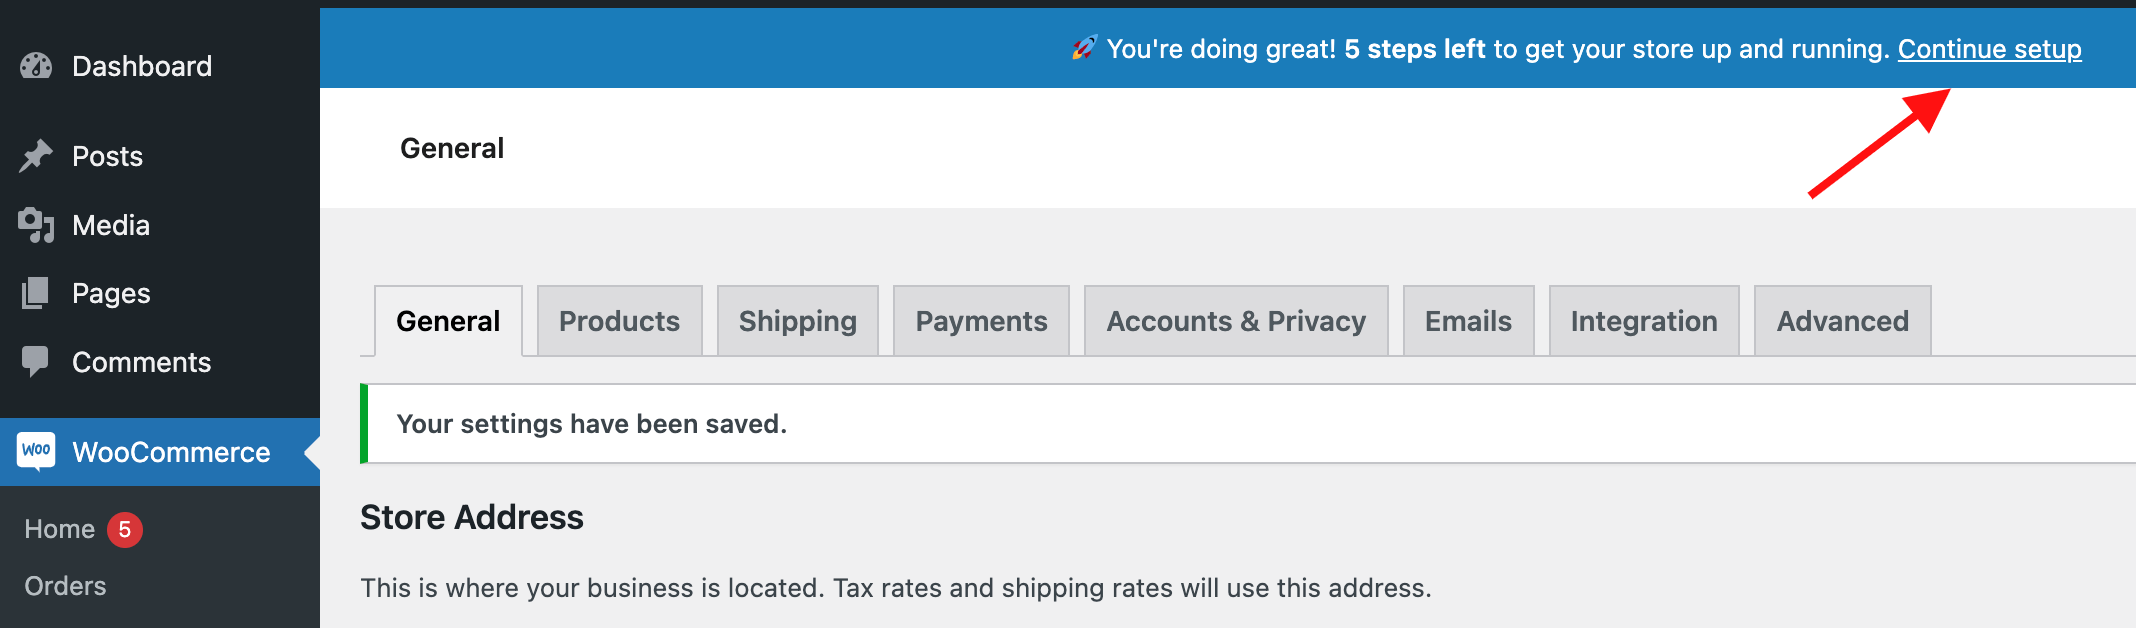
On this web page, it is possible for you to to assessment the handle you will have entered and ensure all the things is so as. After you have verified all the small print, you possibly can click on the “Proceed” button to maneuver on to the following step.
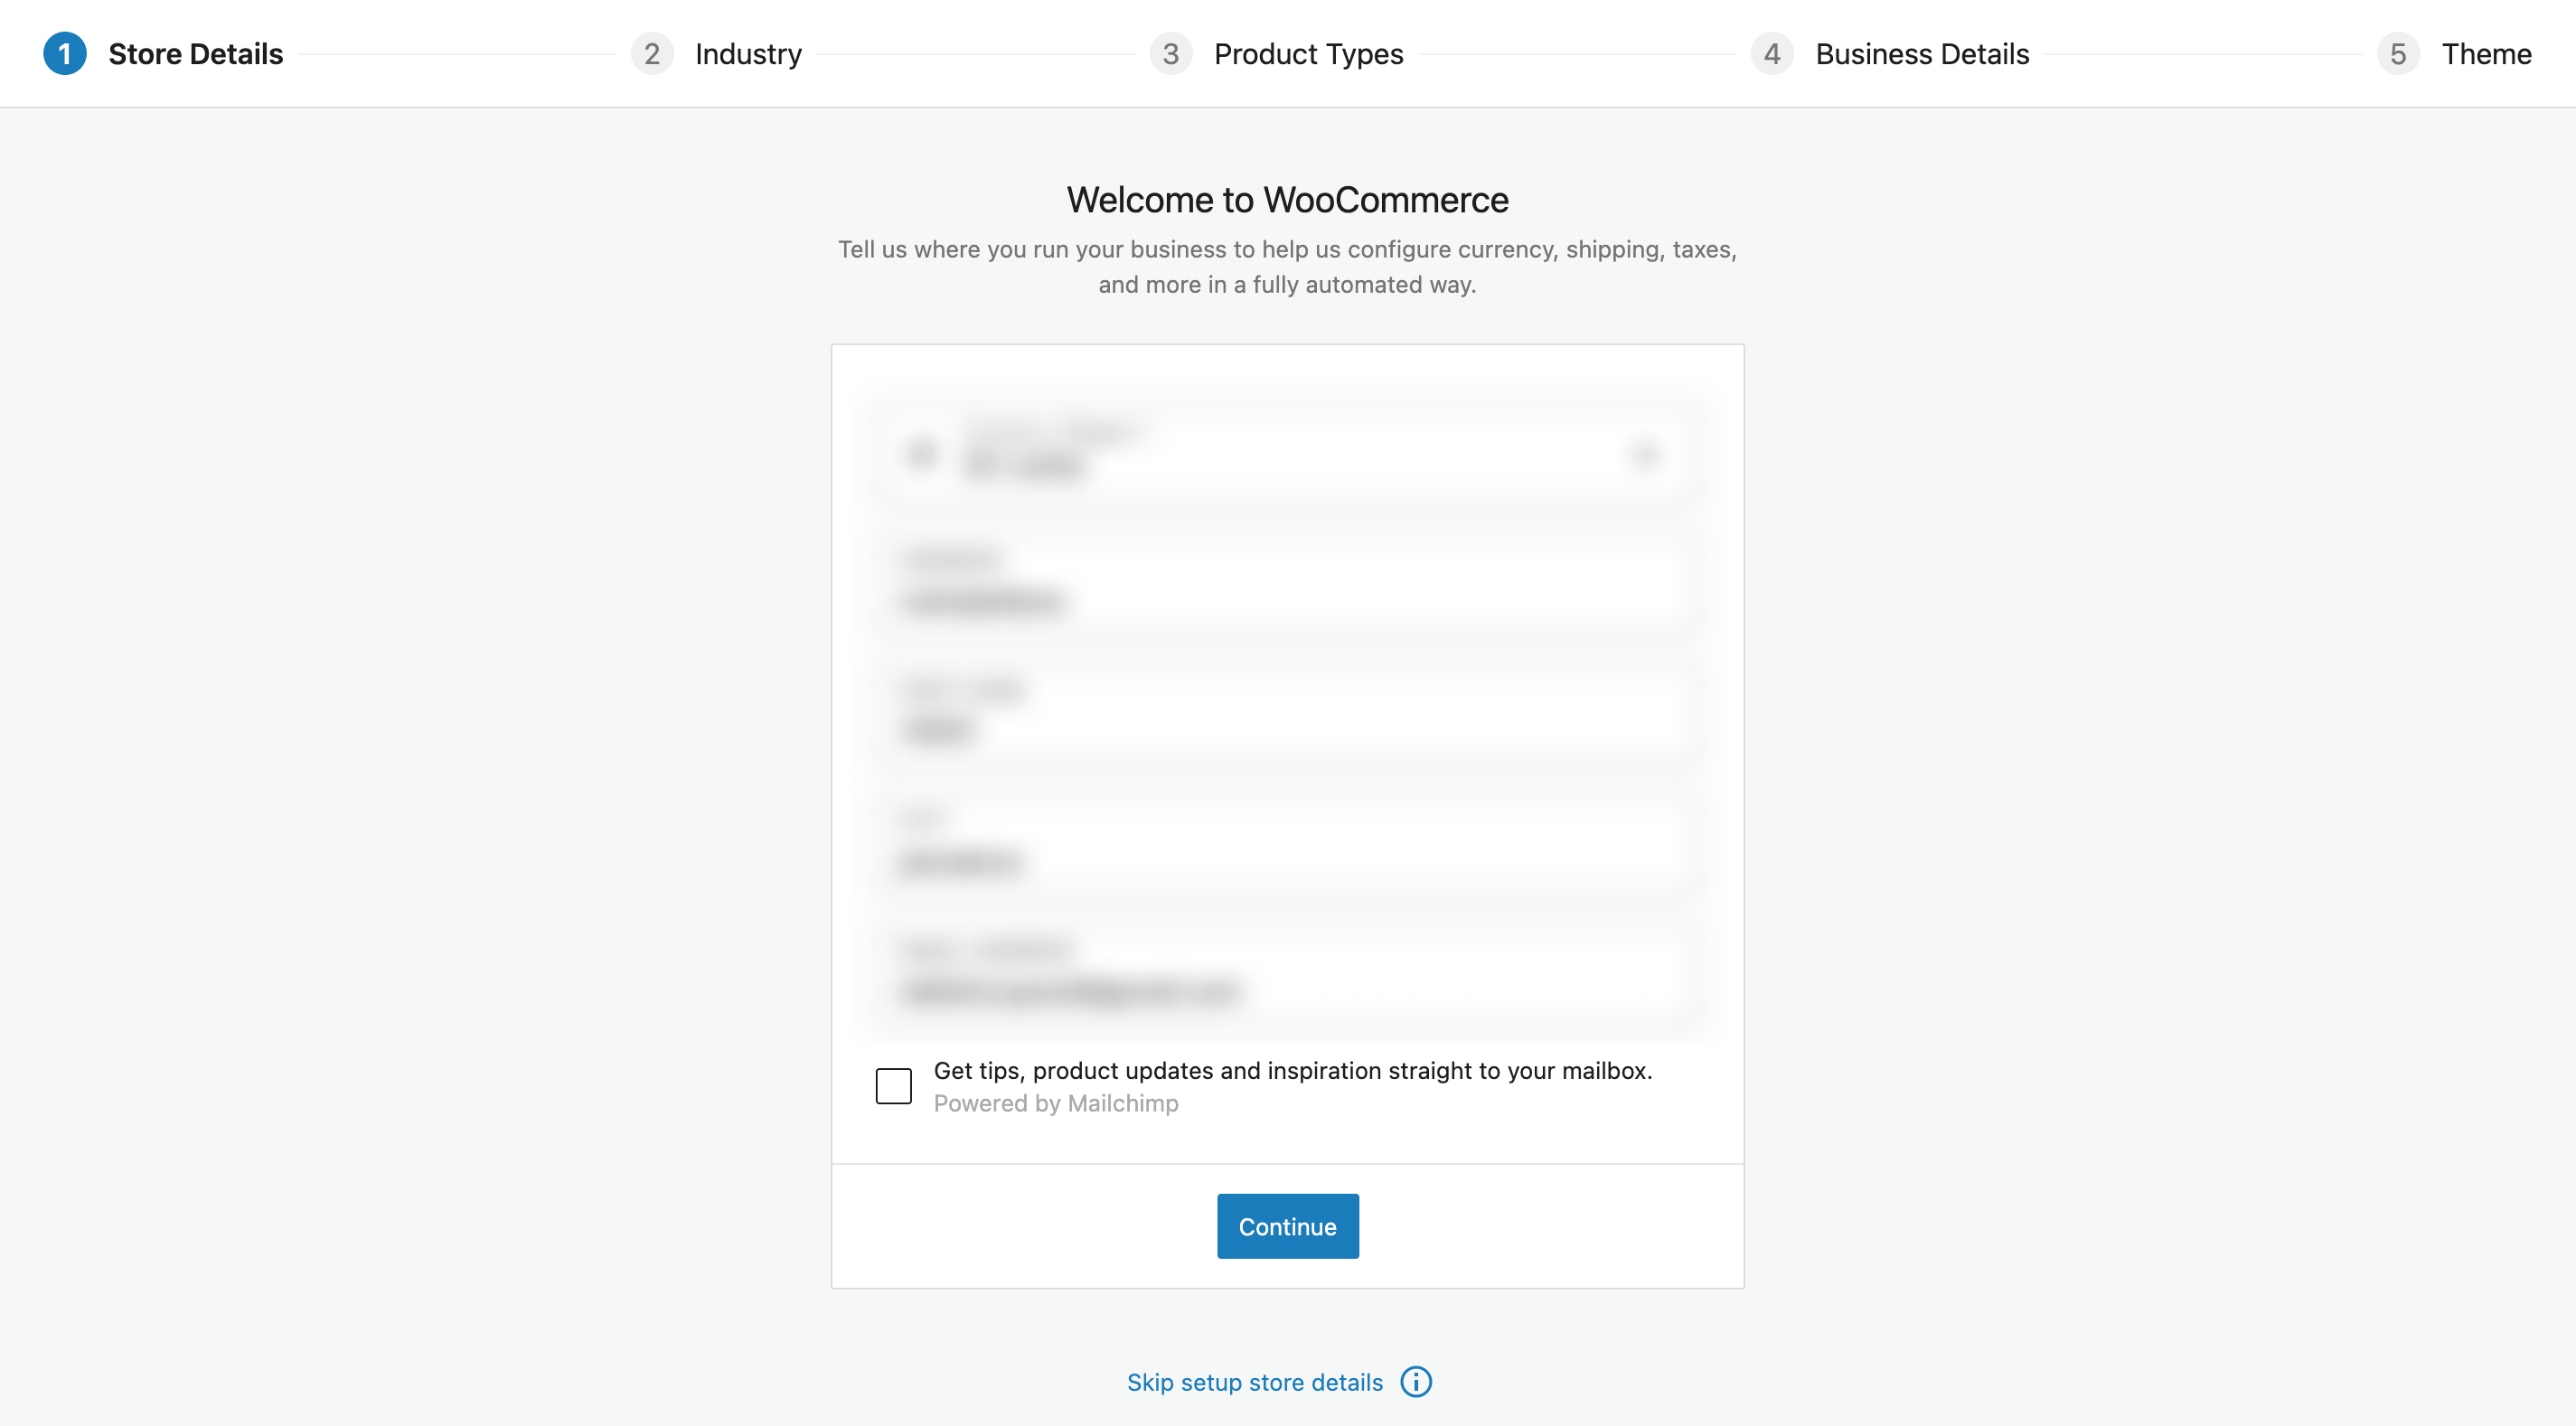
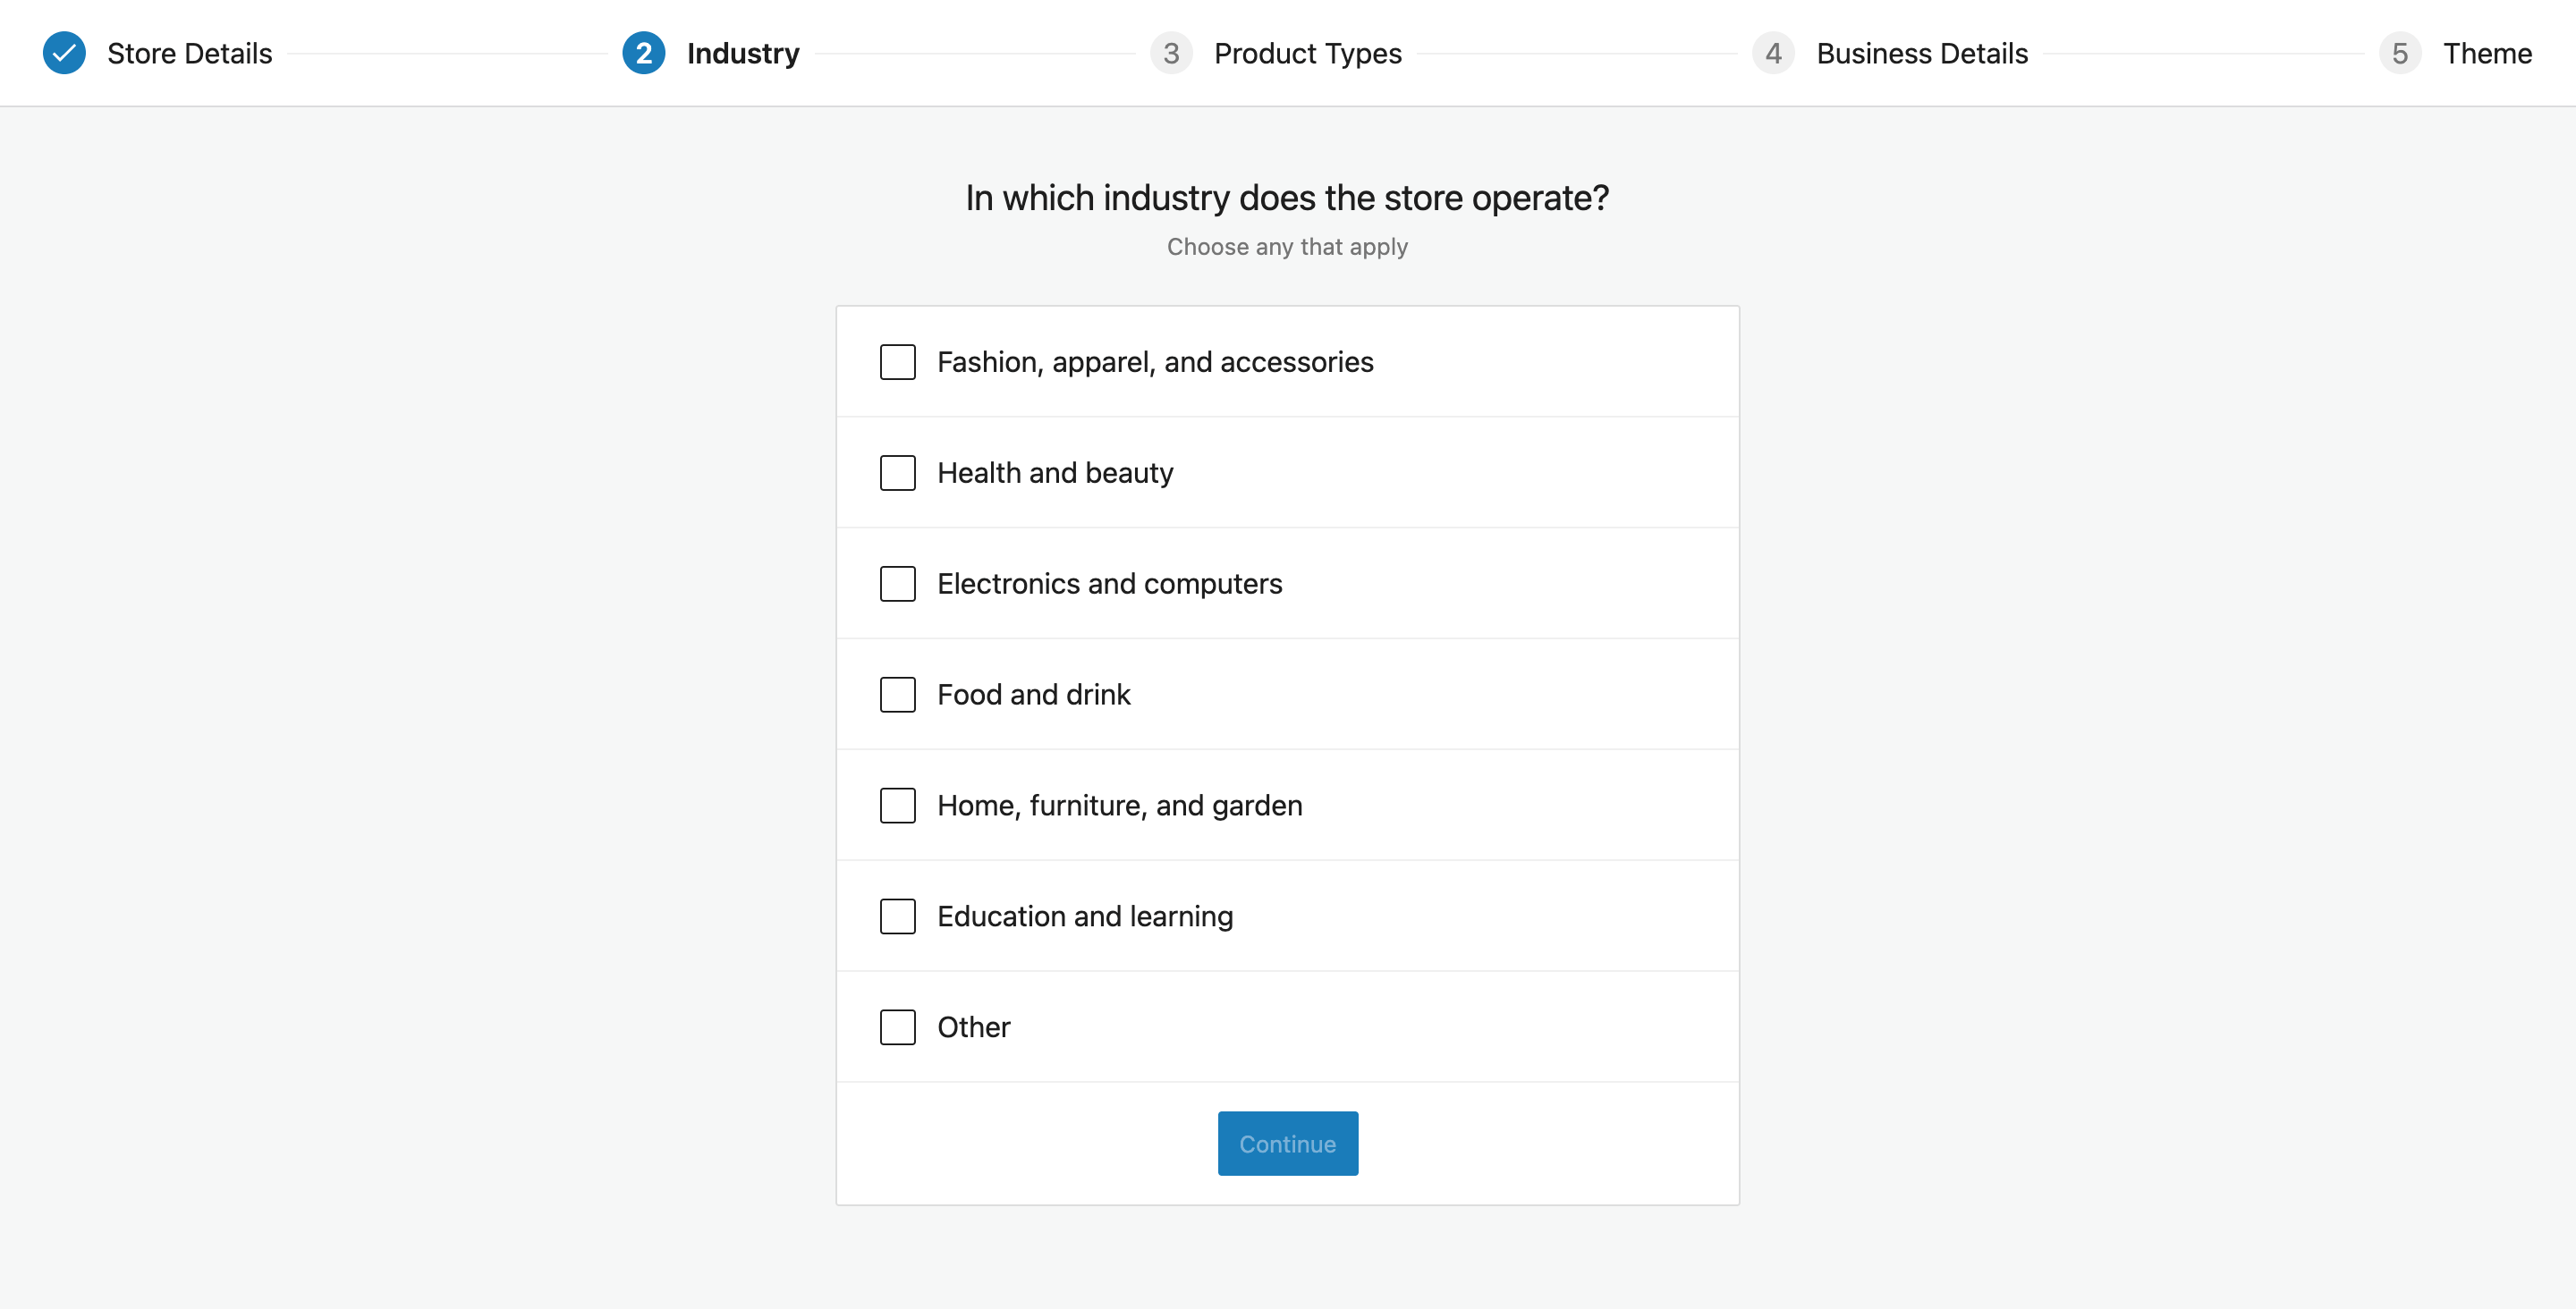
Subsequent, you’ll be requested in regards to the trade you’re in. You might have quite a lot of choices to select from, from clothes and trend to electronics and training. Simply choose those that apply to your enterprise and also you’re good to go.
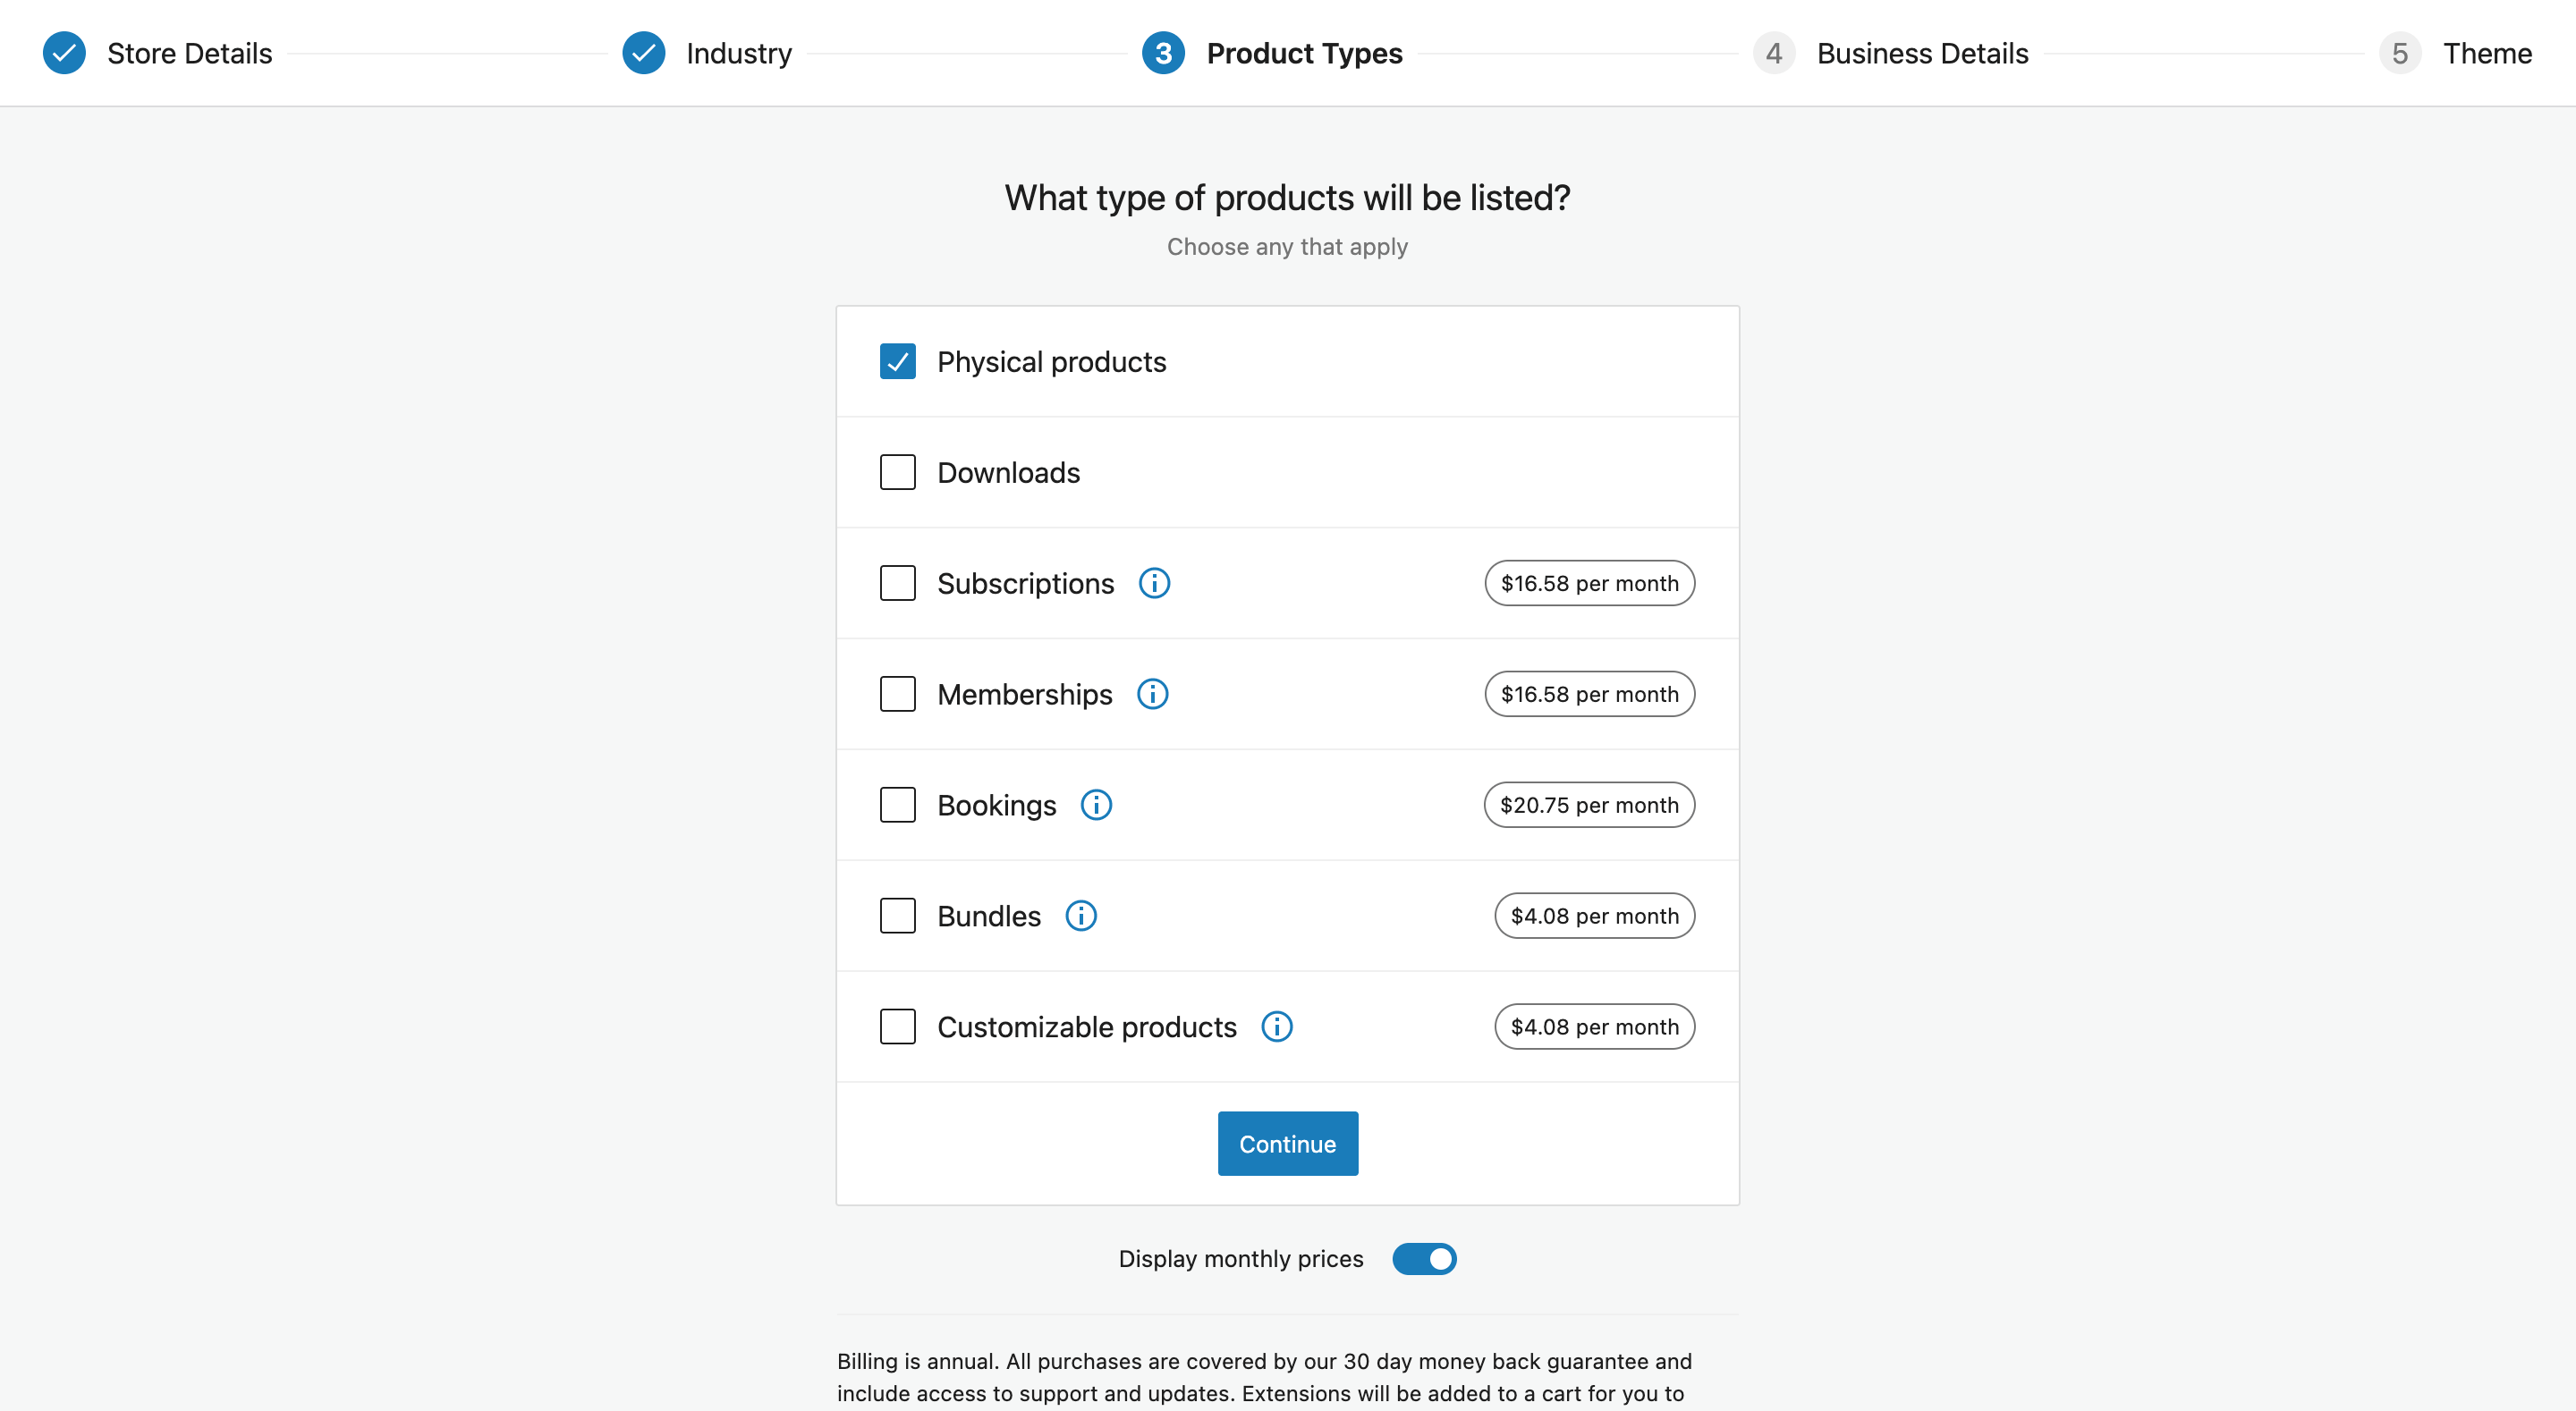
The subsequent step within the setup wizard is to resolve what sort of merchandise you’ll be itemizing in your retailer.
Whether or not you’re promoting bodily items, digital downloads, subscriptions, appointments, or companies, WooCommerce has you coated.
One factor to notice is that some product varieties require further plugins or extensions. If you wish to checklist customizable merchandise, for instance, you’ll must buy an extension to allow this characteristic.
Equally, should you’re pondering of working a subscription-based retailer, you’ll want an extension to arrange that form of retailer. This might value you a couple of further bucks, however it’s value it in the long term.
After you have chosen the sorts of merchandise that you simply wish to checklist in your retailer, you possibly can transfer ahead with the setup.
Now, the setup wizard will ask you a couple of easy questions on your enterprise. It is going to ask what number of merchandise you’re planning to show, the place your enterprise is positioned, and the way you’ll be promoting your merchandise, and so forth.
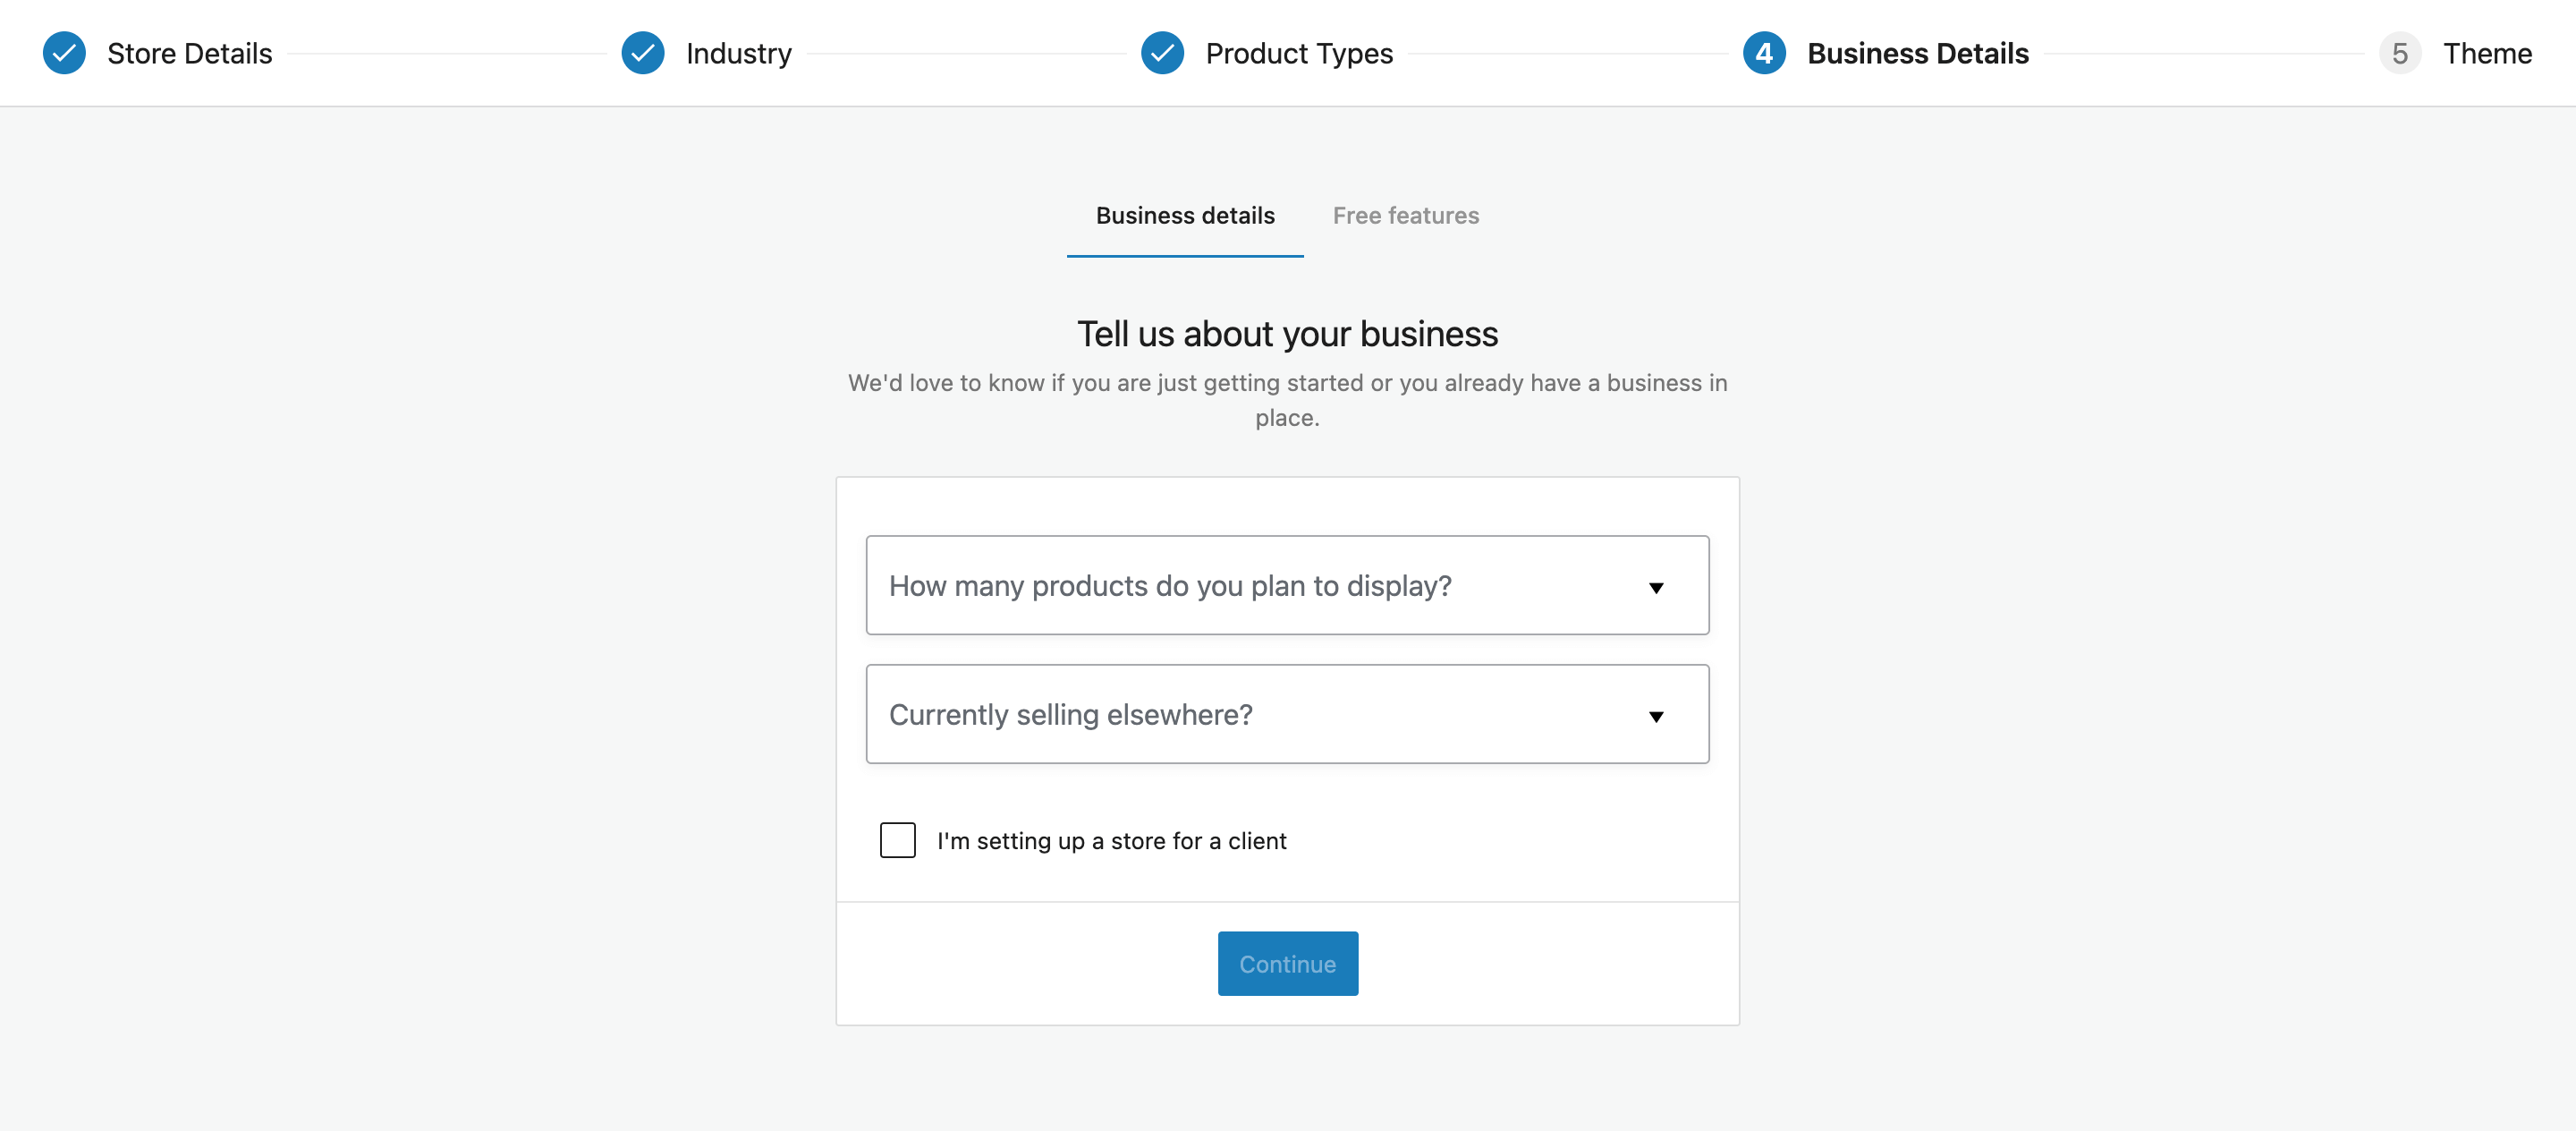
When you’ve answered these questions, WooCommerce will provide some free extensions that may assist improve your retailer. These are optionally available, so you possibly can add or take away them as you like.
Normally, these extensions add extra options or customization choices to your retailer.
On the final step of your WooCommerce setup, you’ll be requested to decide on a theme in your retailer. You might have the choice to decide on a free or a paid one.
Nevertheless, The correct theme could make all of the distinction in terms of the success of your retailer. So put within the effort and time to be sure to choose the proper one for your enterprise.
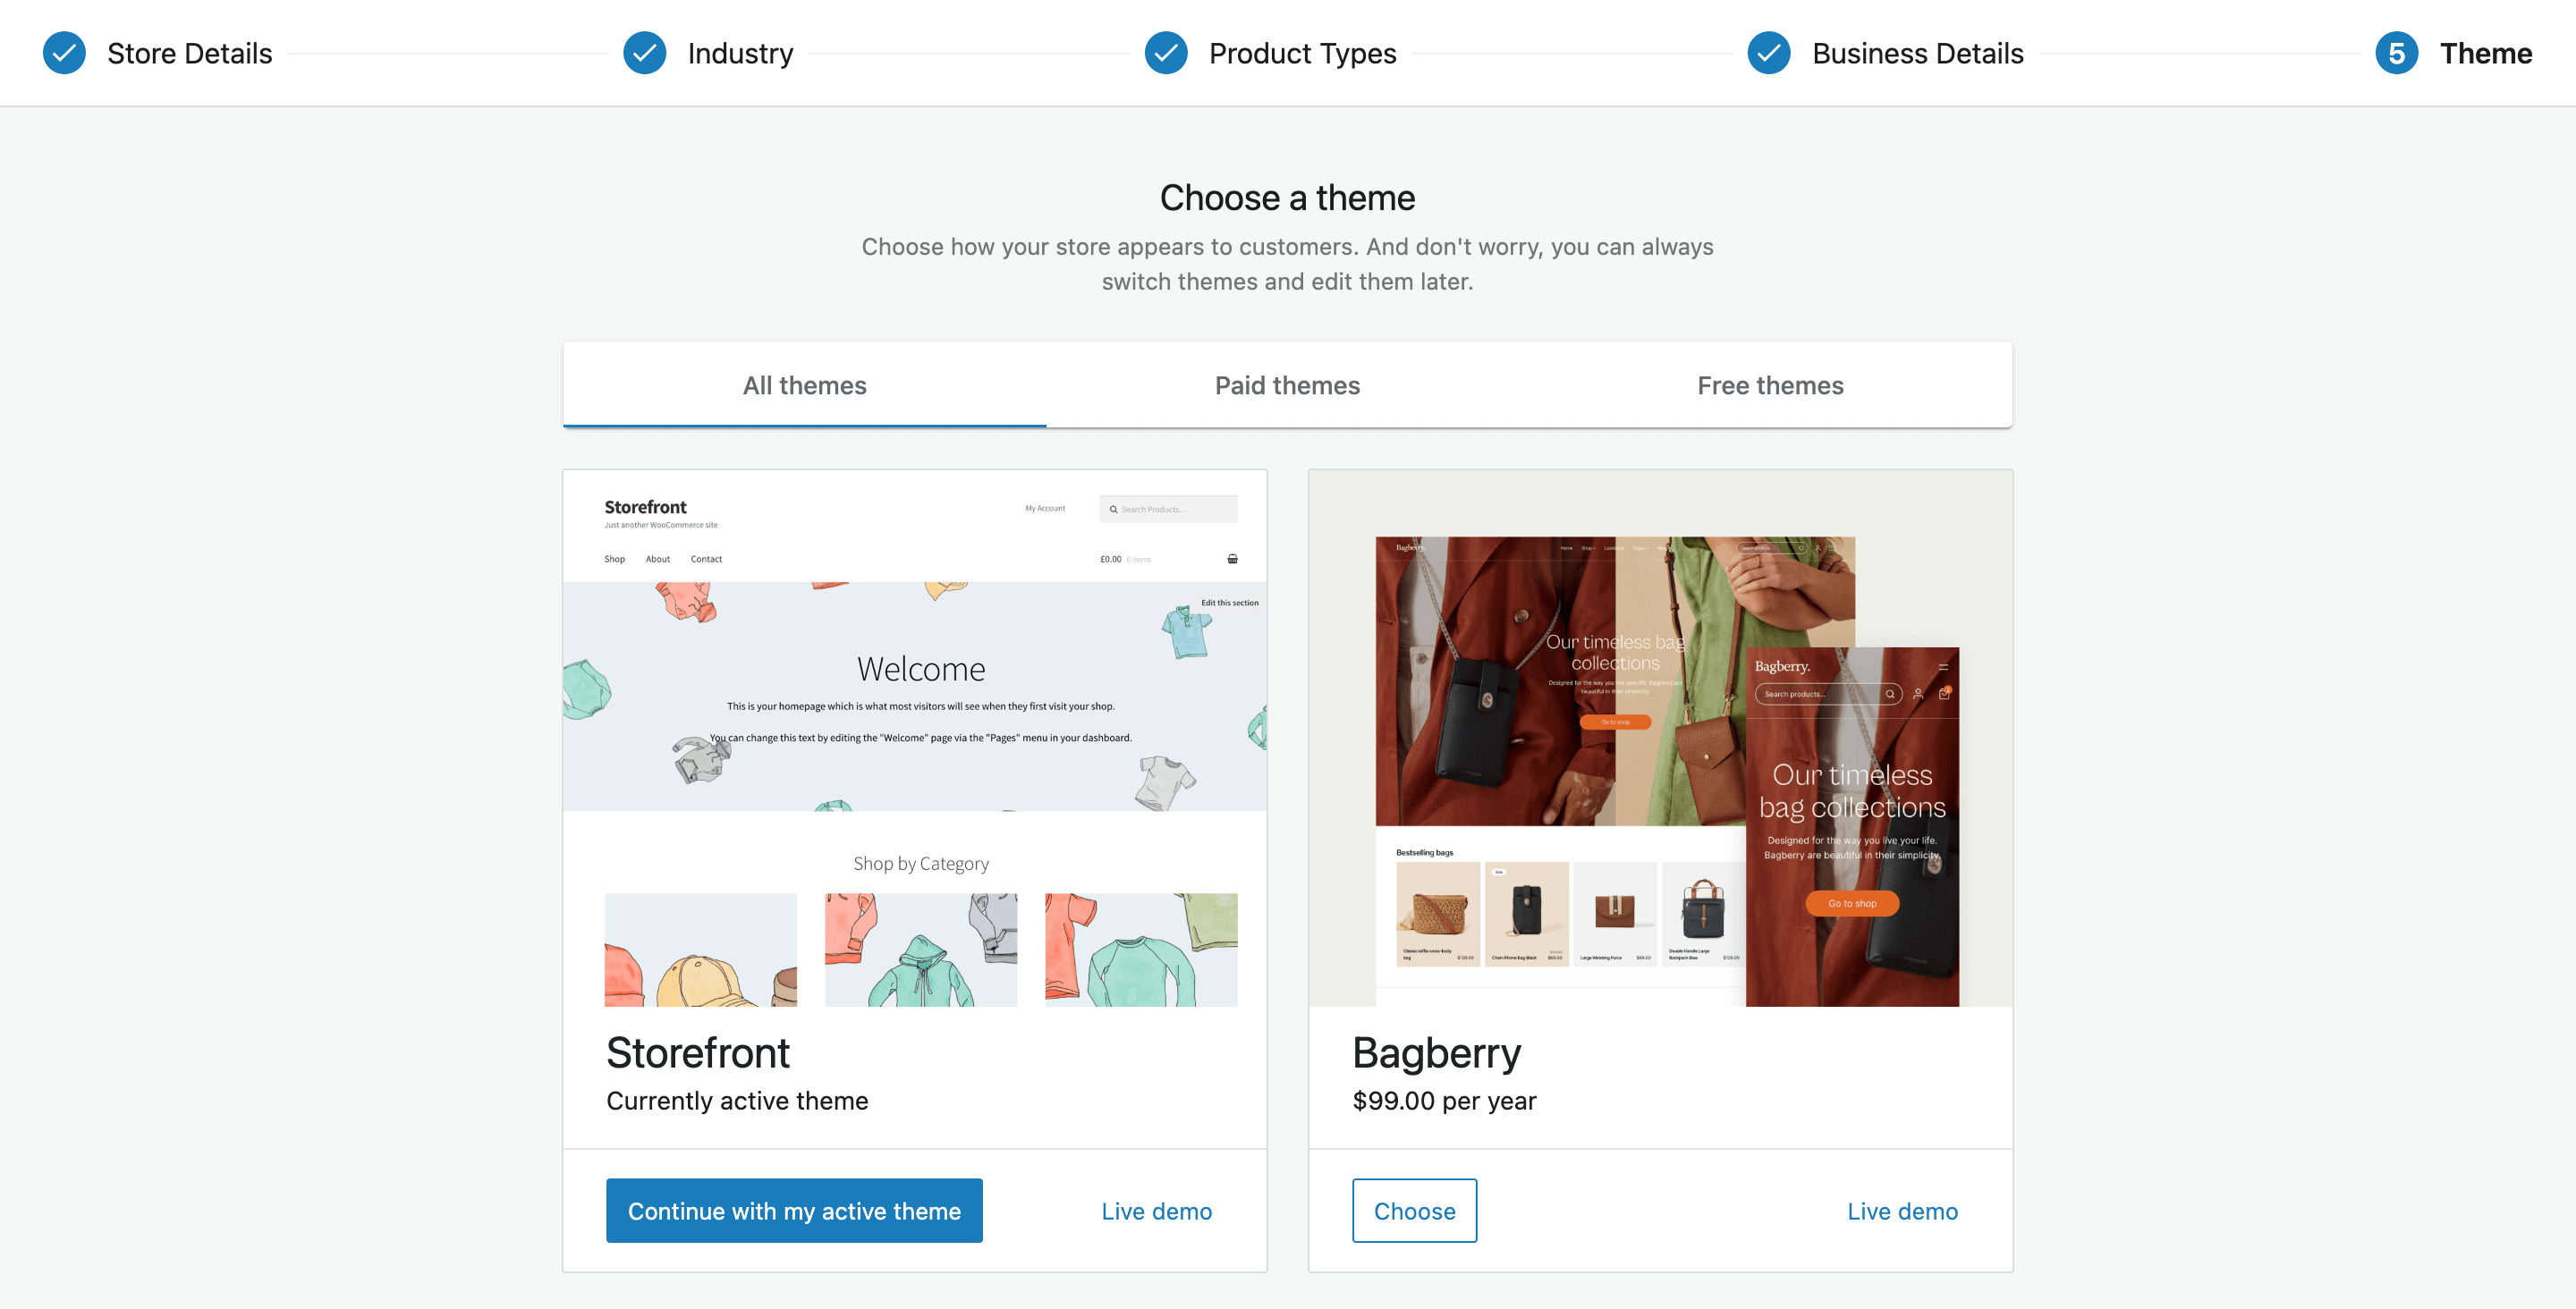
For those who don’t know what theme to select proper now, that’s completely nice! You possibly can all the time change your theme afterward. Click on the “Proceed with my lively theme” button should you’re undecided what to go together with.
3. Managing Your WooCommerce Retailer
Now that you simply’ve accomplished the arduous half and arrange the shop, it’s time so as to add merchandise, arrange a fee processor, and configure your transport and tax-related settings.
And don’t overlook, it’s possible you’ll want to vary these settings as you handle your retailer. WooCommerce makes it simple to regulate settings as you go, so you possibly can all the time hold your retailer up-to-date.
Including Merchandise
Now, head over to WooCommerce > Dwelling and click on the “Add Merchandise” button.
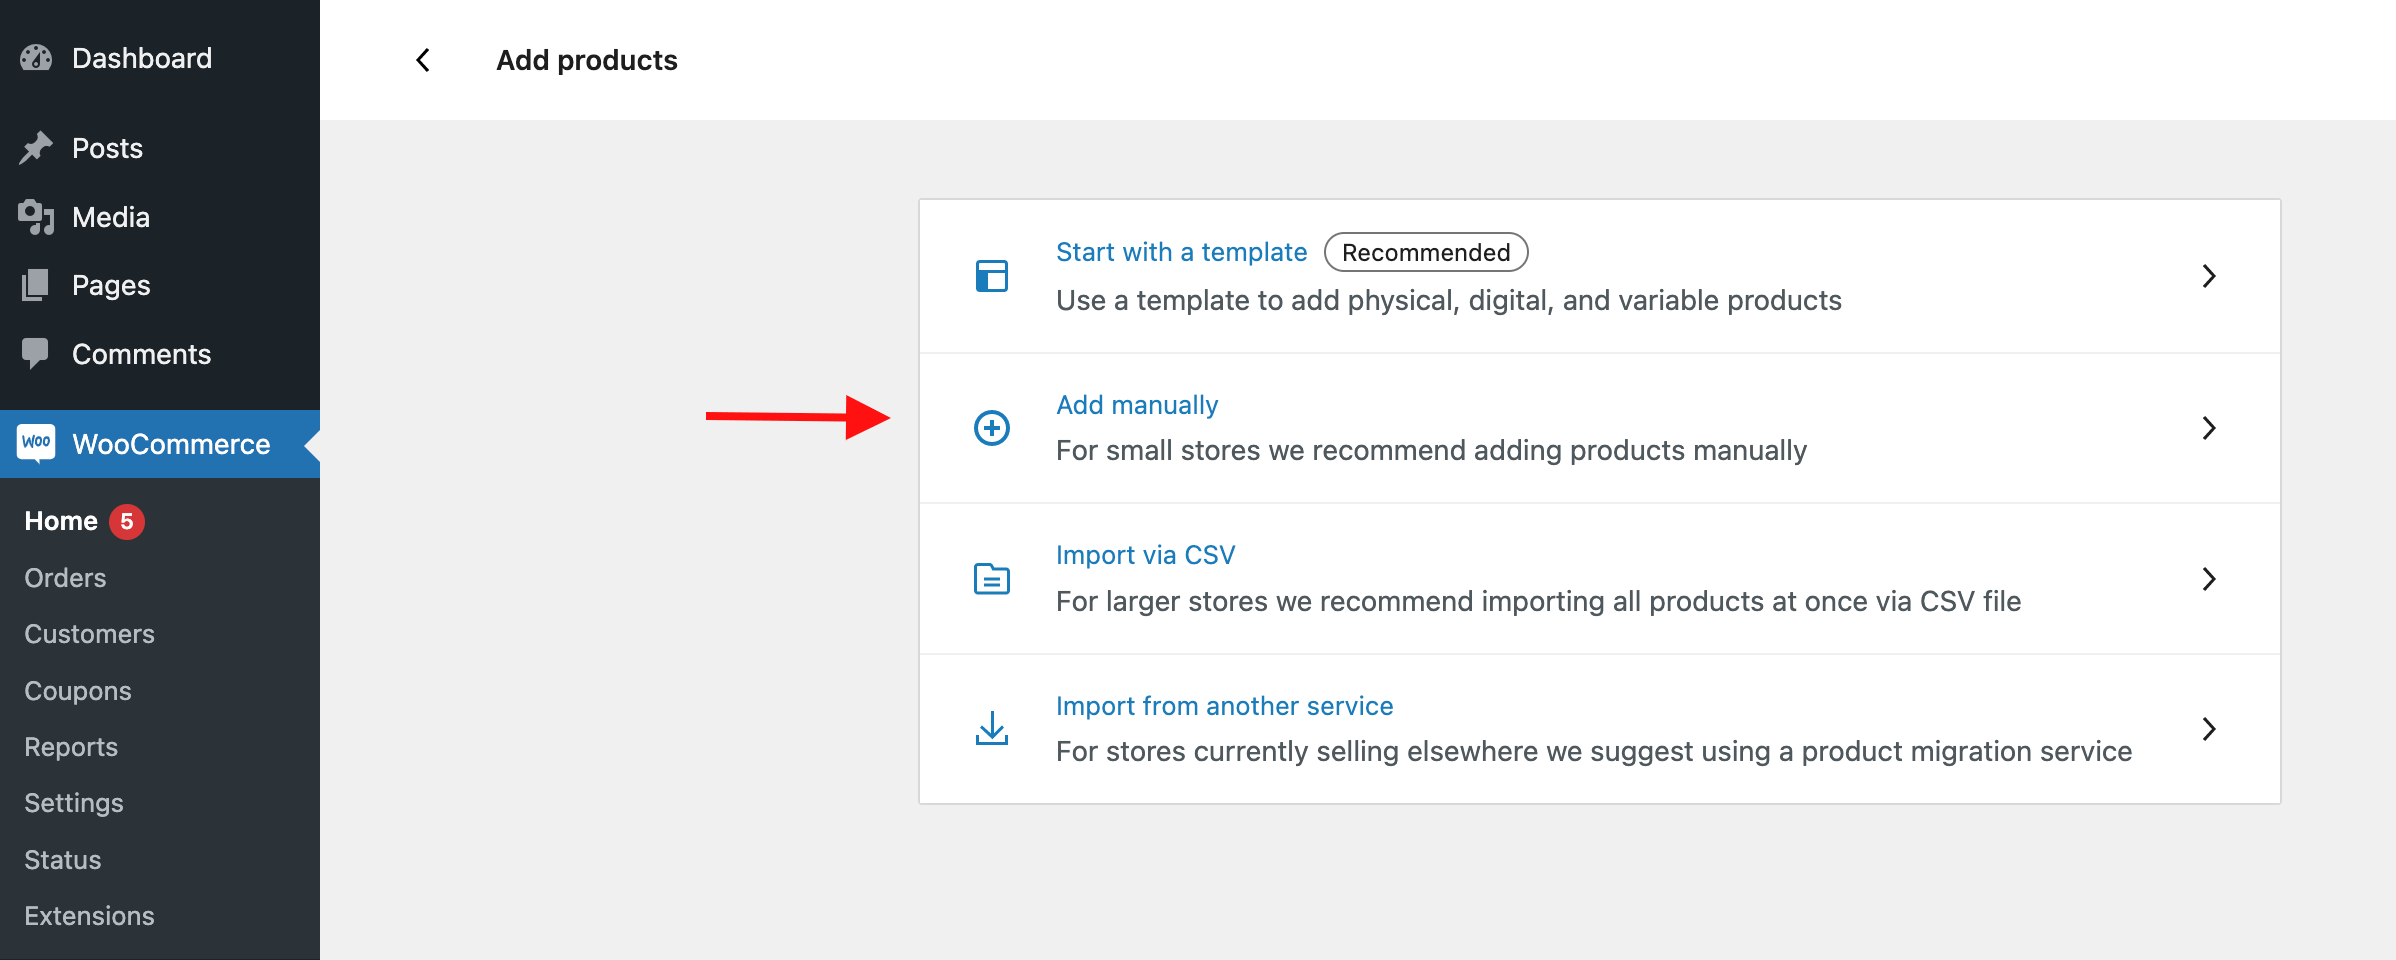
That gives you 4 choices. You possibly can both begin with a template, add manually, import by way of CSV, or import from one other service.
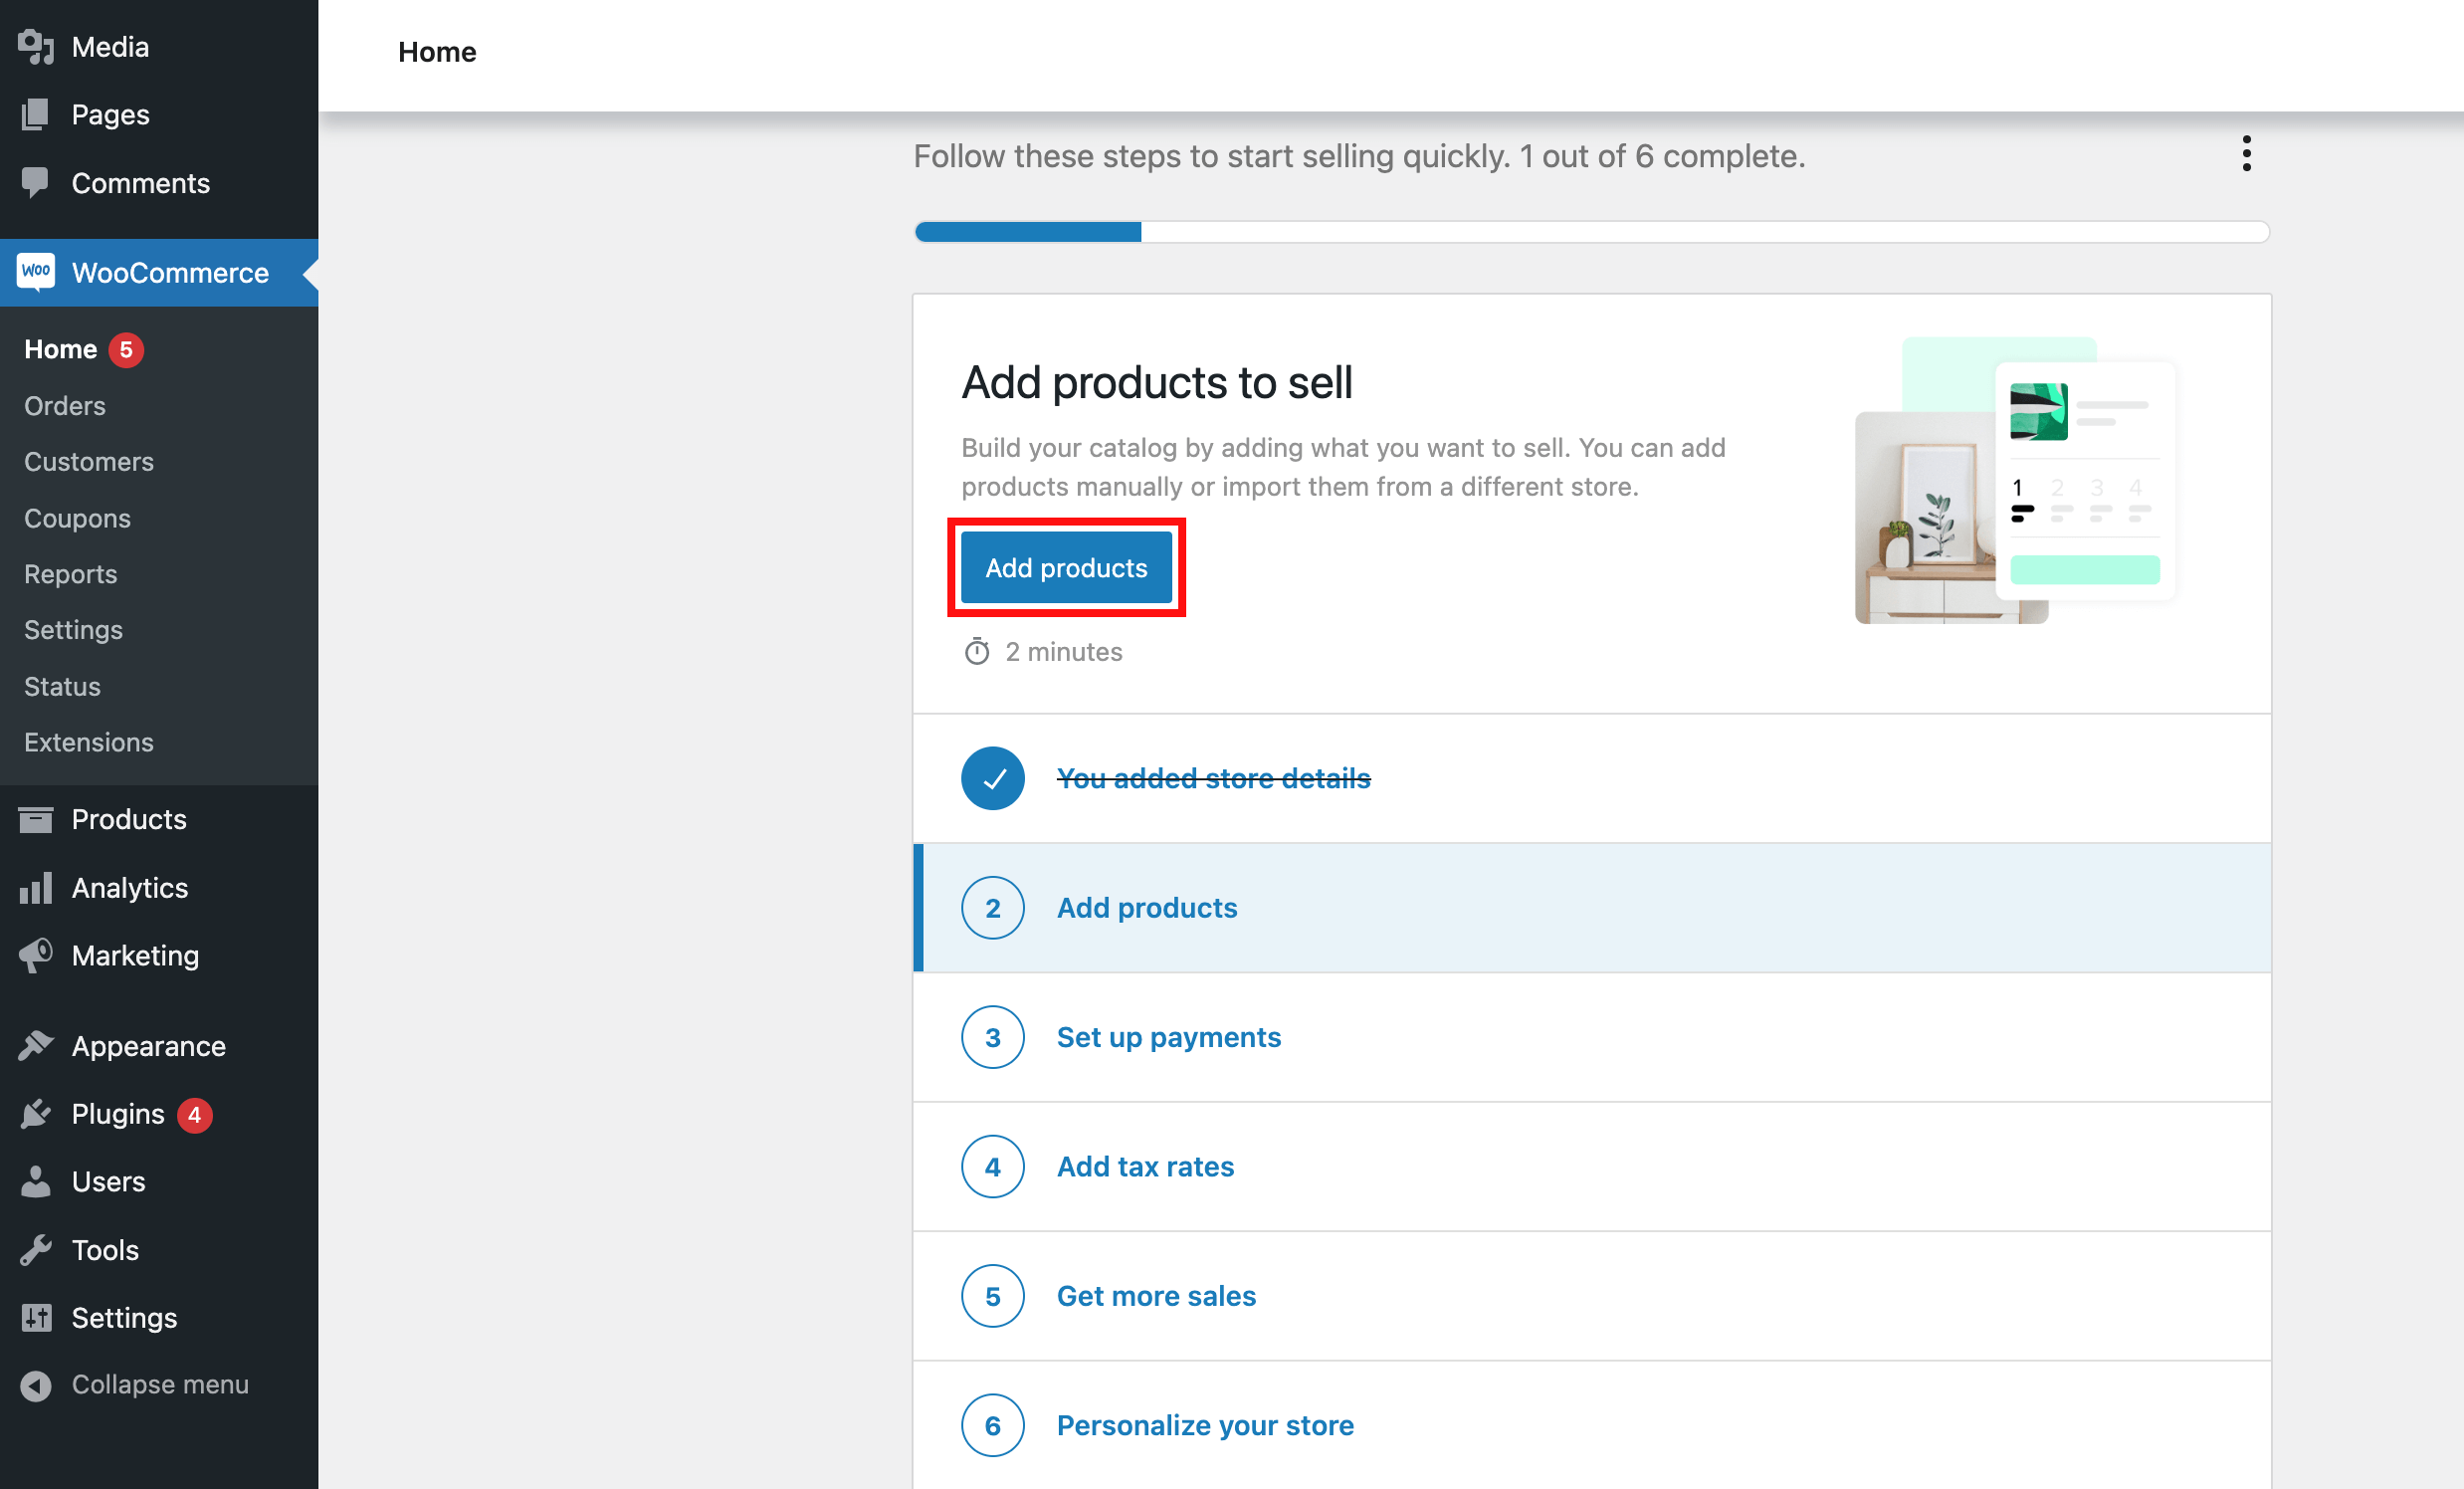
Relying on what’s finest for your enterprise and desires, you possibly can select whichever choice works finest for you. For instance, should you’re ranging from scratch, it’s possible you’ll wish to select the “Add Manually” choice.
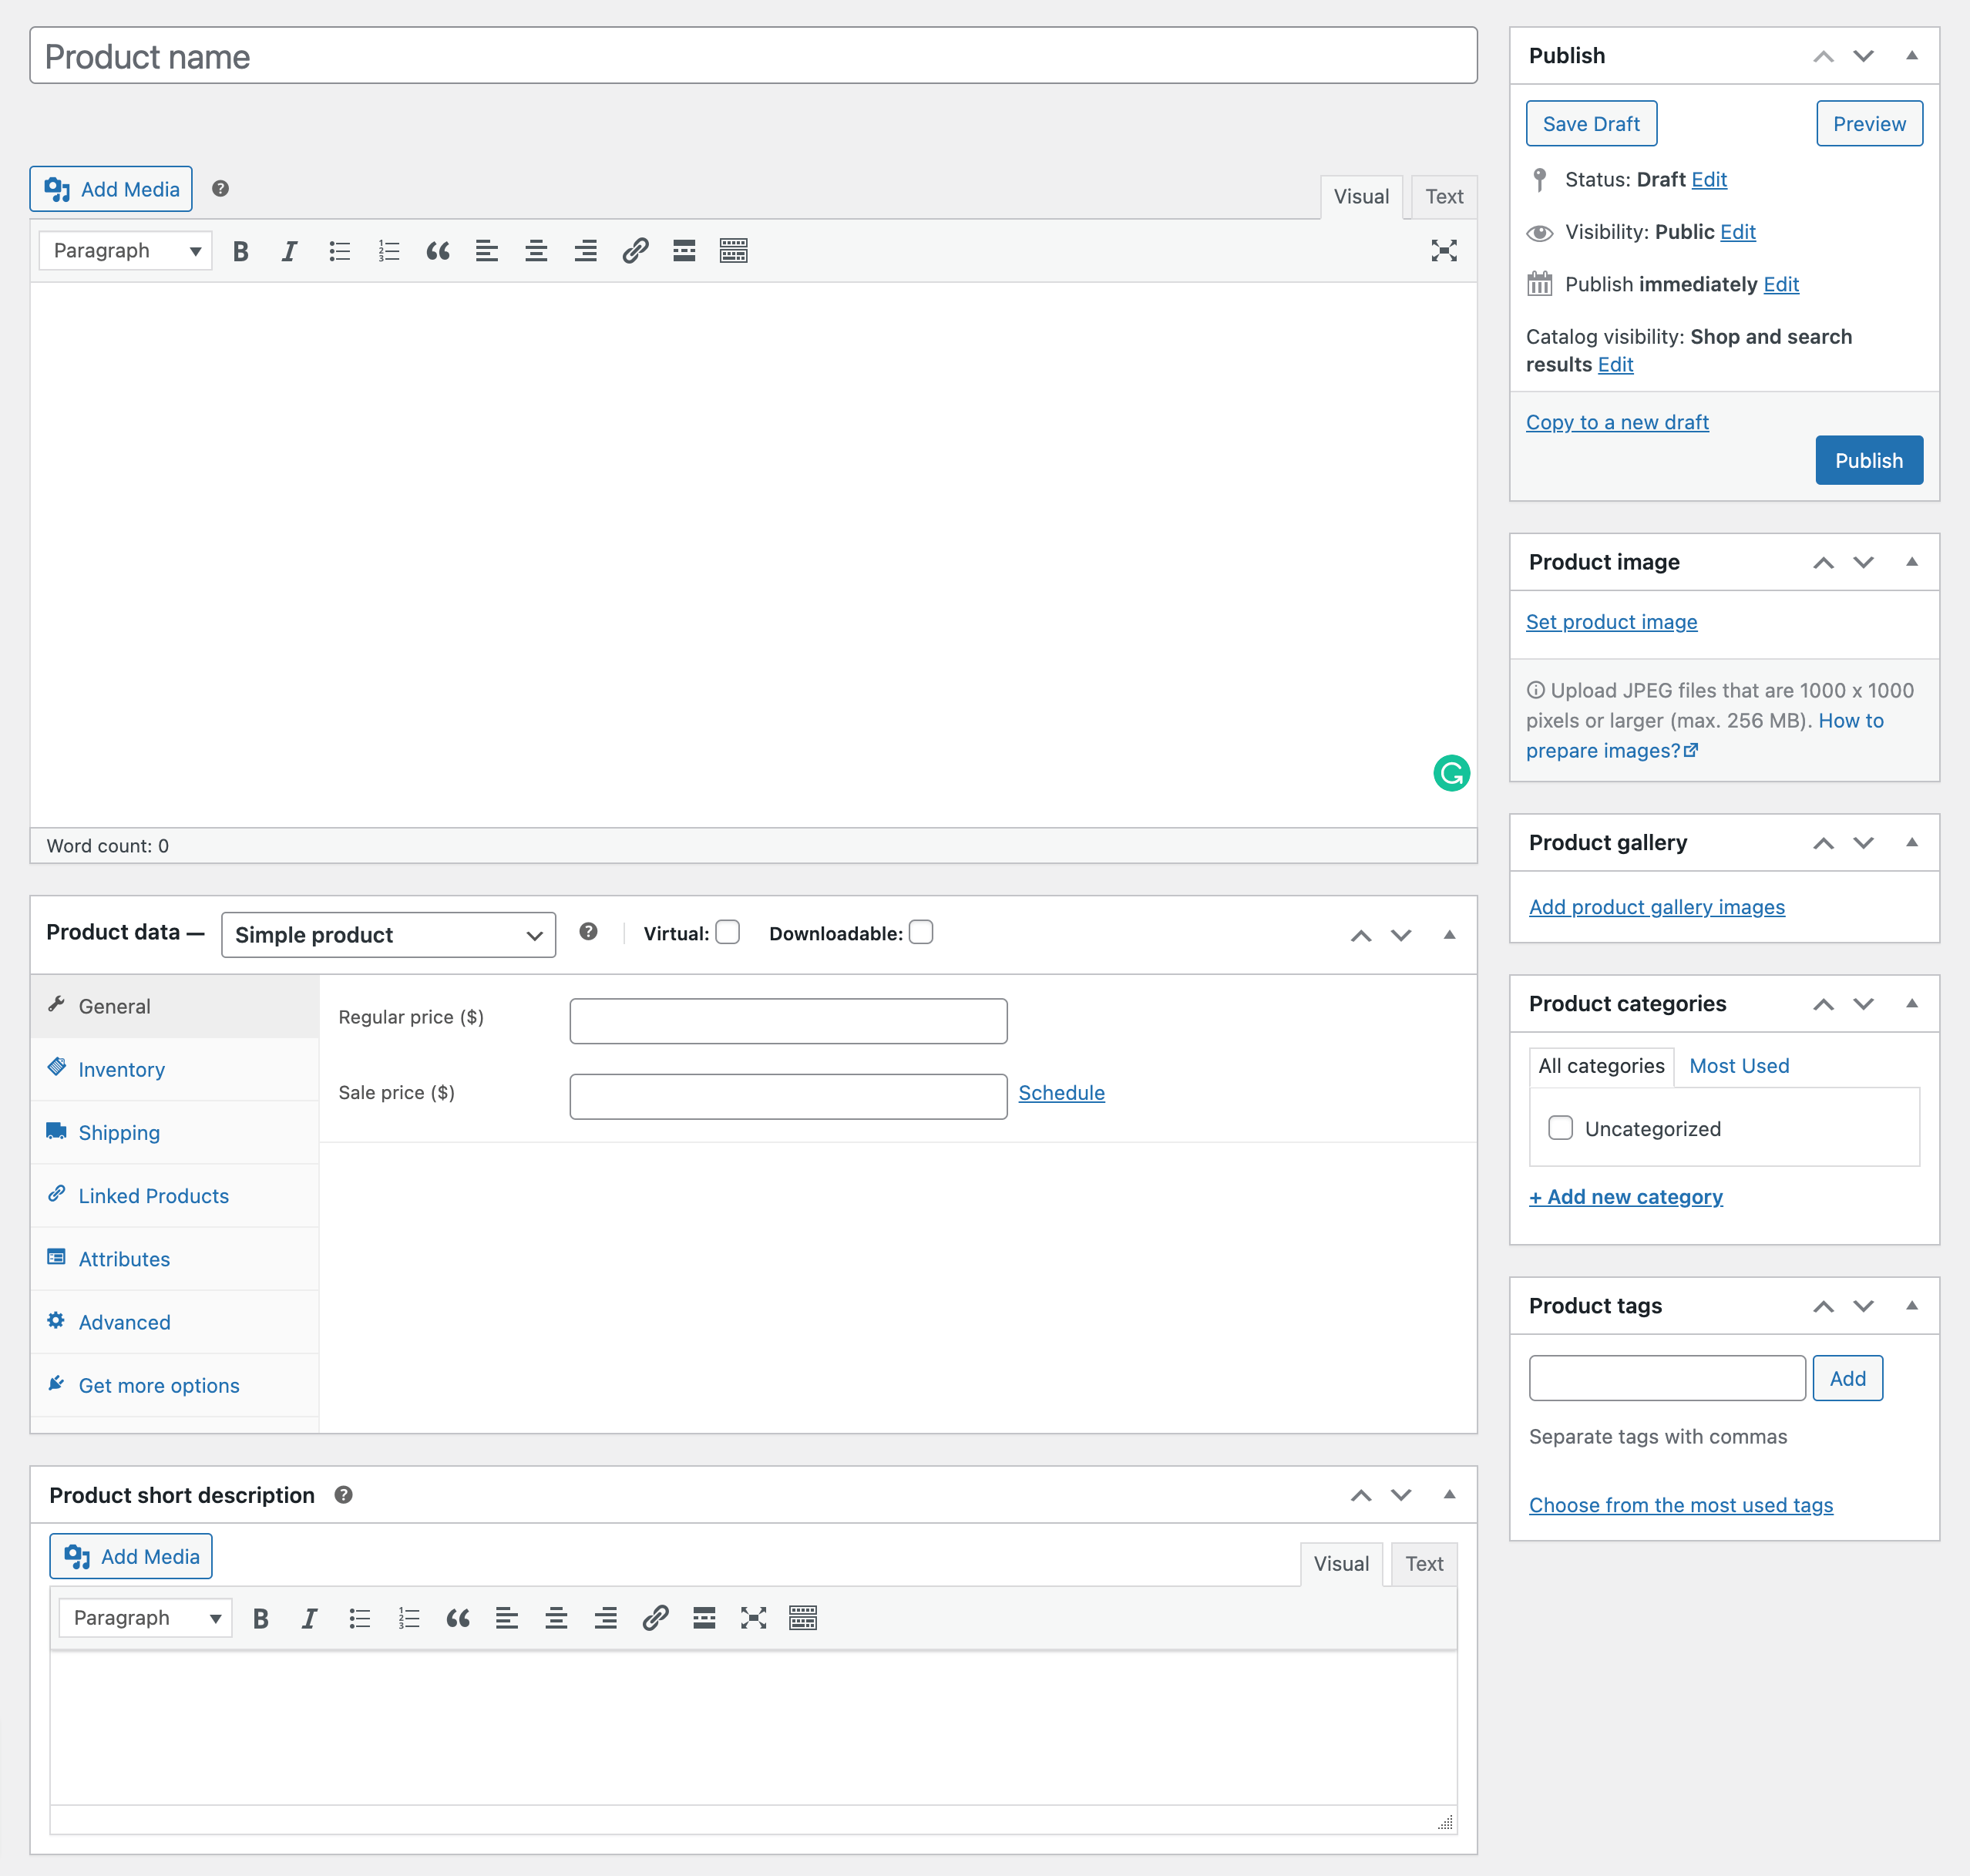
From there, you can begin itemizing your new product. Step one is to fill out the product info, together with the product title, worth, pictures, tags, product knowledge, and outline.
Don’t fear should you’re feeling overwhelmed, as WooCommerce has a fantastic information on how one can add and handle merchandise. It’s very simple to comply with and perceive, so be sure you learn it.
In relation to describing your product, you should utilize Copy.ai to be sure to’re creating the very best product descriptions. Copy.ai is an AI-driven copywriting platform that makes it simpler to create high-quality descriptions that interact readers.
After you have the product info arrange, the following step is so as to add product pictures. That is essential because it permits potential clients to get a greater thought of what they are going to be shopping for.
You may also add further product pictures to indicate off completely different angles or options, so be sure to put aside a while to be sure to get them proper.
For this, you should utilize Canva, a web based graphic design platform. With Canva, you possibly can simply create beautiful product pictures by eradicating picture backgrounds that can attract potential clients.
When you’ve stuffed out the product info and double-checked that all the things appears to be like good, it’s time to click on “publish.”
Congratulations, your new product is now dwell!
Integrating a Cost Supplier
Now that your first product is created and able to go, it’s time to get promoting!
However earlier than you are able to do that, you might want to discover a fee processor in your WooCommerce retailer.
A fee supplier/processor is a third-party service that lets you securely settle for funds out of your clients. And should you’re utilizing WooCommerce, there are some nice fee processor choices so that you can select from.
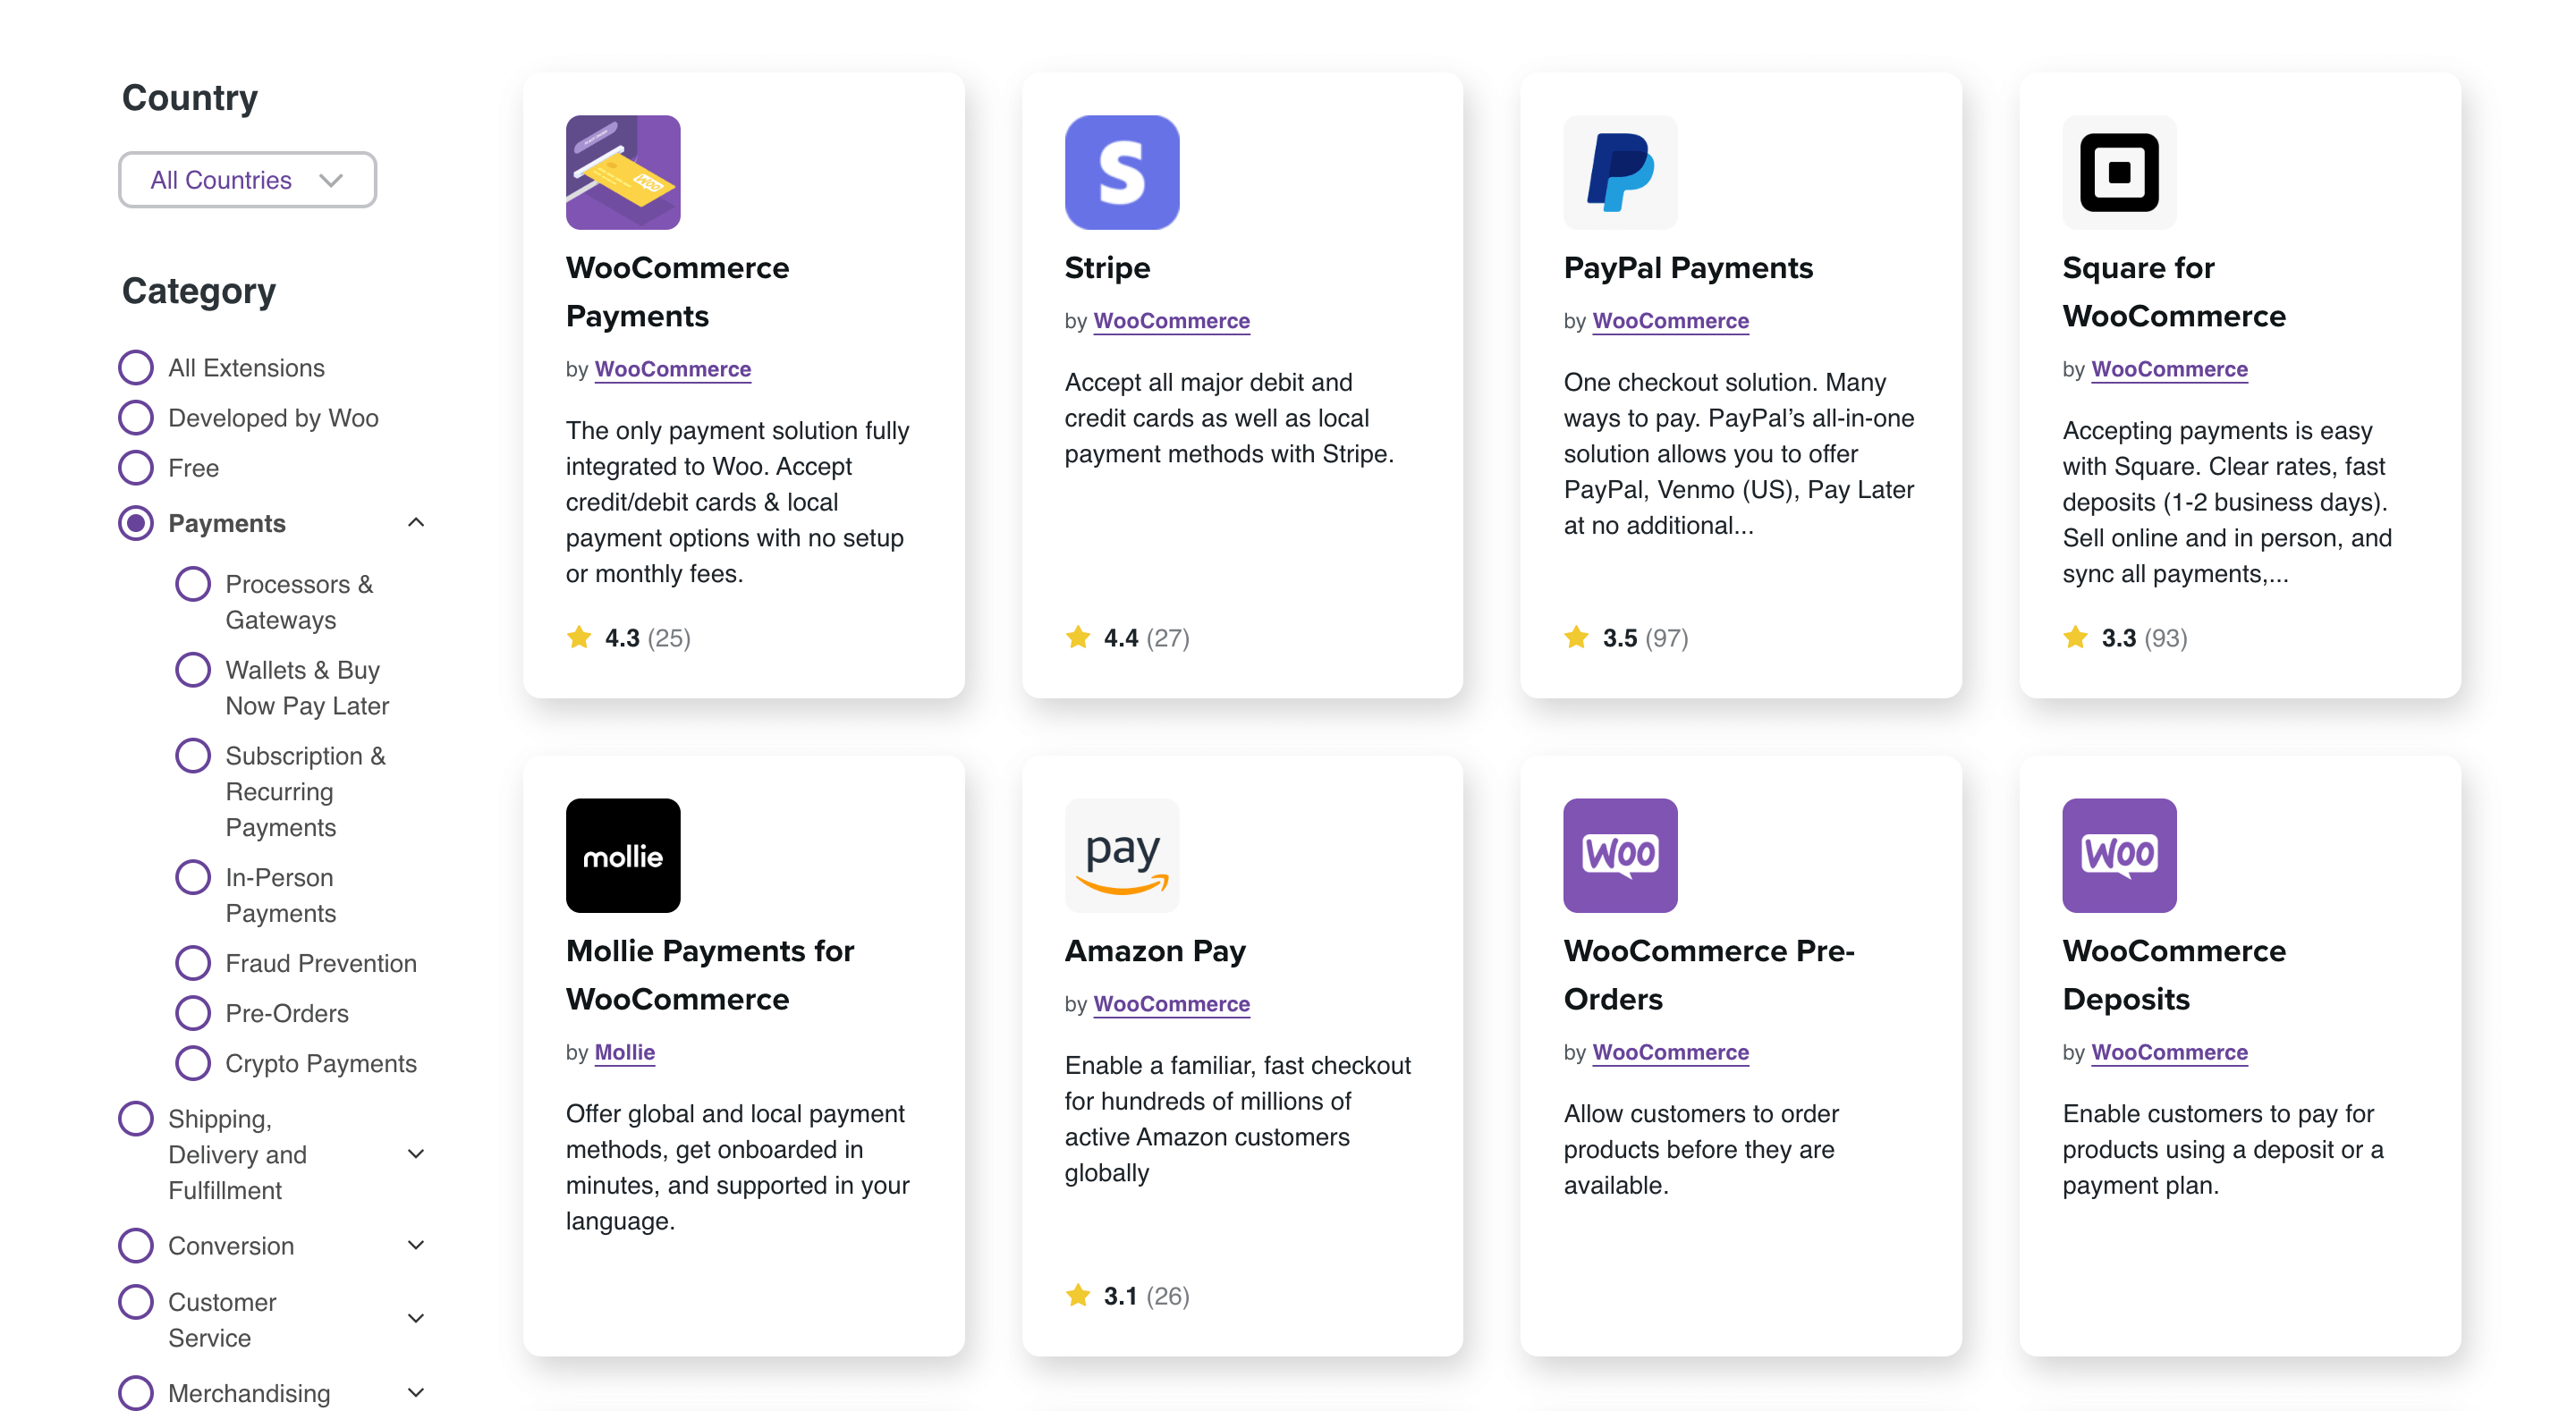
So, what are your choices? Nicely, the simplest option to get began is to easily click on the “View Choices” button in your WooCommerce dashboard.
This can take you to a web page the place you possibly can view a listing of fee processors which can be suitable with WooCommerce.
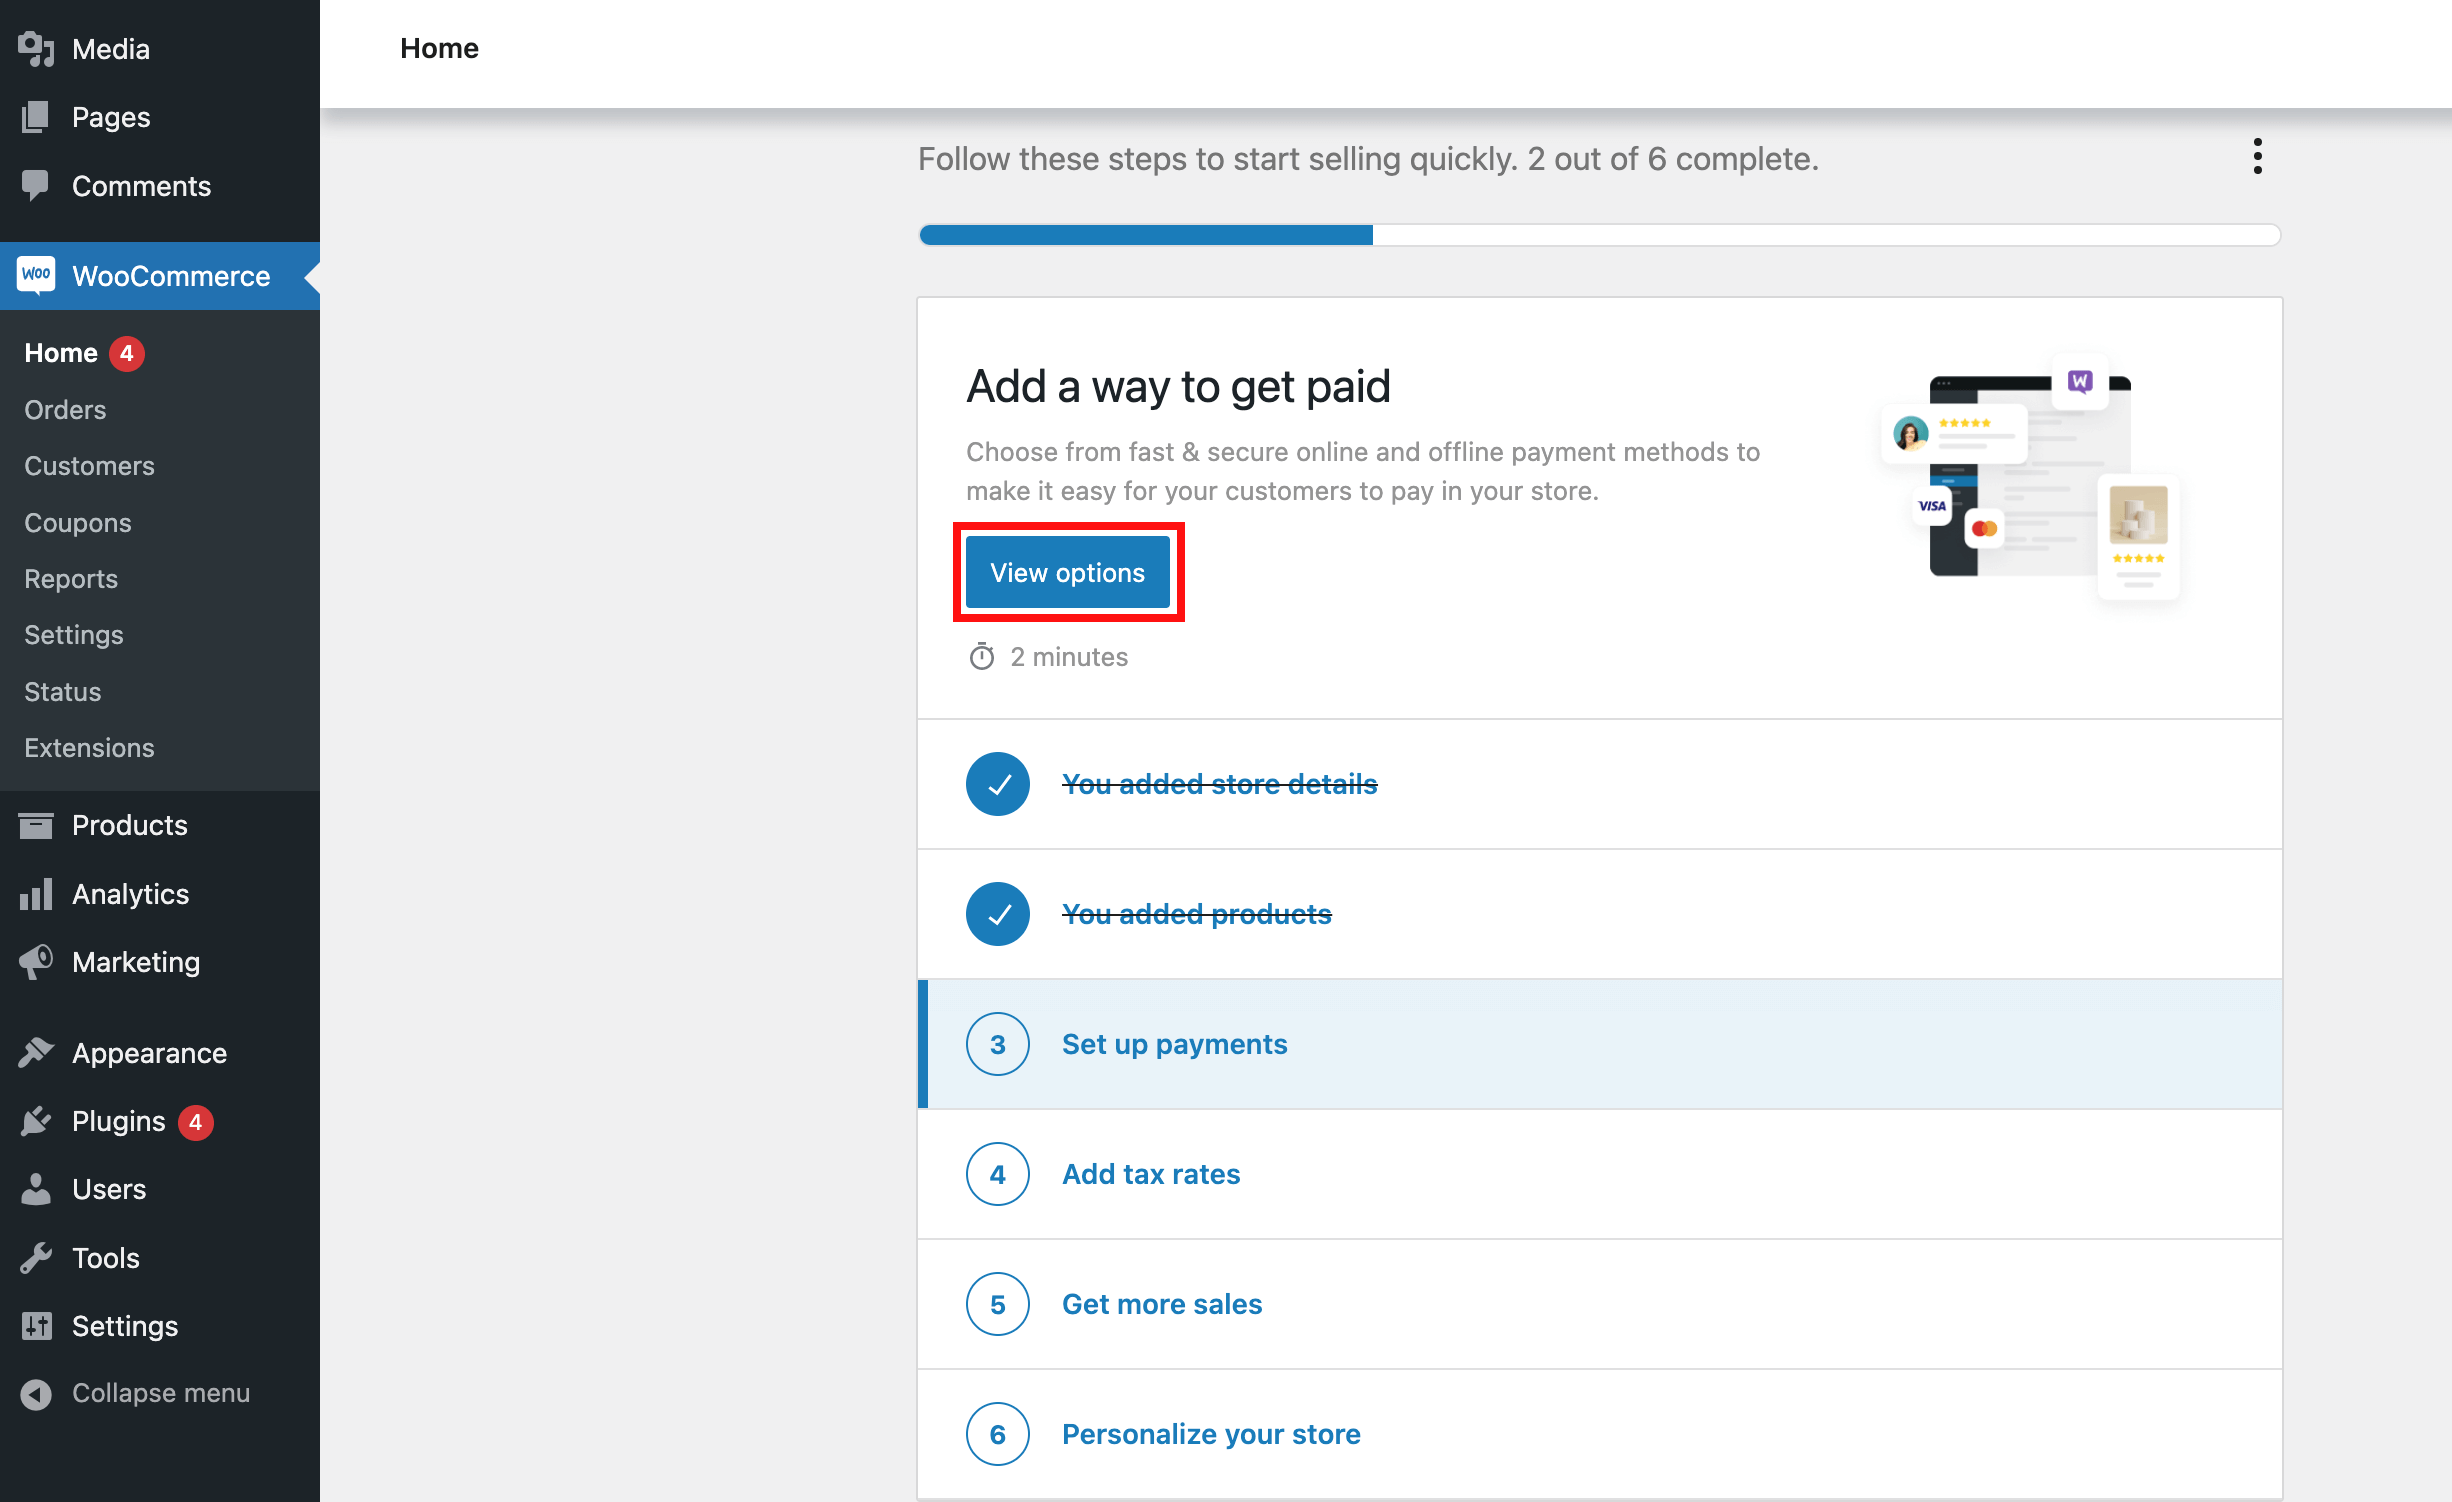
From right here, you possibly can learn extra about every processor and even evaluate them side-by-side that can assist you resolve which one is true in your retailer.
The most well-liked choices are PayPal and Stripe, each of which provide safe, dependable, and easy-to-use fee processing companies.

Moreover, each are well-known and trusted fee processors and are accepted by most clients.
Right here’s what you might want to know earlier than selecting a fee supplier.
Every one in all these fee processors provides completely different options, so that you’ll need to do a little analysis to find out which one is finest for you.
Now, it’s additionally essential to keep in mind that completely different fee processors could have completely different charges and options, so it’s essential to learn all the small print earlier than making a choice.
When you’ve selected a fee processor, you’ll want to join an account.
This normally entails offering some private, enterprise, and monetary info, in addition to linking your checking account.
It’s essential to verify your fee processor is safe and has a very good fame, so be sure you learn critiques.
And should you’re searching for an offline fee technique, you possibly can provide clients the choice to pay with money on supply.
When you’ve discovered the fee processor for you, the following step is to combine it along with your WooCommerce retailer. Most fee processors present detailed directions for this course of, so simply comply with their directions and you need to be good to go.
Organising Delivery and Tax Choices
It’s time to arrange your transport and tax choices in WooCommerce. For those who’re promoting bodily items, organising shipping-related configurations is a crucial a part of working your enterprise.
Alternatively, should you’re promoting digital merchandise, you don’t want to fret about shipping-related settings.
To get began, go to WooCommerce > Settings > Delivery. Right here, you’ll discover a number of choices that you should utilize to configure the transport course of.
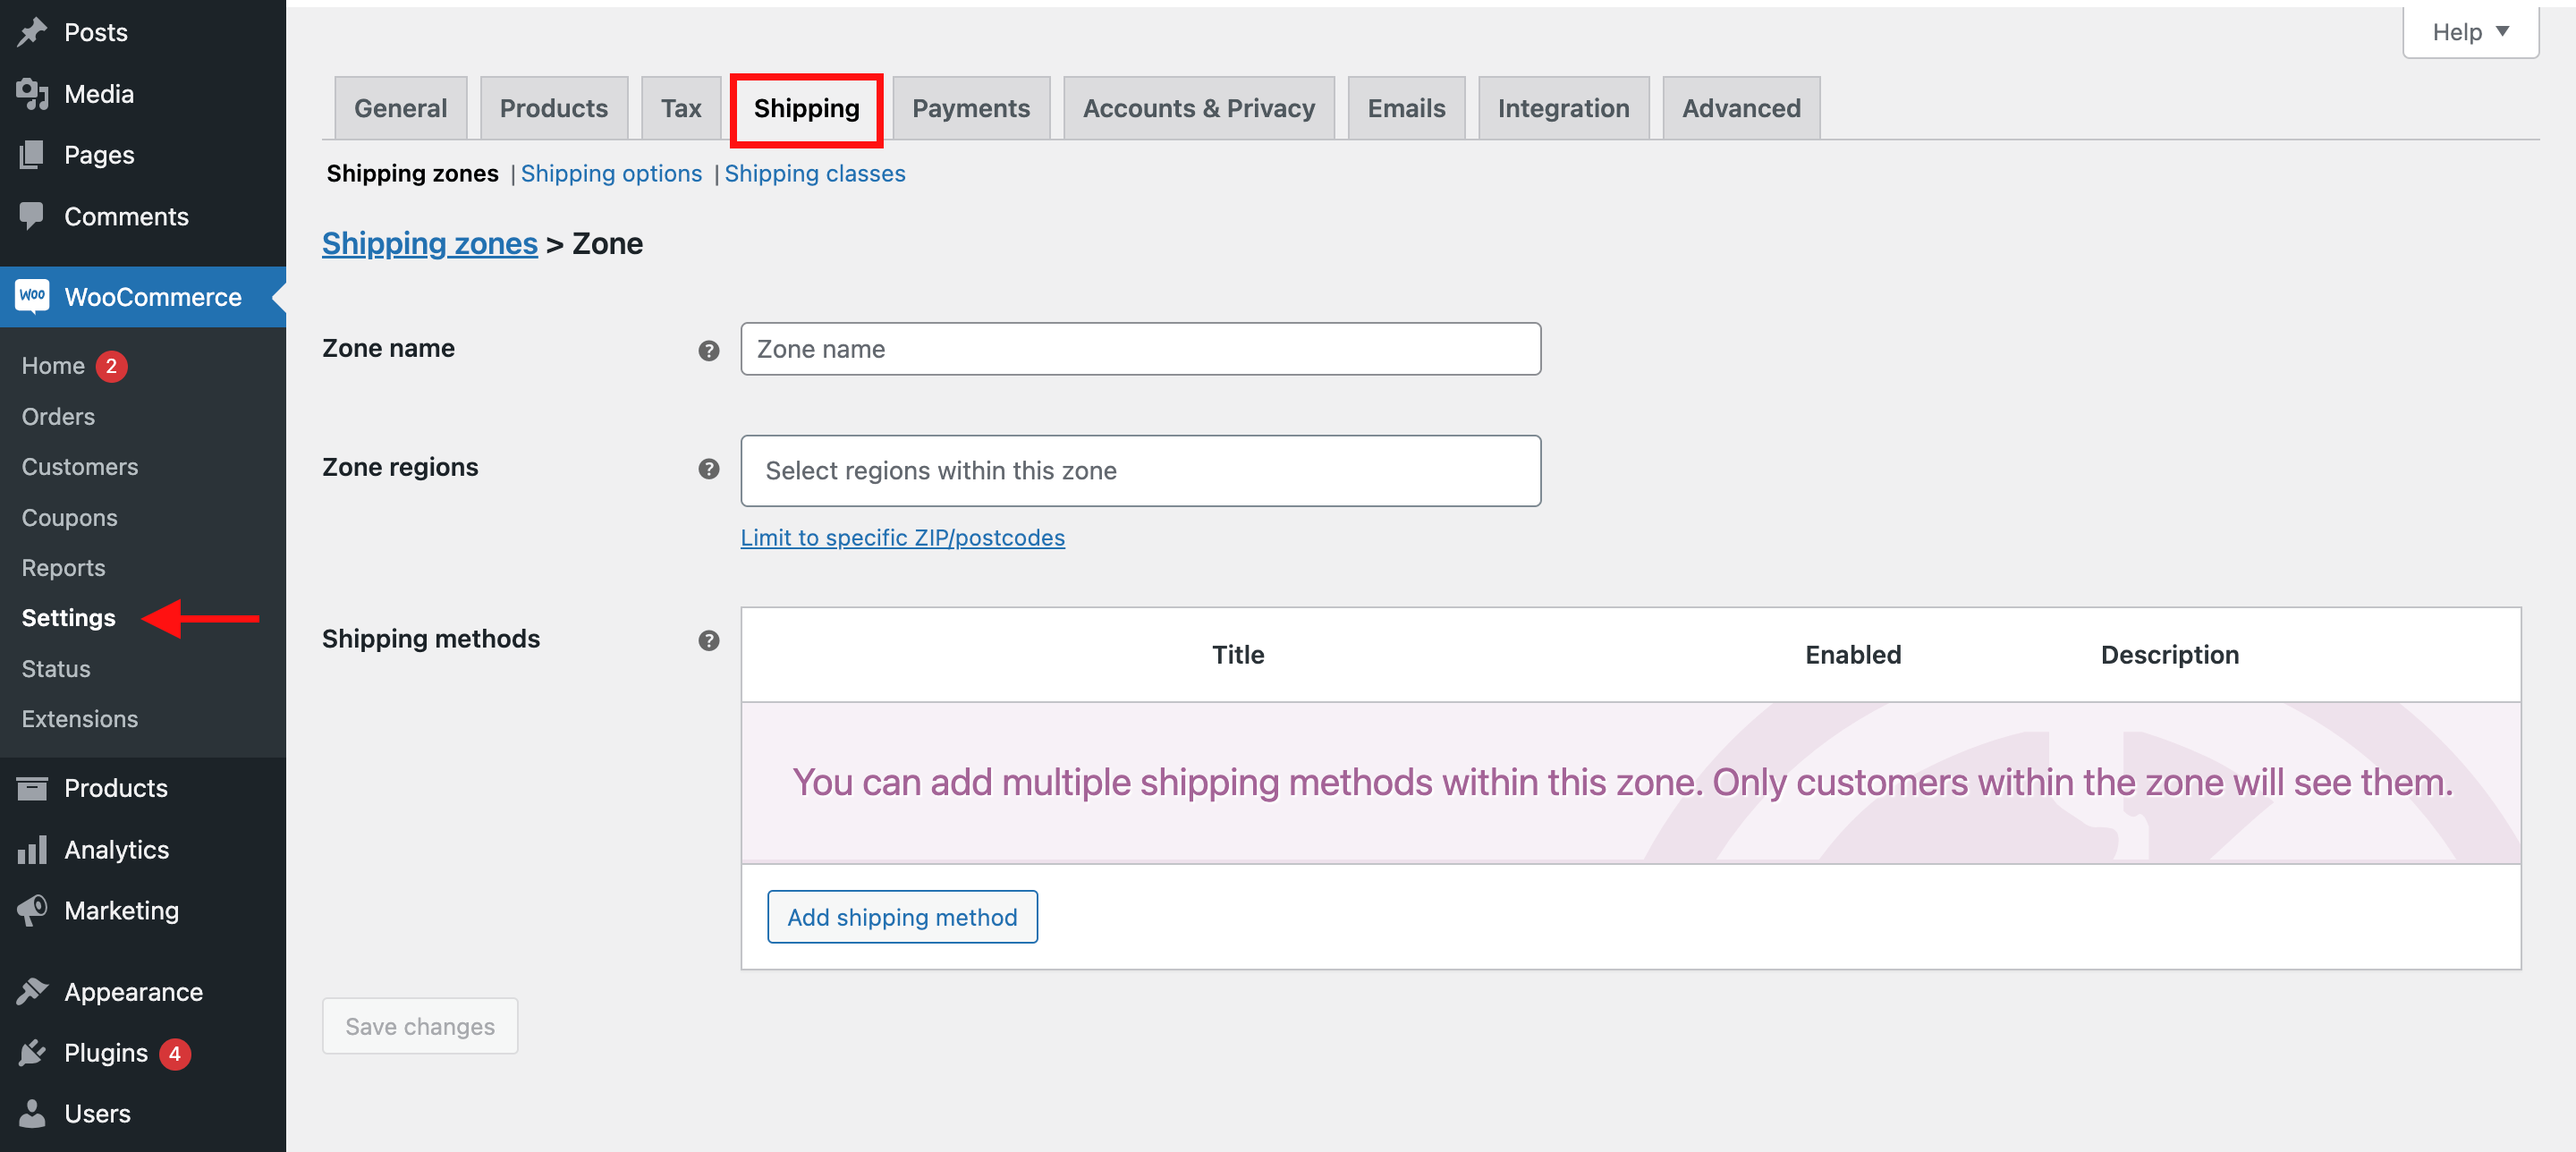
You possibly can resolve on what sort of transport you wish to provide, equivalent to a flat charge or free transport. You may also arrange completely different transport zones, so you possibly can provide completely different costs to clients in numerous areas.
For those who’re nonetheless feeling a bit misplaced, you possibly can all the time try the WooCommerce transport documentation. It’s stuffed with useful info and ideas, so be sure you give it a learn earlier than you begin organising your transport choices.
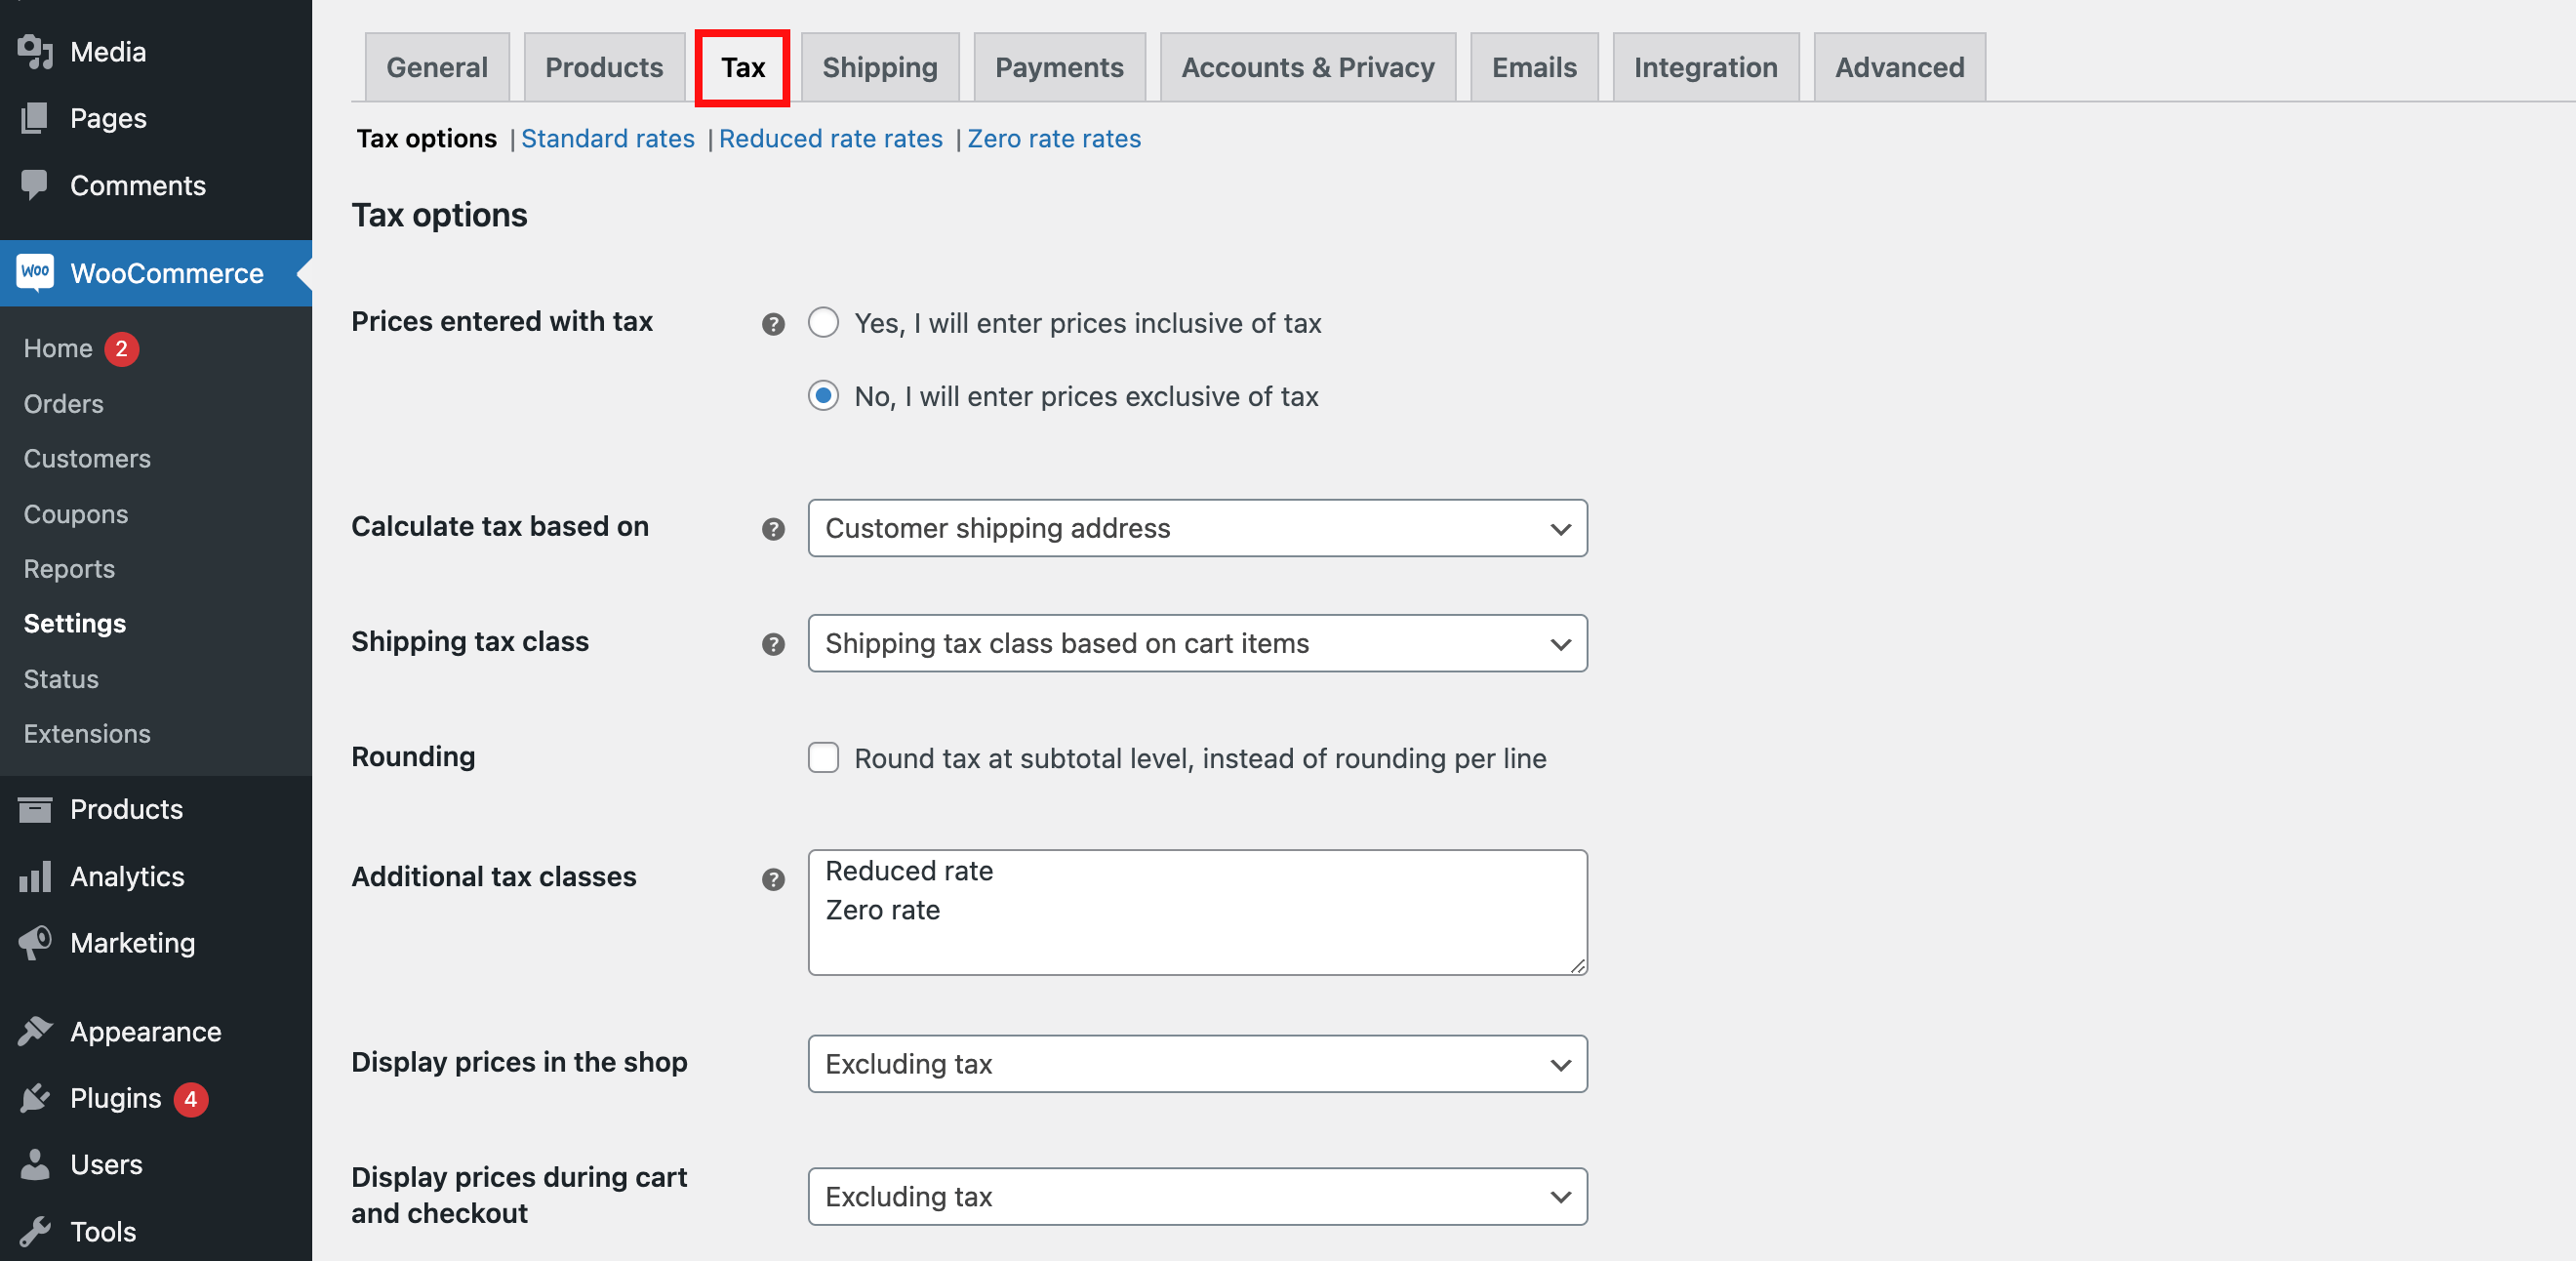
When you’ve configured all of the shipping-related choices, you’ll additionally must arrange tax choices in WooCommerce. That is accomplished within the “Tax” tab.
In relation to organising taxes in your WooCommerce retailer, you will have a few choices. Whether or not you resolve to make use of a tax associate or take a extra hands-on method, you’ll be capable of guarantee your enterprise is compliant with native laws.
Right here, you possibly can arrange the tax charges in your retailer, in addition to resolve whether or not taxes must be included within the worth of the gadgets or added at checkout.
For those who’re undecided how one can get began, don’t fear. WooCommerce provides complete documentation on organising taxes in your retailer.
So, be sure you learn by means of the documentation and get assist should you want it.
4. Customise Your WooCommerce Retailer
It’s lastly time to customise and launch your retailer!
After weeks (or perhaps even months) of planning, designing, and getting your merchandise prepared, you’re lastly able to make your massive debut.
Your retailer goes to be a mirrored image of your ardour and arduous work, so it’s essential to verify it appears to be like, feels, and features simply the best way you need it to.
Selecting a WooCommerce Theme
Step one is to decide on a WooCommerce theme in your retailer. There are a whole lot of themes obtainable, so you need to take the time to seek out one which most closely fits your model.
Considered one of my favourite themes is Astra.
It’s a multipurpose theme, with a variety of customization choices.
In relation to putting in a theme, the method is pretty easy.
All you might want to do is head to the WordPress dashboard and choose the Themes tab. From there, you’ll be capable of flick through a big selection of free and premium themes. When you’ve put in the one you want simply click on “Activate” and also you’re all set.
And should you’re searching for much more choices, you possibly can all the time try marketplaces like ThemeForest.
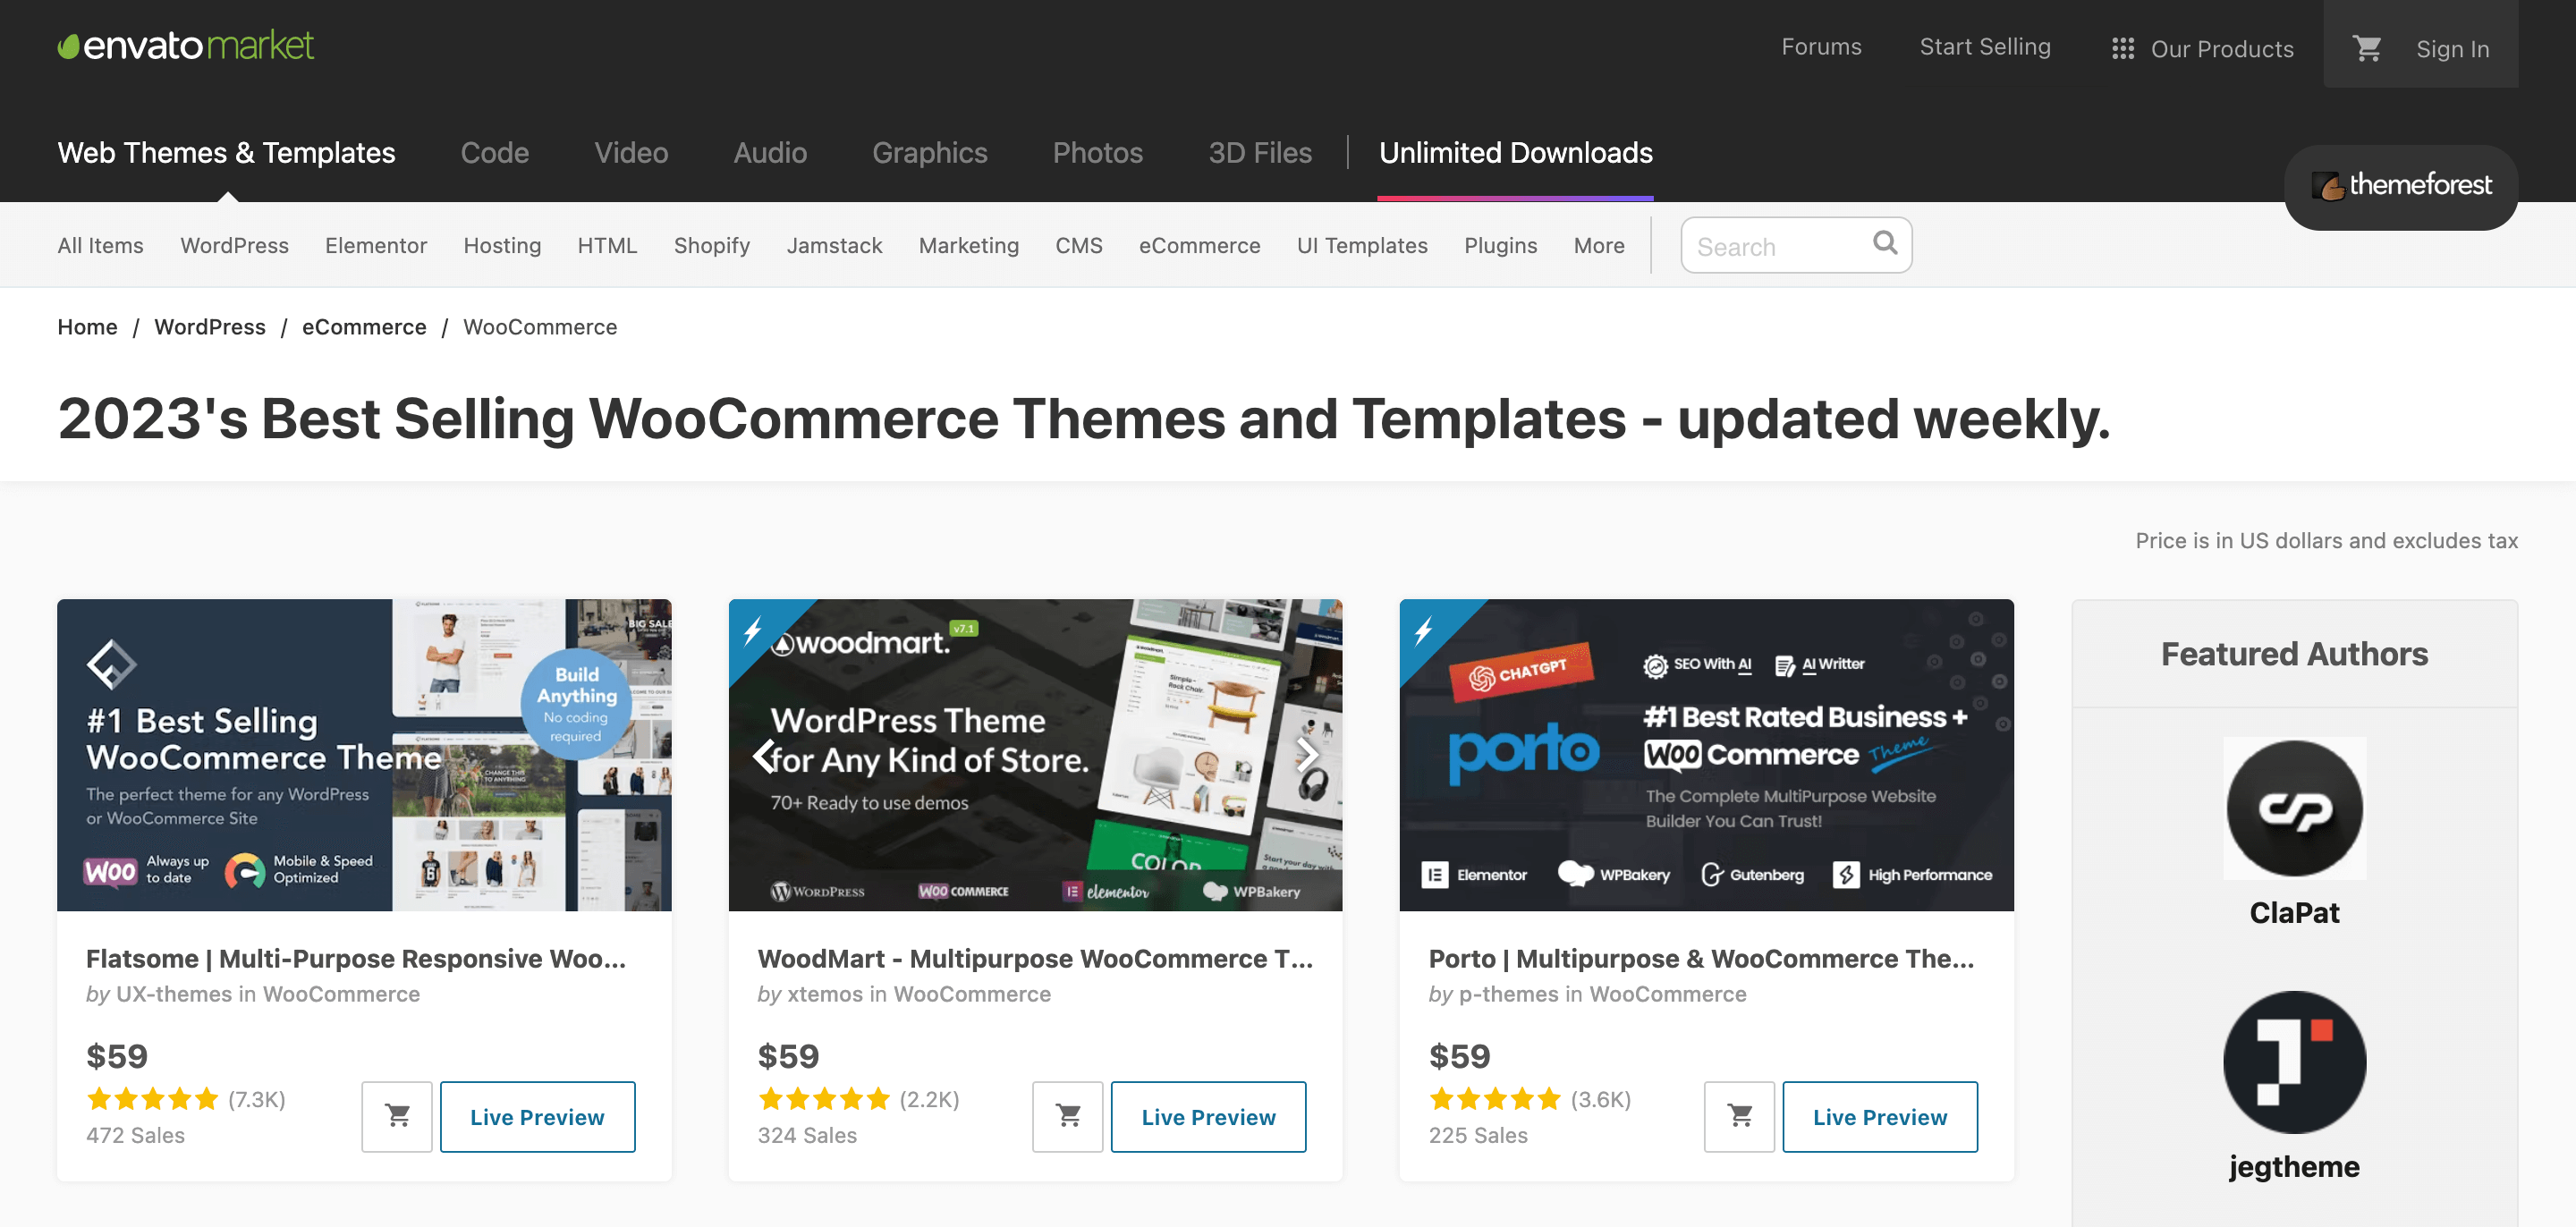
On ThemeForest, you possibly can flick through a whole lot of WooCommerce themes to seek out the proper one in your retailer.
When you’ve put in and activated a theme, you possibly can customise it. To do that, navigate to Look > Customise out of your WordPress dashboard. Right here, you possibly can customise the colours, fonts, and different components of your retailer’s design.
It might take some effort and time to get all the things trying good, so should you don’t really feel like getting your fingers soiled, you possibly can all the time search for a contract designer from standard freelance marketplaces like Fiverr.com.
And don’t overlook so as to add the ending touches equivalent to including a weblog, organising an about me, contact web page, and creating authorized pages together with a privateness coverage.
Including WooCommerce Plugins
The correct plugins could make your retailer run smoother, optimize velocity, scale back buyer frustration, and make your retailer extra profitable.
So, what are among the finest plugins for a WooCommerce retailer?
Listed here are 5 of our favorites:
- MonsterInsights – This plugin makes it simple to trace the efficiency of your retailer utilizing Google Analytics. You possibly can monitor your retailer’s incoming site visitors, prime merchandise, and extra, all from the consolation of your dashboard.
- WP Rocket – This plugin helps to verify your retailer is blazing quick. It might scale back loading instances, optimize pictures, and assist your retailer run easily.
- RankMath search engine optimization – This plugin helps you be sure your retailer is search engine optimized. It might enable you create the appropriate titles, descriptions, and tags in your merchandise, in order that they present up in the appropriate search outcomes.
- Elementor – This highly effective plugin permits you to create customized pages in your retailer. You possibly can design customized product pages, touchdown pages, and extra, all with none coding or design expertise.
- WooCommerce PDF Invoices & Packing Slips – That is an electronic mail advertising and marketing plugin for Woocommerce shops. It’s a simple option to arrange automated emails (like deserted cart emails) to your clients, serving to you keep in contact, construct relationships, and enhance gross sales.
These are just some of the good plugins obtainable for WooCommerce shops. For extra plugins, you possibly can browse the WordPress plugin listing or marketplaces like Codecanyon. You may also try our checklist of one of the best WooCommerce plugins for extra concepts.
Putting in a plugin is simply easy as putting in a theme. Once more, head to the WordPress dashboard and choose the Plugins tab.
When you’ve put in the one you want, simply click on “Activate” and also you’re good to go.
It doesn’t matter what plugins you select, an important factor is that you simply discover ones that assist make your retailer run extra effectively and enable you meet your objectives. So, select correctly.
5. Launch Your WooCommerce Retailer
For those who’re able to launch your WooCommerce retailer, it’s time to make the leap!
Earlier than you do, you’ll want to attach your area title to the Cloudways server.
That is accomplished by updating the A file within the DNS settings of your area title. As soon as the A file is up to date, you possibly can entry your WooCommerce retailer at your area title.
To do that, you will have to log in to each your Cloudways and Namecheap accounts.
Including Your Area to Cloudways
Now, this will likely appear overwhelming should you’re new to organising a web site, however it’s really fairly easy when you get the grasp of it.
To do that, you’ll must comply with the steps beneath:
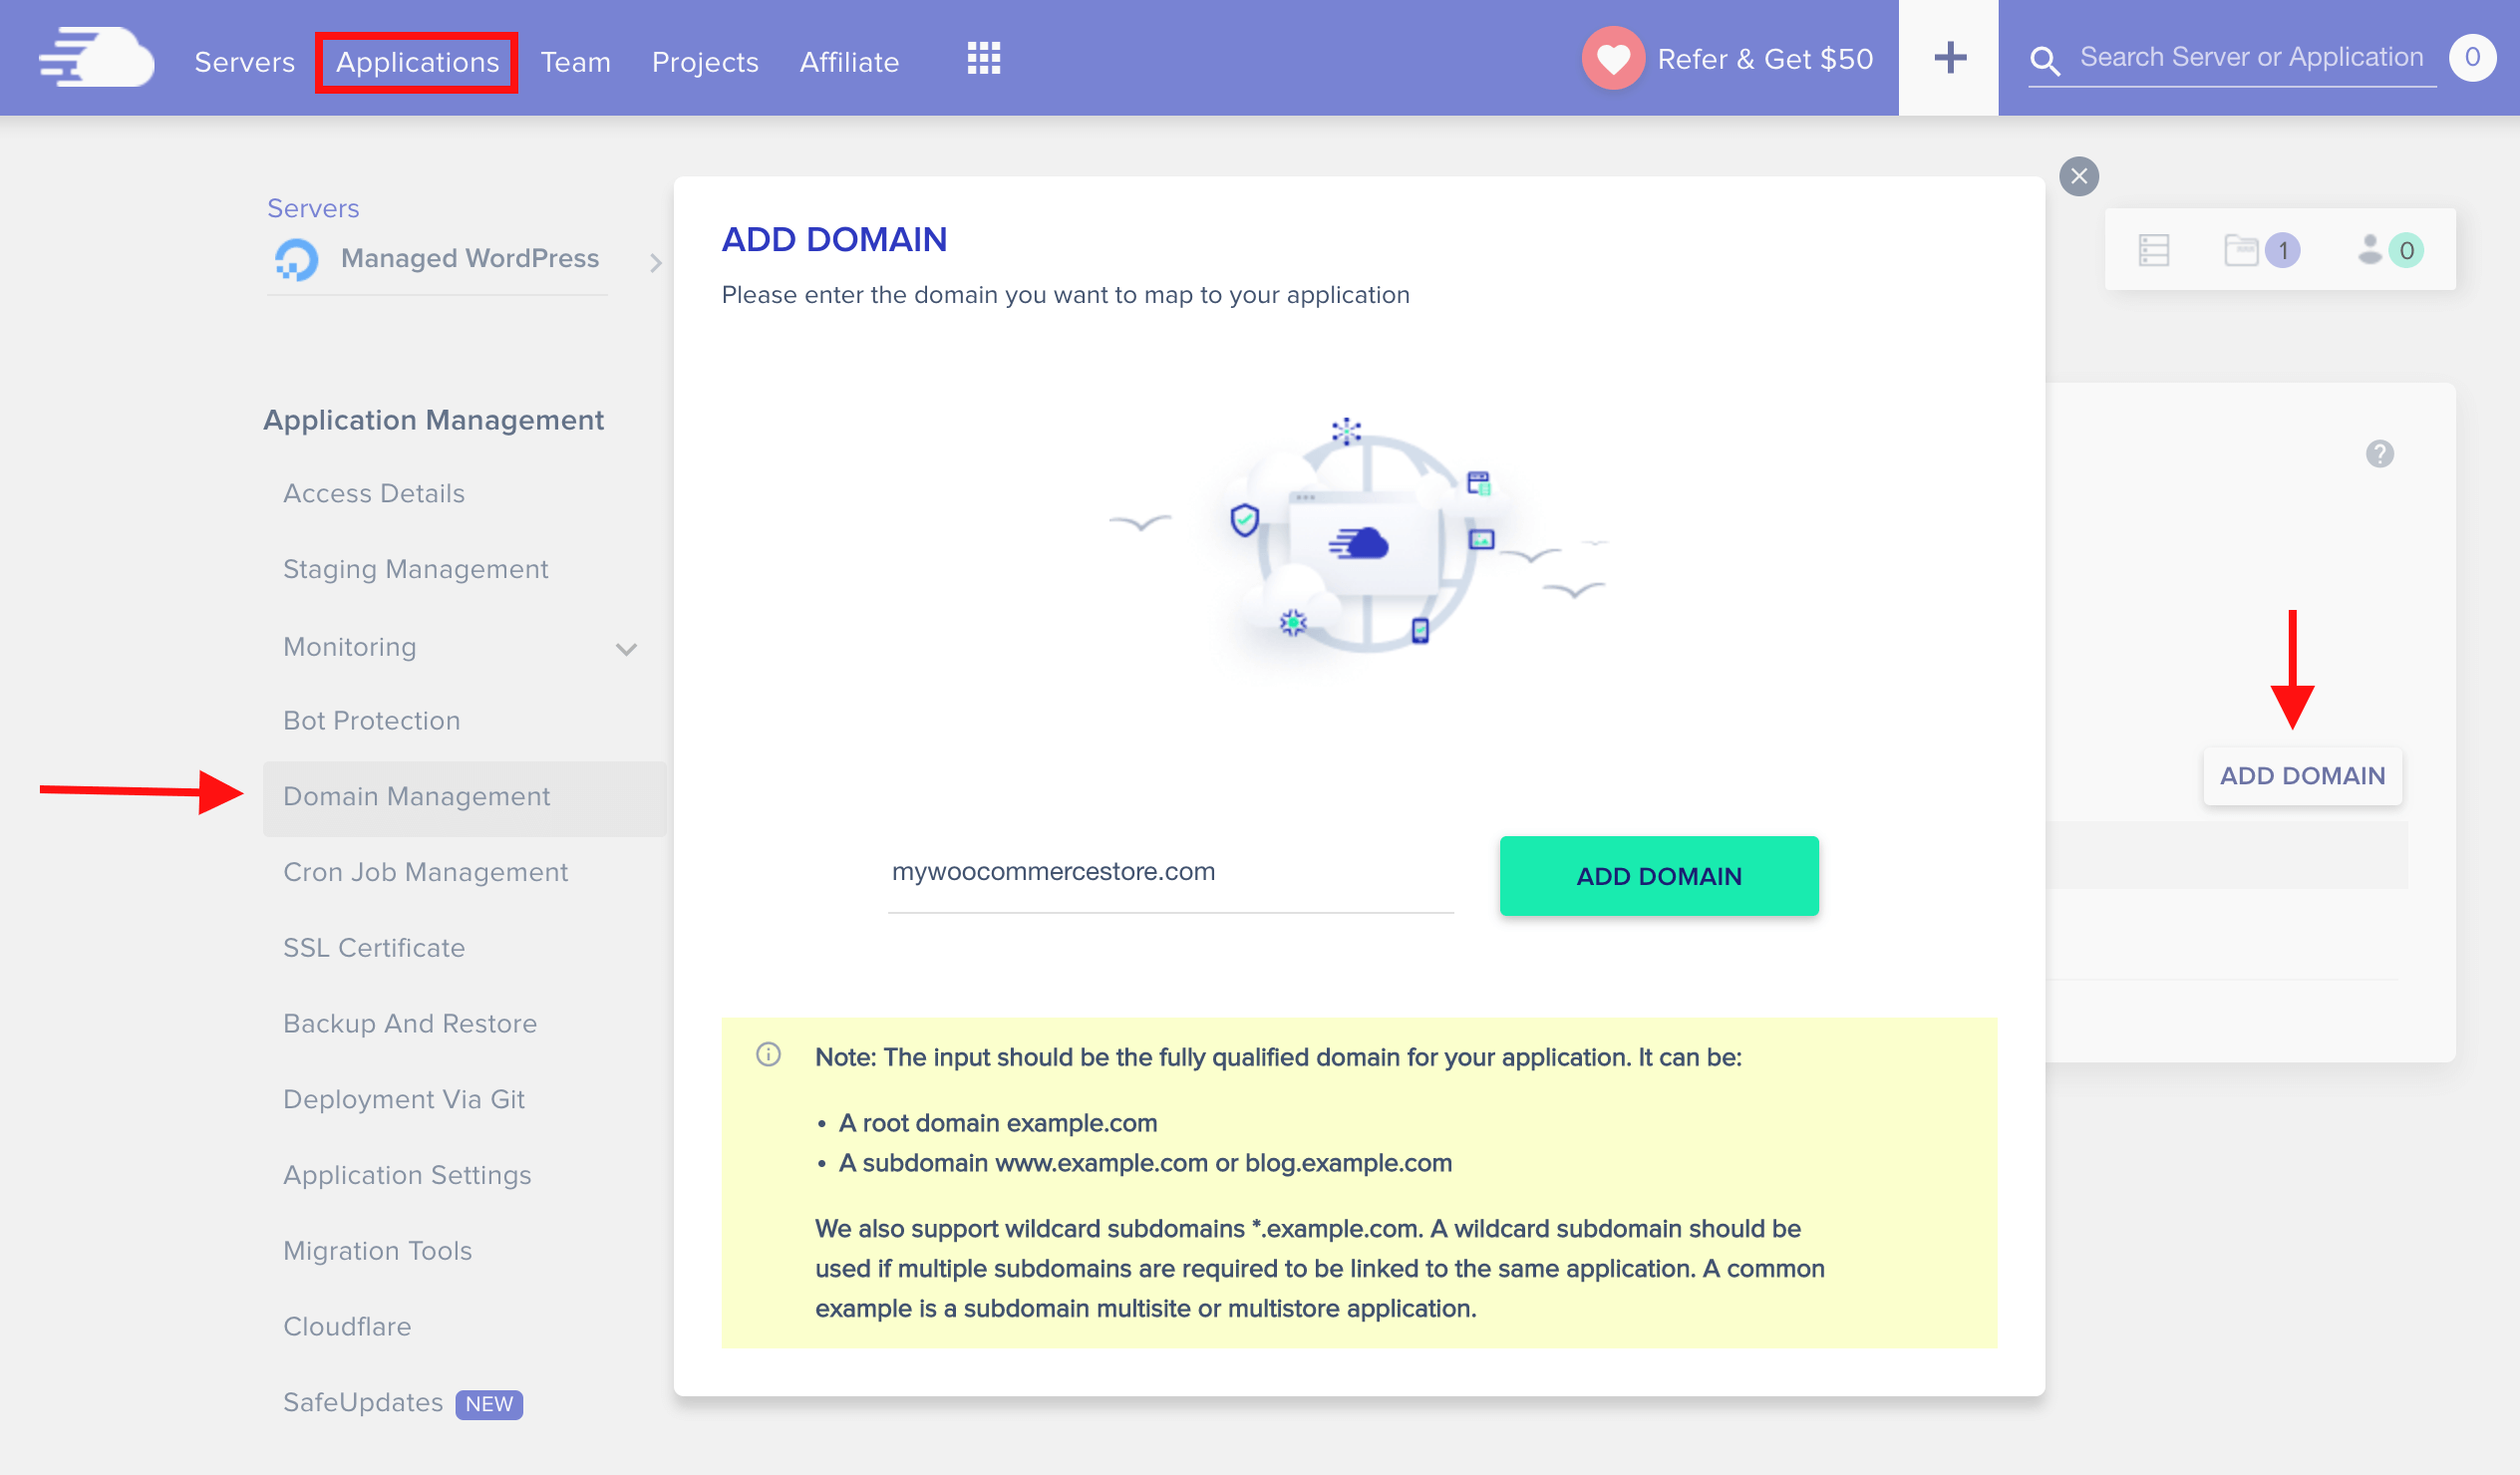
- First, log into your Cloudways account, go to Purposes, choose your WooCommerce set up, and click on on the “Area Administration” tab.
- Subsequent, click on on the “Add Area” button and enter the area title that you simply’ve bought from Namecheap.
- Lastly, click on on the three dots subsequent to your area after which choose “Make Main” to verify your area is meant for use as the primary area title.
How do I set up an SSL certificates on my area?
For those who’re trying (you need to) to safe your area with an SSL certificates, Cloudways Platform provides a free Let’s Encrypt SSL Certificates. With this, you’ll be safe with out the trouble of setup or configuration.
So, how do you get this up and working?
It’s tremendous simple. First, you’ll must learn their documentation.
They’ve clear and easy directions that can stroll you thru the entire course of.
However, should you’re searching for a customized SSL certificates. You should buy one from a Certificates Authority (CA) or certificates vendor like Namecheap. They’ll give you the certificates, in addition to directions on how one can set up it.
For those who really feel overwhelmed and don’t really feel like you possibly can sort out this process by yourself, don’t hesitate to check out Cloudways’ assist docs which will be simply discovered on their web site.
Updating DNS Information
When you’ve added your area title, you’ll must level it to the IP handle of your CW internet hosting server.
To do that:
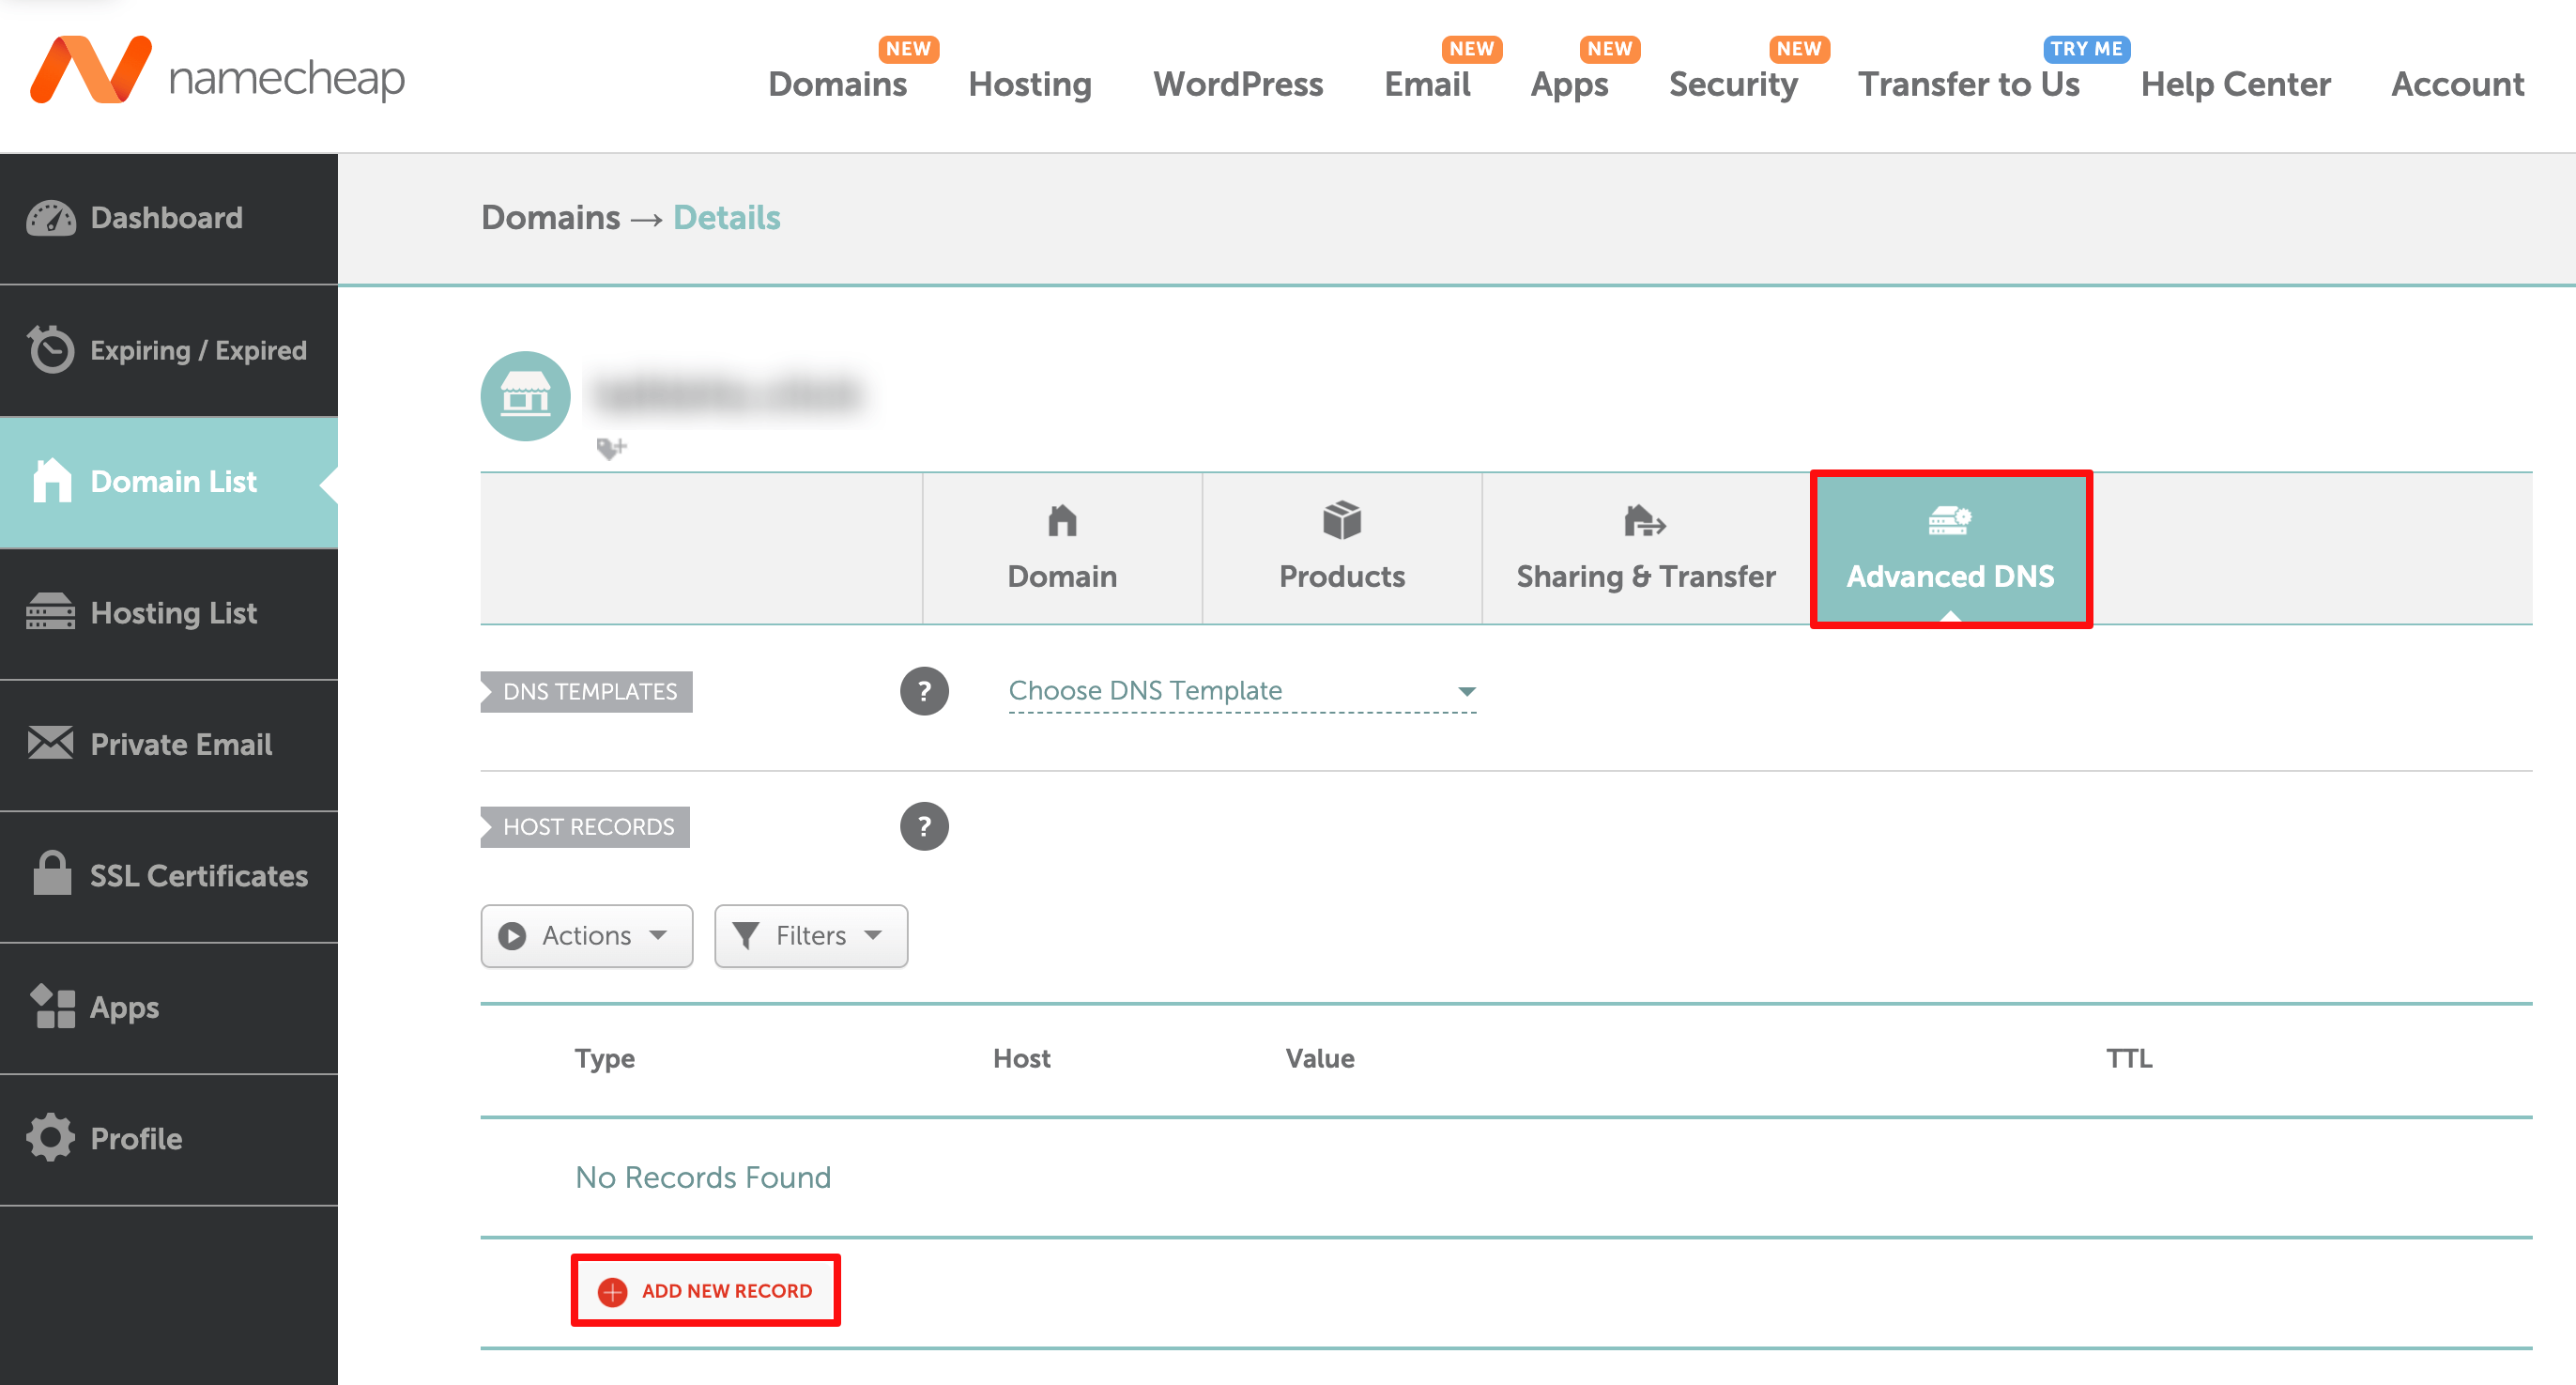
- Log into your Namecheap account, click on on the “Domains” tab, after which click on “Handle” subsequent to the area title you’ve bought.
- Subsequent, scroll all the way down to the “Superior DNS” part and add the all data as described right here.
- Lastly, click on “Save” and also you’re all set!
Congratulations! You’ve taken the leap and now you’ll be capable of entry your WooCommerce retailer by utilizing the area title you’ve bought.
It’s a giant step for any enterprise, and we’re positive you’re feeling excited and perhaps slightly nervous. Don’t fear, you’ve bought this!
Last Ideas
Now, the actual work begins – getting the phrase out and rising your enterprise.
For those who want any additional help, you possibly can look into companies like WP Buffs for WordPress upkeep and Cloudways for hosting-related help – each provide 24/7 customer support, in order that they’re positive to have the ability to give you the help you want.
Moreover, don’t overlook to construct an electronic mail checklist, use social media platforms, optimize your retailer for search engine optimization, leverage influencer advertising and marketing, and take into account paid promoting to get your retailer on the market and appeal to extra clients.
Pleased promoting!


